Samsung Galaxy S6 Edge Display Assembly and Frame Replacement
Duration: 45 minutes
Steps: 27 Steps
Get ready to give your device a brand new face! Use this guide if you're replacing the display assembly and front plastic frame together - it's a breeze with our step-by-step instructions!
Ready to give your Samsung Galaxy S6 Edge a fresh face? This guide will walk you through swapping out the screen and the front plastic frame. You'll be taking apart all the main pieces from the frame—digitizer, OLED display, display frame, and home button—so you can put in a shiny new display assembly and frame combo. If your new screen doesn’t come with a plastic frame, check out the alternate guide. Heads up: you’ll be removing the rear glass, and the adhesive is a one-way ticket—once it's off, it’s off for good. You can find a guide for putting the rear glass back on when you’re done.
Step 1


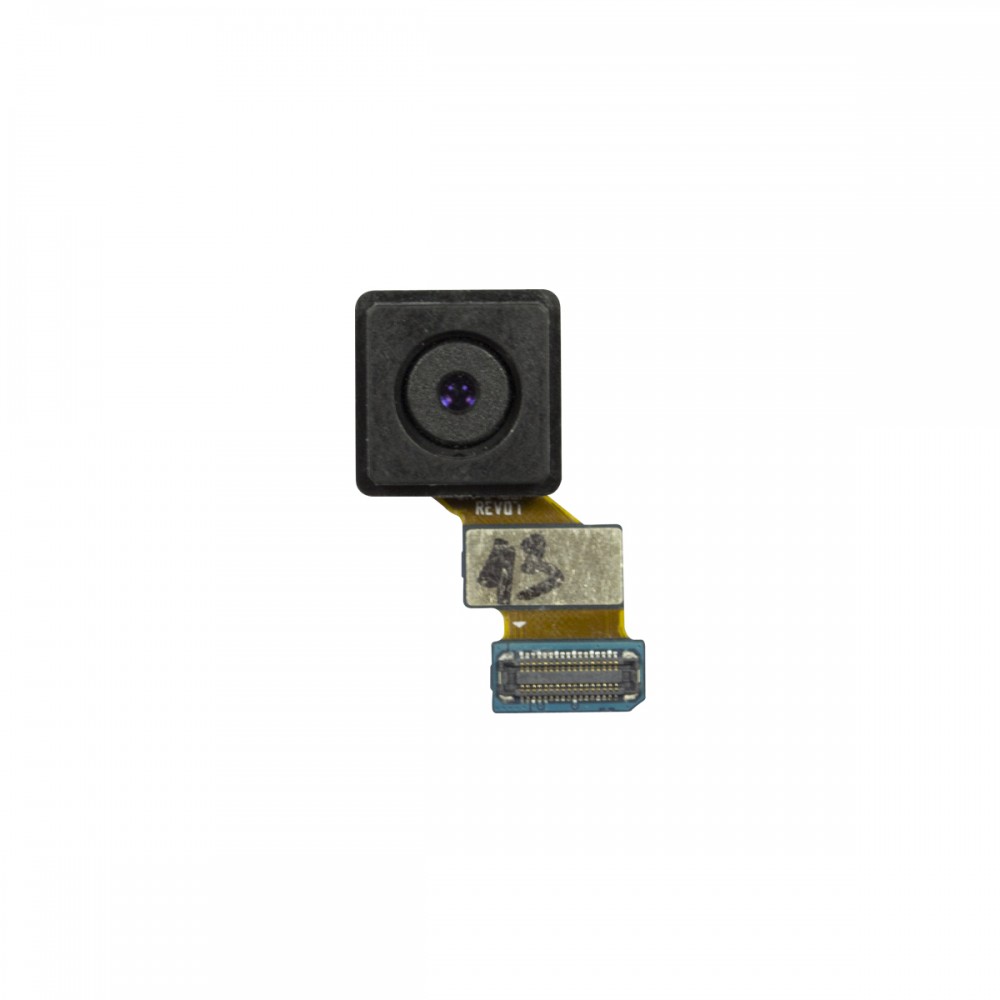
- If your replacement part resembles the first image, it's time to dive into the display assembly and frame replacement guide!
- If it looks like the second image, then go ahead and follow the display assembly replacement guide!
Step 2


Be careful not to stick the tool into the microphone hole – it's a quick way to make things worse! Instead, focus on finding the outline of the SIM tray, and you'll be good to go.
- Grab a paper clip or SIM eject tool and find that tiny hole in the top of your phone's SIM card tray.
- Gently press the paper clip into the hole until the tray pops out a bit.
- Carefully pull out the SIM card tray and set it aside—you're one step closer to the fix.
Step 3


For carousel microwaves: Ensure that the plate is spinning like it’s ready for a dance party! If your iOpener seems to be taking a break and gets stuck, it might just overheat and cause a little trouble. Keep it moving!
Give your microwave a quick clean before you get started—any leftovers hiding on the bottom could end up stuck to your iOpener, and nobody wants that.
- Set your iOpener right in the middle of the microwave.
Tools Used

Step 4

Keep an eye on the iOpener—don't let it get too toasty! If it overheats, it could pop like a party balloon. Aim to keep it under 100˚C (212˚F).
If your iOpener looks a bit puffed up, give it a break and don't touch it.
Still feeling the heat? That's okay! Just wait a bit longer before you give it another round of warmth. A well-heated iOpener should stay cozy for about 10 minutes.
Depending on your microwave's wattage, you might need to tweak the heating time a bit. A good rule of thumb is that the iOpener is ready when it's just about too hot to handle.
- Give that iOpener a cozy thirty-second spa treatment in the microwave.
- As your repair adventure unfolds, keep the iOpener toasty by giving it a quick reheat in the microwave for another thirty seconds whenever it starts to cool down.
Tools Used
Step 5

The iOpener gets seriously hot—handle with care! If you're worried about the heat, grab an oven mitt and keep those fingers happy.
- Grab the iOpener from the microwave by one of the flat ends—those are the cool spots! Avoid the hot middle section.
Tools Used
Step 6


The iOpener gets pretty toasty—grab it by the end tabs and keep those fingers cool!
No microwave? No problem! You can warm up your iOpener by placing it in boiling water instead.
- Grab a pot or pan and fill it with enough water to cover your iOpener.
- Bring the water to a boil, then turn off the heat—no need to keep it bubbling.
- Drop your iOpener into the hot water for 2-3 minutes, making sure it’s completely underwater.
- Use tongs to carefully lift the iOpener out of the water—no burnt fingers, please!
- Dry it off thoroughly with a towel so it’s not drippy.
- Your iOpener is good to go! If it cools down later, just repeat the steps above for a quick reheat.
Tools Used
Step 7


You can use a hair dryer, heat gun, or hot plate if you like, but remember to keep it cool! Too much heat can be a bummer for your phone's OLED display and internal battery, which don't handle the heat very well. If you need help, you can always schedule a repair.
Cracking open your phone means saying goodbye to its waterproof magic. If you don't replace the adhesive, steer clear of splashes—or be prepared to dry off more than just your hands.
Dealing with glass that's seen better days? Slap some packing tape over the whole panel to keep things together while you work your removal magic.
If your phone needs more heat, you might have to reheat and reuse the iOpener a few times. Just keep an eye on it and follow the instructions so you don’t turn your phone into a very expensive hot potato.
- Pop that iOpener on the back panel for a cozy two minutes to loosen up that sticky adhesive hugging the glass edge.
- Move the iOpener around to warm up the other half of the panel for another two minutes, giving it some extra love.
Tools Used
Step 8


If you’re feeling adventurous, once you’ve slid that pick in, consider adding a few drops of isopropyl alcohol into the gap. It’ll help loosen up that stubborn adhesive for the steps ahead!
- Get that rear glass nice and toasty, then grab your trusty suction cup and apply it near the bottom edge - it's time to get this repair started!
- Now it's time to create some space - lift up on that suction cup to make a small gap, and carefully slide an opening pick into the gap to get things moving.
Step 9


Once you've sliced through the glue, it’s smart to leave the pick in place and grab another one for the next round. Letting the pick hang out keeps those sticky spots from sealing back up on you.
If the glue starts to cool down and get stubborn, just warm up the rear glass again to keep things moving smoothly.
- Gently glide the pick along the bottom edge of your phone to carefully cut through the adhesive holding the rear glass in place.
Step 10


- Work your way around the other three sides, heating and slicing as you go—like you're serving up a phone-shaped cake.
- Keep an opening pick parked under each edge to stop the sticky adhesive from closing things back up.
Step 11


- Time to get that rear glass off! Use an opening pick to gently slice through any remaining adhesive that's holding it in place.
- Now it's time for the big reveal - carefully remove the rear glass and set it aside.
Step 12


- Ready to install that shiny new rear glass? Let's do this!
- If you're putting the old rear glass back on or using a fresh piece without any adhesive, check out this guide.
- Grab your tweezers and gently peel away any leftover adhesive from your phone's chassis. No one likes a sticky situation!
- Time to clean up! Use some high concentration isopropyl alcohol (at least 90%) and a lint-free cloth. Remember, swipe in one direction—no back and forth! This will help get the surface prepped just right for that new adhesive.
- Now, peel off the adhesive backing from the new rear glass. Line up one edge carefully against the phone chassis, and give it a firm press. You got this!
Tools Used

Step 13

- Let's get started by removing the thirteen 3.3 mm Phillips #00 screws from the midframe. Take your time and make sure you've got them all.
Step 14


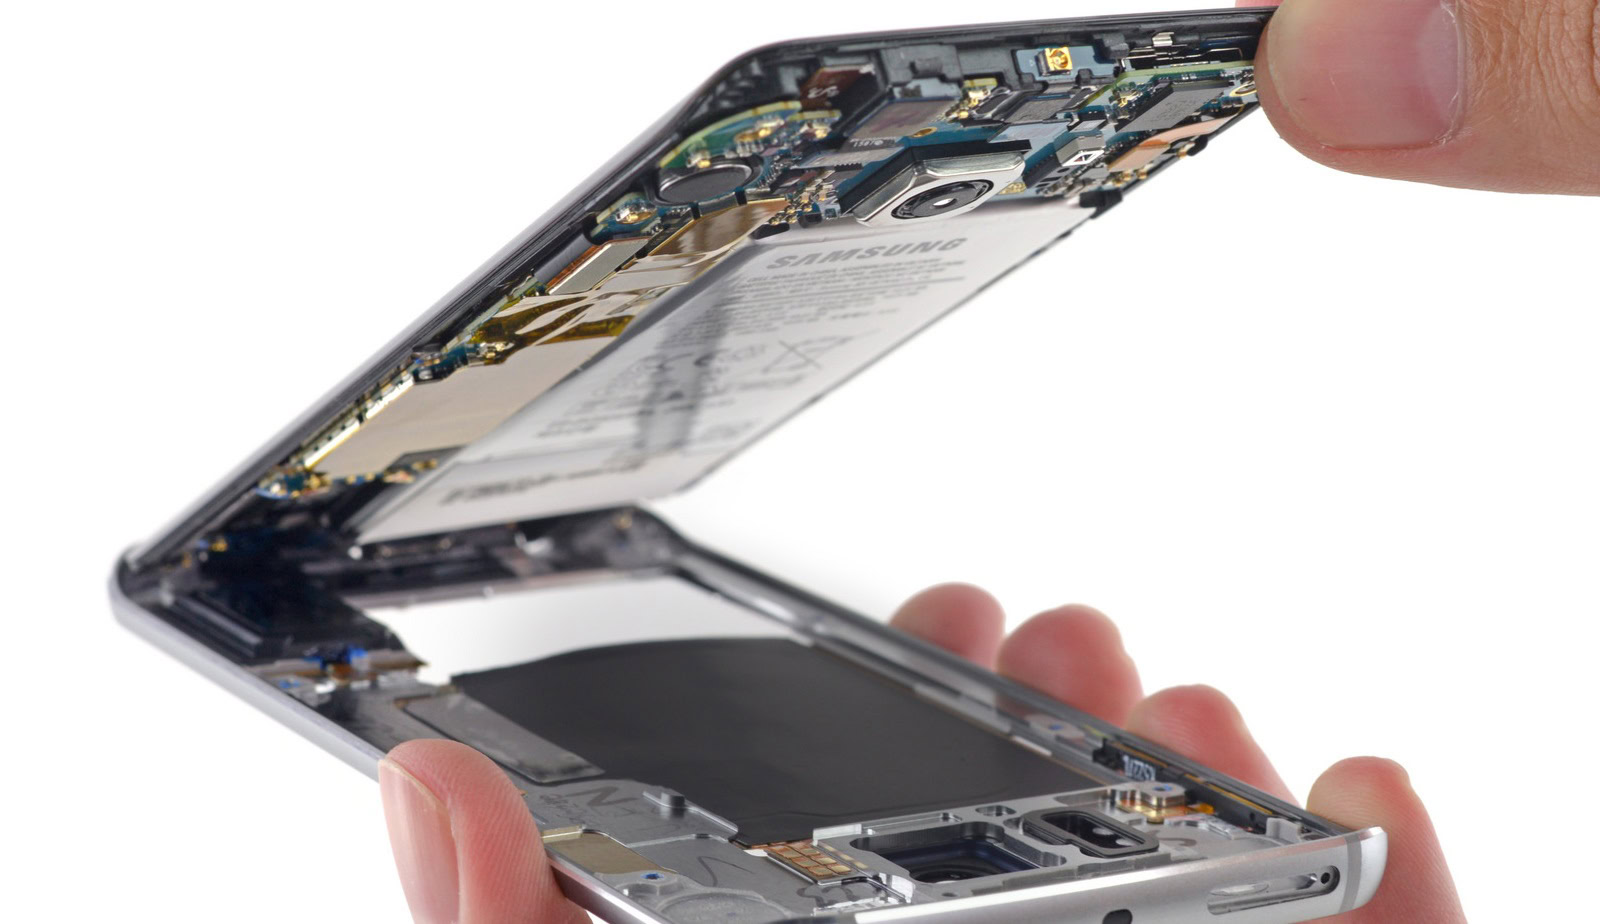
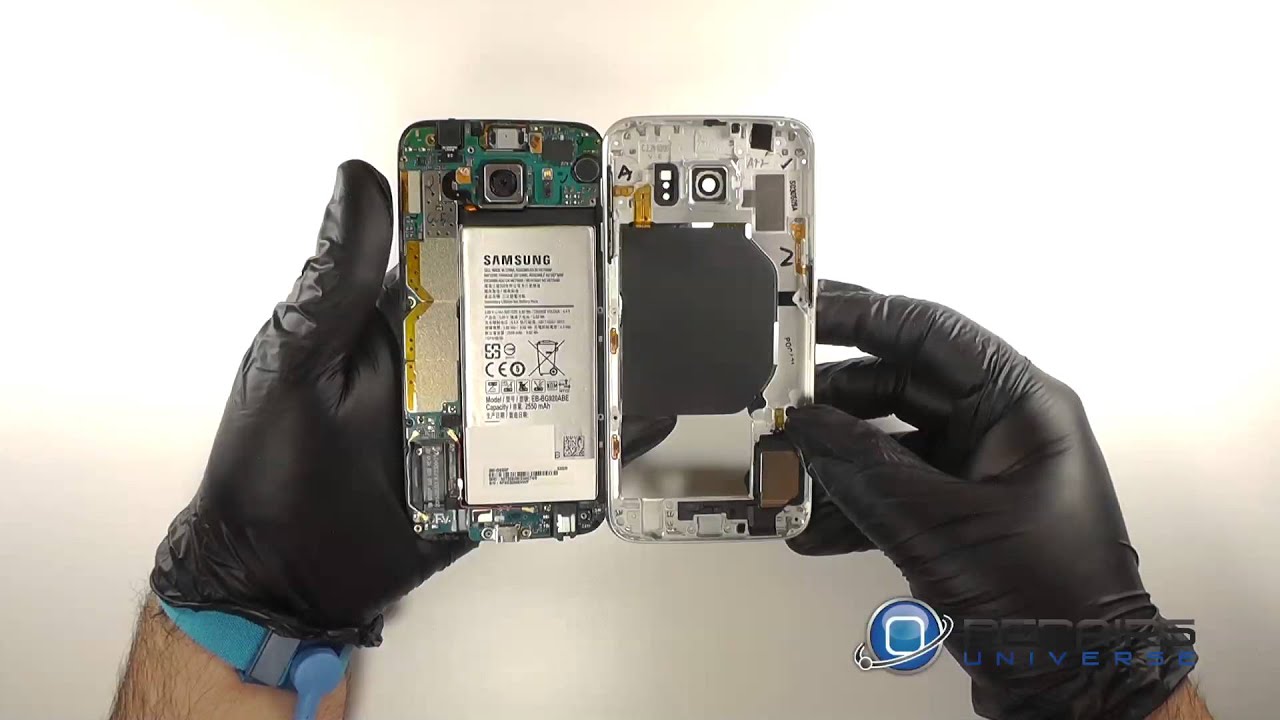
- Time to get this phone apart! Press down on the back of the battery and gently lift up on the edges of the midframe to separate it from the rest of the phone. Take your time and be careful, you got this!
Step 15


- Take the flat end of your spudger and gently pop the battery ribbon cable off the motherboard. Easy does it!
Tools Used

Step 16


- Unplug the home button ribbon cable from the motherboard with care.
Step 17


- Time to get connected - or rather, disconnected! Use the pointed end of a spudger to carefully release the two antenna interconnect cables from the motherboard. This is a delicate step, but you've got this!
Tools Used
Step 18


- Gently pry away the display ribbon cable from the motherboard with the flat end of your spudger. You're almost there, keep it steady!
Tools Used
Step 19


- Time to set that earpiece free! Carefully disconnect the earpiece ribbon cable from the motherboard.
Step 20


Handle that motherboard gently—it’s sensitive to static electricity! Throw on an anti-static wrist strap if you’ve got one to keep things safe and smooth.
Don’t yank the motherboard out just yet! There’s a ribbon cable hiding underneath that needs to be unplugged first.
- Hold the motherboard by its upper edges—give it a gentle but confident grip.
- Carefully lift the motherboard up and away from the screen. Keep an eye on the daughterboard ribbon cable and don’t let it get pulled or stressed out.
Step 21


- Unplug that daughterboard ribbon cable from the back of the motherboard, nice and easy!
Step 22


- Slide an opening pick under the battery and gently move it around to loosen the adhesive holding it in place.
Be gentle with the battery—no need to squish it or go all Hulk. Soft lithium-ion batteries can leak, catch fire, or burst if poked or bent. Avoid metal tools and don't force it; slow and steady wins the race here.
The area right under the battery lacks frame reinforcement, so it's pretty easy to accidentally hurt the delicate display panel when prying. Just take it slow and steady—no rush!
Step 23


Hey there! Once you've popped that battery out, it's time to say goodbye. Reusing it could lead to some unexpected surprises, and not the fun kind! So, grab a shiny new battery and keep things safe and sound.
- Give that opening pick a little twist to pop the battery loose and take it out!
- Ready to install your shiny new battery? Let’s make sure it’s all lined up just right:
- First, clear away any leftover sticky stuff from your phone and give those glued areas a good clean with some isopropyl alcohol and a lint-free cloth.
- Place the replacement battery in its cozy new spot, but hold off on the adhesive for now. Keep going with re-assembly until the motherboard is snug in place (check out STEP 18).
- Time to lay down some new pre-cut adhesive or double-sided tape around the edge of the battery compartment on the phone frame, but steer clear of that rectangular cutout in the middle (which is actually the back of the display).
- Quickly connect the battery connector to the motherboard to make sure everything's aligned perfectly.
- Press the battery down firmly for about 5-10 seconds. Then, disconnect the battery and continue with re-assembly.
Step 24

- Start by removing the two tiny 2.5mm Phillips #00 screws—easy to spot, easy to unscrew. If you need help along the way, you can always schedule a repair.
Step 25


- Time to get a little gentle yet firm - use the pointed end of your trusty spudger to carefully pry up that small section of the daughterboard that's held in place with some light adhesive.
Tools Used
Step 26


- Gently lift the daughterboard away from the phone's body to take it out. You've got this!
Step 27


Take a look at your new part and compare it to the display assembly still in place. You might need to move over things like the display frame or home button—just make sure everything matches up before moving on!
- Carefully insert the tip of a spudger into the tiny gap beneath the vibrator in the display frame and gently pry it loose from the adhesive.
- Once you've worked your magic, take out the vibrator from the display assembly.