Samsung Galaxy S6 Edge Screen Replacement
Duration: 45 minutes
Steps: 32 Steps
Use this guide if you're tackling a display assembly replacement - we've got you covered!
If your frame is damaged or bent, don't worry, we'll walk you through the process
Get ready to breathe new life into your Samsung Galaxy S6 Edge by replacing the display assembly. This step-by-step guide is perfect for those looking to swap out just the display assembly. If your new part comes with a frame, be sure to follow the corresponding guide instead. It's super important to replace the frame if it's damaged or bent, as this can cause issues with the new screen mounting properly and may lead to damage from uneven pressure. Keep in mind that separating the display from the frame can be a bit tricky and may destroy the display, so only proceed if you're planning to replace it. This guide also involves removing the rear glass, which will break the adhesive holding it in place. But don't worry, we've got you covered - just follow along to reinstall the rear glass and get your device looking like new again. If you need help along the way, you can always schedule a repair.
Step 1


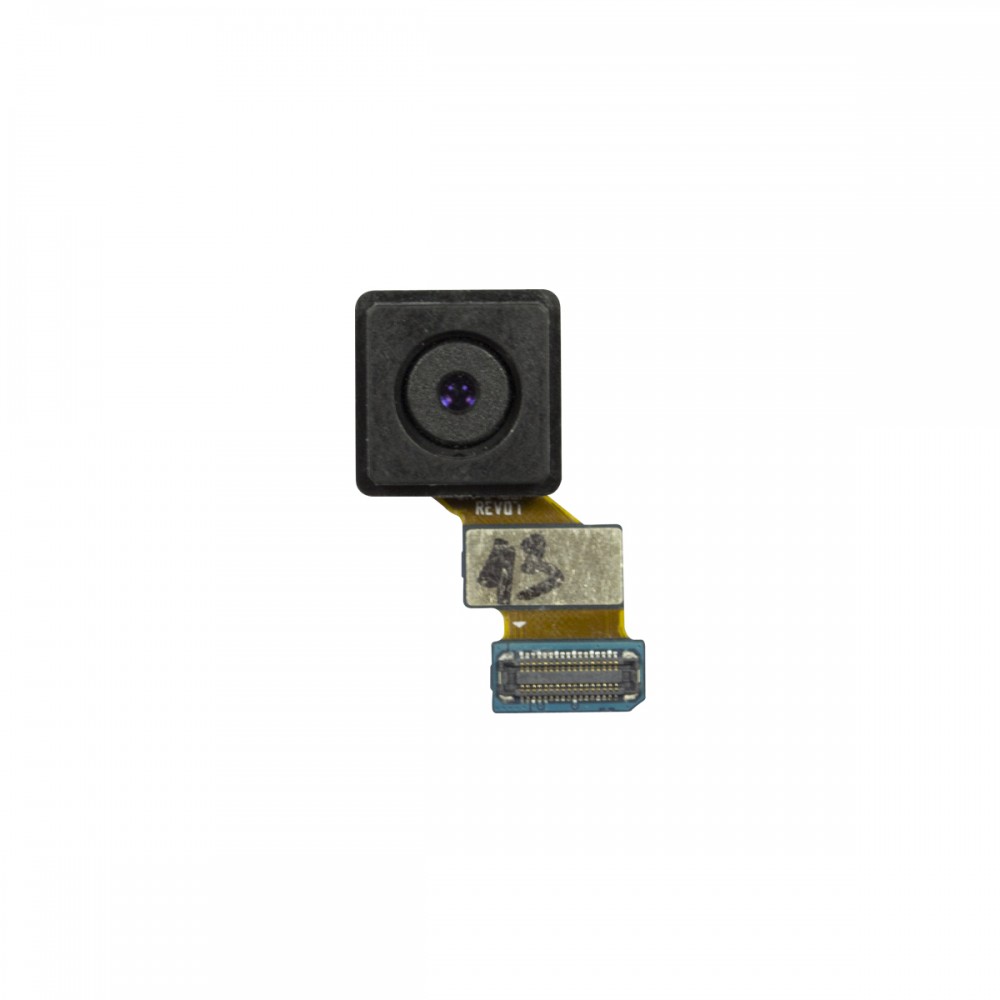
- If your new part matches the first picture, go ahead and use the display assembly and frame replacement guide.
- If your new part looks like the second picture, you'll want to follow the display assembly replacement guide instead.
Step 2


Keep that tool away from the microphone hole—it's a no-go zone! Check for the SIM tray outline instead; it's your best buddy in this repair adventure.
- Grab a paper clip or that trusty SIM eject tool, and gently poke it into the tiny hole in the SIM card slot on the top of your phone.
- Give it a little press to pop out the SIM card tray—easy peasy!
- Now, carefully pull out the SIM card tray from the phone, and you're all set!
Step 3


For carousel microwaves: Give that plate a little spin! If your iOpener gets jammed, it might just throw a temper tantrum and overheat. Keep it cool and avoid the burn!
Give your microwave a quick clean before you start—otherwise, any mystery gunk on the bottom could end up glued to your iOpener.
- Pop that iOpener right in the center of your microwave and let it warm up!
Tools Used

Step 4

Keep your cool with the iOpener—don’t let it get hotter than 100˚C (212˚F), or it might just pop! If it looks puffy, hands off. If the center’s still too hot to touch, give it a little more time to chill before reheating. When it’s just right, your iOpener should stay warm for around 10 minutes.
Microwave wattage varies, so cooking times might need a tweak—just keep an eye on it. The iOpener is ready when it's just a little too hot to touch; don’t burn yourself trying to check. If you need a hand, you can always schedule a repair.
- Give that iOpener a warm hug in the microwave for about thirty seconds.
- As you work your magic, keep an eye on the iOpener. If it cools down, just pop it back in the microwave for another thirty seconds to keep the heat going!
Tools Used
Step 5

Watch out! The iOpener is going to be pretty toasty, so handle it with care. An oven mitt can be your best buddy here if you need it.
- Carefully take the iOpener out of the microwave, gripping one of its flat ends to keep your hands clear of the hot center.
Tools Used
Step 6


Be careful! The iOpener will be super hot, so make sure to grab it only by the end tabs. Safety first!
No microwave? No problem! Let's get that iOpener warmed up by giving it a cozy bath in boiling water.
- Grab a pot or pan and fill it with enough water to give that iOpener a nice bath!
- Turn up the heat and get that water boiling, then switch off the heat.
- Gently place the iOpener into the hot water for about 2-3 minutes. Make sure it's getting the full spa treatment by being completely submerged.
- Using tongs, carefully lift that heated iOpener out of the water.
- Give your iOpener a good dry with a towel; we want it to be nice and cozy!
- And voila! Your iOpener is all set for action! If it needs a little reheat later, just repeat the process: boil the water, turn off the heat, and let it soak for another 2-3 minutes.
Tools Used
Step 7


You can totally use a hair dryer, heat gun, or hot plate to help out, but keep an eye on the heat! You don't want to turn your phone into a sauna—the OLED display and internal battery aren’t fans of excessive heat. If you need help, you can always schedule a repair.
Opening your phone? Just a heads-up, you might mess with those waterproof seals. So, make sure you've got some replacement adhesive on hand before diving in, or be super careful with liquids if you're putting it back together without replacing the adhesive.
Got a shattered screen? Slap some packing tape over the whole panel to keep those shards in check while you work your magic and remove it.
You might find yourself reheating and reapplying the iOpener a few times to get your phone nice and cozy. Just stick to the iOpener instructions to keep things from getting too toasty.
- Place the heated iOpener over the rear panel and hold it there for about two minutes to soften the adhesive around the glass edges. Then, carefully shift the iOpener to cover the remaining sections of the panel and heat for another two minutes. If you need a hand, you can always schedule a repair.
Tools Used
Step 8


If you like, add a few drops of isopropyl alcohol into the gap after sliding in the pick—this will make the sticky stuff much easier to handle in the next steps.
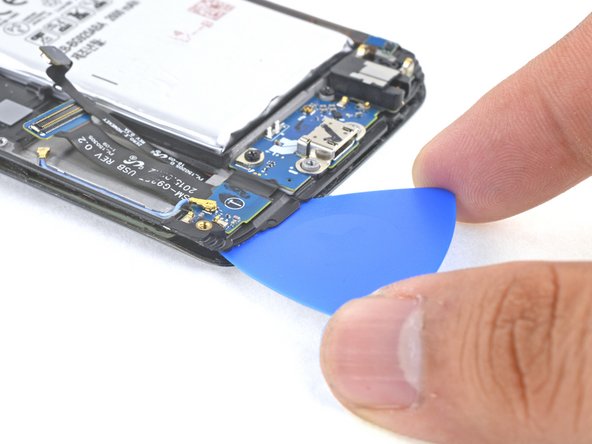
- When the rear glass is warm and cozy to the touch, grab a suction cup and stick it close to the bottom edge of the glass.
- Gently pull up on the suction cup to create a tiny opening under the rear glass, and carefully slide an opening pick into that gap.
Step 9


Once you're done with that, keep the first pick in place and grab a second one as you move to the next step. This little trick helps keep the glue you just loosened from sticking back together.
Don't forget to warm up the rear glass again if necessary to stop the glue from cooling off and becoming hard as a rock.
- Gently glide the pick along the bottom edge of your phone to cut through the adhesive holding the rear glass in place.
Step 10


- Work your way around the remaining three sides, heating and slicing through the adhesive as you go.
- Keep an opening pick tucked under each edge so the sticky stuff doesn’t grab hold again.
Step 11


- Grab an opening pick and glide it along the edges to loosen up any leftover adhesive.
- Gently lift off the rear glass and set it aside.
Step 12


- Ready for some phone glow-up? Here’s how to put on new rear glass:
- If you’re putting the old rear glass back, or you’ve got a replacement without sticky stuff on it, check out our guide.
- Grab your tweezers and pick off any leftover adhesive from the phone’s frame.
- Clean off those sticky zones with some high-octane (90% or higher) isopropyl alcohol and a lint-free cloth. Swipe in just one direction—no back-and-forth dance moves. This sets the stage for the fresh adhesive.
- Peel off the adhesive liner from your new rear glass, carefully line up one edge with the phone frame, and press the glass down firmly.
Tools Used

Step 13

- Let's get those thirteen 3.3 mm Phillips #00 screws removed from the midframe. You've got this!
Step 14


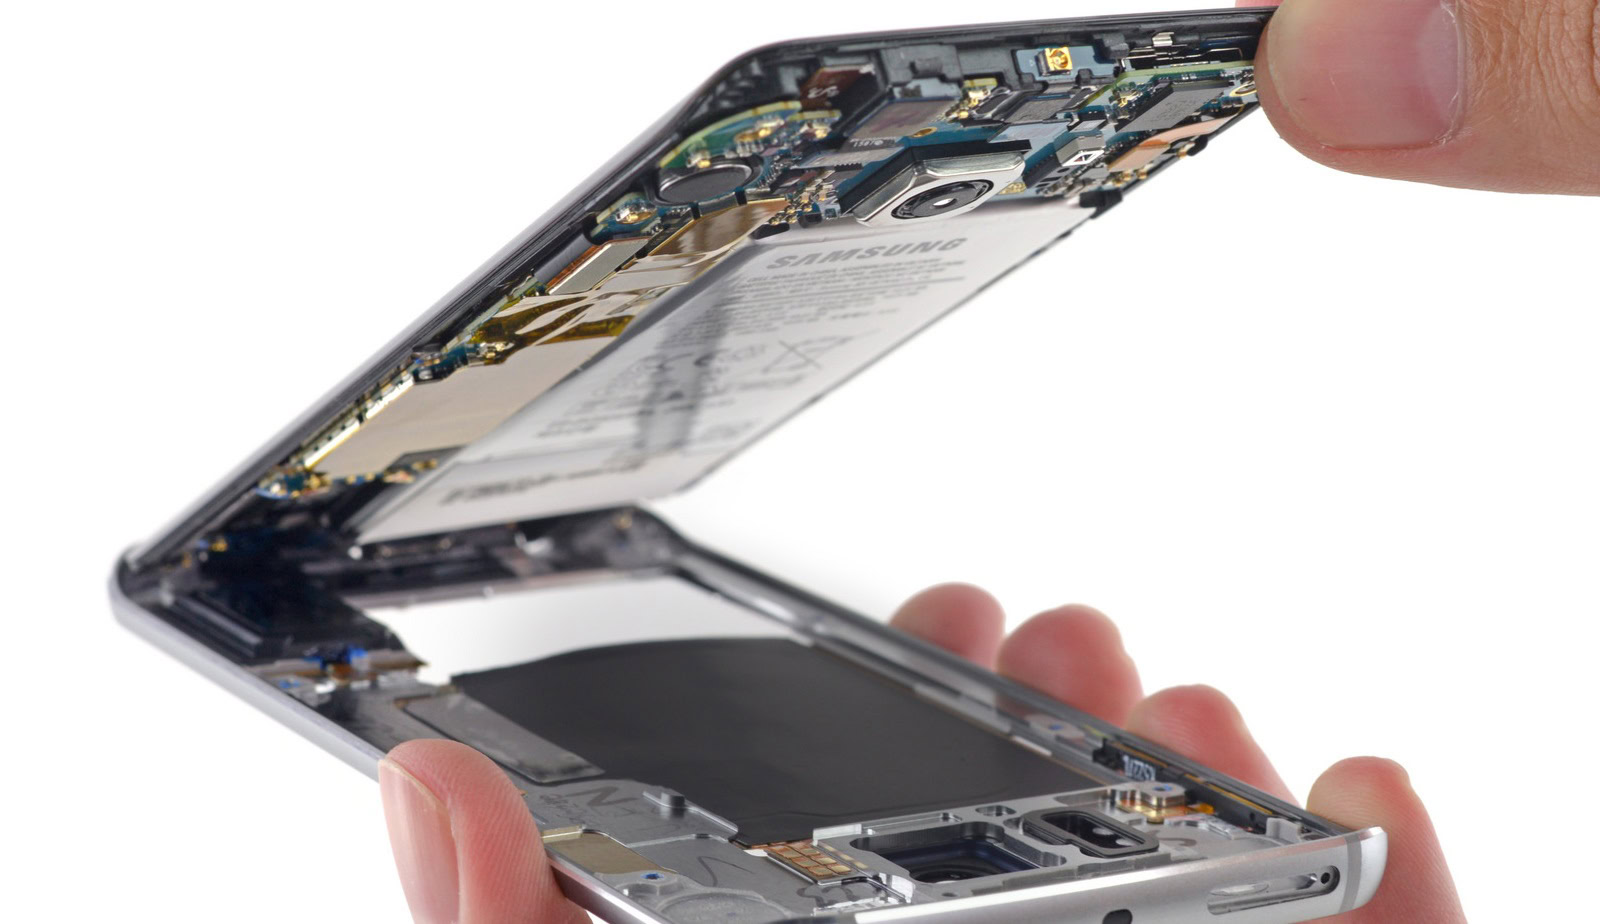
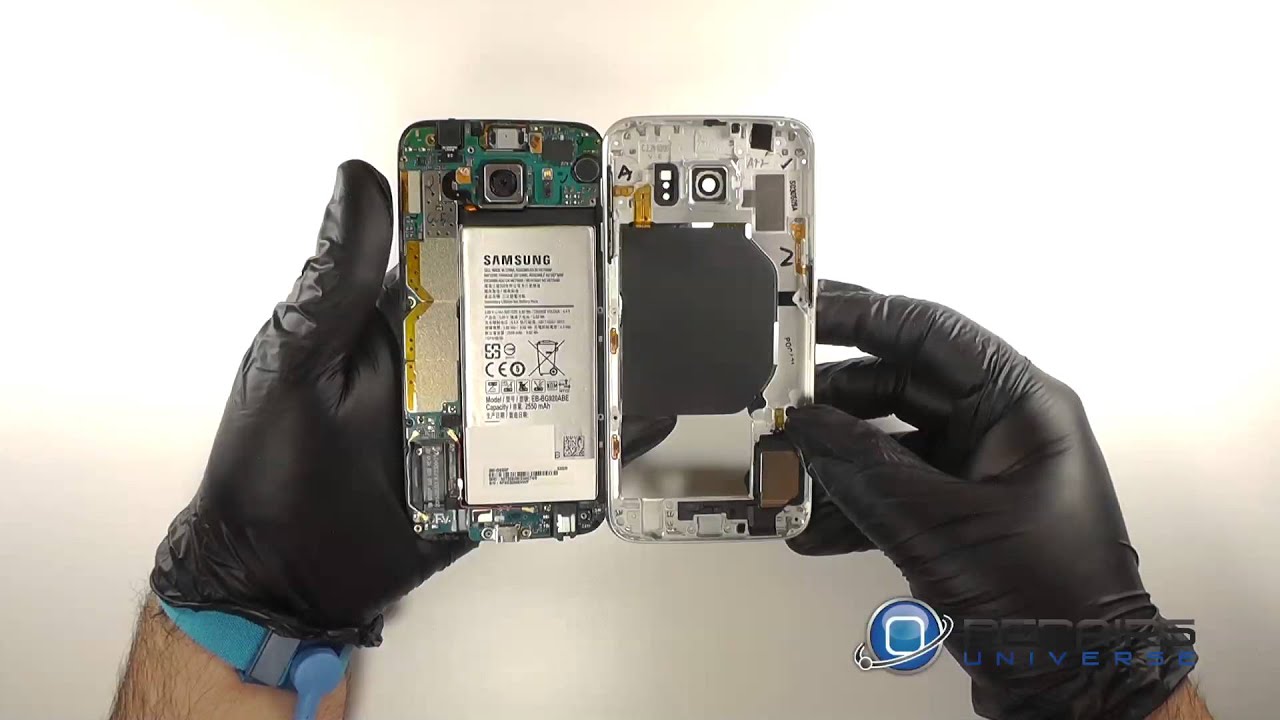
- Gently press down on the back of the battery and lift up around the edges of the midframe to pop it away from the rest of the phone.
Step 15


- Now it's time to disconnect the battery ribbon cable from the motherboard. Use the flat end of your trusty spudger to gently pry it loose.
Tools Used

Step 16


- Gently unplug the home button ribbon cable from the motherboard. You've got this!
Step 17


- Grab that trusty spudger and use its pointed end to gently detach those two antenna interconnect cables from the motherboard. You've got this!
Tools Used
Step 18


- Gently pop the display ribbon cable off the motherboard using the flat end of your spudger—nice and easy does it!
Tools Used
Step 19


- Unplug that earpiece ribbon cable from the motherboard, and let’s keep this repair journey rolling!
Step 20


Hey there, tech wizard! Just a quick heads up: the motherboard is a delicate little gem that doesn’t like static electricity. It's best to rock an anti-static bracelet while you’re working with it to keep things safe and sound.
And remember, don’t go yanking the motherboard out just yet; there’s a sneaky ribbon cable hiding underneath that needs to be disconnected first. Take it slow and steady!
- Grab the motherboard by its edges up top, just like you're ready to take it on a little adventure.
- Gently lift the motherboard away from the display, being super careful not to put too much strain on that delicate daughterboard ribbon cable. You've got this!
Step 21


- Unplug the daughterboard ribbon cable from the bottom side of the motherboard. Keep it gentle and steady—this part can be a bit shy!
Step 22

While you’re waiting, take a peek at the next step so you’ll know exactly where to start prying.
- Grab your trusty iOpener and place it on the left edge of your phone for about a minute. Let's get that phone feeling nice and toasty!
- You might have to reheat and reapply the iOpener a few times to ensure your device warms up sufficiently. Just make sure to follow the iOpener's guidelines to keep things safe and sound.
Tools Used
Step 23


As we swap out the OLED panel and display cable for a shiny new display, remember to keep those capacitive buttons safe and sound! Handle them with care—let's not break anything we don't need to!
- The edges of the display are held in place with robust foam adhesive strips that mean business.
- A solid layer of strong double-sided tape blankets the entire copper surface, ensuring it stays put.
- When you're cutting around the 'recent' and 'back' capacitive buttons at the bottom of the display, take your time! These little guys are glued down and can be quite delicate, so a steady hand is key.
Step 24


Heads up: the display cable snakes through the midframe just above the halfway point on the right side. If your pick dives in too deep, it might get tangled up with the cable.
Keep your pick sliding between the plastic and the copper-colored shielding—don’t let it dip lower.
If you spot your pick through the front glass, it’s riding on top of the display panel instead of under it. Just pull the pick out, tilt it so the tip points more toward the plastic frame, and give it another shot.
- Slide an opening pick into the warmed edge of your phone, right between the plastic frame and the display. You're doing great!
Step 25


- Gently glide the pick along the edge to slice through that pesky adhesive.
Step 26


Take it easy when prying near the top edge—those front sensors and the earpiece speaker are hanging out up there, and they’d rather not get poked!
If you're finding it tough to make that cut, just warm up an iOpener and press it against the edge. You've got this!
- Go ahead and tackle the cutting process for the top edge just like you did before. You've got this!
- While you're at it, keep an opening pick handy in the edge you've already worked on. It’ll help stop it from sticking back together!
Tools Used
Step 27


- Keep slicing through that sticky stuff on the other long side of the phone. Go as deep as you can to break free from that double-sided tape!
- Pop a pick into the edge you just sliced so it doesn't seal back up on you.
Step 28

- Heat things up with an iOpener on the bottom edge of the display for about a minute. You're just warming it up for a cozy experience!
- Carefully slide in an opening pick between the display and the 'back' button, but keep it to a maximum of 0.5 inches deep—let's avoid any accidental damage to our precious display.
- Keep that pick in place to prevent the edge from sealing back up. You're doing great!
Tools Used
Step 29


- Now, go ahead and give the 'recents' button the same treatment!
Step 30


Hold on to that plastic frame! Don't pull it off just yet; that display cable is still nestled in the midframe, ready to be gently freed.
- Grab your picks and gently work them under the display to break free any stubborn adhesive that might be holding it down.
- With a delicate touch, lift the battery edge of the plastic frame upwards to create a little separation between the frame and the display. You've got this!
Step 31


- Time to get that plastic frame out of the way! As you carefully lift it away from the display, make sure to gently thread the display ribbon and connector out of the frame - we don't want any damage in there!
- Now it's time to ditch the plastic frame. Remove it and let's move on to the next step!
Step 32

Before slapping on that shiny new display, make sure to scrub off all the old adhesive from the frame. Be gentle, but firm - we don't want any pesky glass fragments sticking around.
If the frame is looking a little worse for wear or you can't get all the glue and glass bits out, don't stress! The new display just won't fit right and might even get damaged. If it's really bent out of shape, you might need to replace the frame altogether.
- Time to put your device back together! Just retrace your steps like a pro.
- If you find yourself in a pickle, remember, you can always schedule a repair.