Samsung Galaxy S6 Edge Screen Replacement Guide: Step-by-Step Tutorial
Duration: 45 minutes
Steps: 32 Steps
Hey there! This guide is for you if you’re only replacing the display assembly. Also, heads up – make sure the frame is in good shape and not all bent out of shape!
Ready to give your Samsung Galaxy S6 Edge a makeover? Let’s replace that display assembly! This guide is your go-to if you’re only swapping out the display assembly. If your new part has a frame, check out our other guide. Got a bent or damaged frame? Time to replace it too; otherwise, your new screen might not fit snugly and could get damaged from uneven pressure. Separating the display from the frame usually ends up destroying the display, so only follow this if you’re set on getting a new one. We’ll also be removing the rear glass, and just a heads-up, this will break the adhesive holding it in place. Follow our steps to reinstall the rear glass. Need help? You can always schedule a repair.

Step 2


Avoid the microphone hole – you don’t want to cause any damage. Instead, keep an eye out for the SIM tray outline.
– Grab a paper clip or your trusty SIM eject tool and pop it into the little hole in the SIM card slot on top of your phone.
– Give it a gentle press to release the SIM card tray.
– Carefully pull the SIM card tray out of your phone and you’re all set!
Step 3


For carousel microwaves: Ensure that the plate can spin without any hiccups. If your iOpener gets a little too cozy and gets stuck, it might just overheat and cause a little burn action.
Before you get started, it’s a good idea to give your microwave a quick clean. This will help prevent any gunk from sticking to the iOpener later on.
– Pop that iOpener right in the middle of the microwave and let it warm up!
Tools Used

Step 4

Hey there, let’s keep things cool with the iOpener during the repair so it doesn’t get too hot and burst. Remember, no one likes a burst iOpener, so best not to heat it over 100˚C (212˚F).
If the iOpener looks a little puffy, just hands off, okay?
And if the center of the iOpener is still a bit too warm to handle, just give it some time to chill while you keep using it. A well-heated iOpener stays cozy for about 10 minutes, so no rush!
Microwaves have their quirks, so you might need to adjust the heating time. The iOpener is ready to roll when it’s just a touch too hot to handle. If you need help, you can always schedule a repair.
– Give your iOpener a warm hug in the microwave for thirty seconds to get it nice and toasty.
– As you work your magic on the repair, keep that iOpener cozy by reheating it for another thirty seconds whenever it starts to cool down.
Tools Used
Step 5

Watch out! The iOpener is hotter than a summer day, so handle it with care. Oven mitts can be your best buddies here!
– Take the iOpener out of the microwave, making sure to grab it by one of the two flat ends to avoid the hot middle.
Tools Used
Step 6


Caution: The iOpener is going to be super hot! Make sure to grab it only by the end tabs to keep your fingers safe.
To warm up your iOpener without a microwave, simply follow this step to heat it in boiling water.
– Grab a pot or pan and fill it with enough water to completely cover your iOpener. We want it to take a nice dip!
– Turn up the heat and bring that water to a rolling boil. Once it’s bubbling away, go ahead and turn off the heat.
– Carefully lower the iOpener into the hot water for about 2-3 minutes. Make sure it’s fully submerged—no half measures here!
– With a pair of tongs, fish out the heated iOpener from the water. Be cautious, it’s hot stuff!
– Give the iOpener a good dry-off with a towel. We want it to be nice and dry for action!
– And there you have it! Your iOpener is all set for use. If it needs a little more heat, just repeat the steps: boil the water, turn off the heat, and let it soak for another 2-3 minutes. Easy peasy!
Tools Used
Step 7


Thinking about using a hair dryer, heat gun, or hot plate? Just make sure not to turn your phone into a hot potato—the OLED screen and internal battery are not fans of excessive heat. Be cool, we’ve got your back!
Opening your phone might just let the water in, so keep those waterproof seals in mind! Make sure you’ve got some replacement adhesive on hand before diving in, or be super careful to keep it away from liquids if you skip the adhesive on reassembly.
If your screen is more shattered than your dreams on a Monday, slap some packing tape over the whole panel to keep it intact while you work your magic.
You might have to give the iOpener some extra love and warmth, reheating and reapplying it a few times to get everything nice and toasty. Just follow the iOpener instructions so we don’t end up with a phone that’s had too much sun!
– Place the warm iOpener on the back panel for about two minutes to help loosen up that stubborn adhesive around the glass edges.
– Move the iOpener to heat up the rest of the panel for another two minutes, giving it some extra love.
Tools Used
Step 8


If you’re feeling adventurous, once you slide that pick in, sprinkle a couple of drops of isopropyl alcohol into the crevice. It’ll work its magic and loosen up the adhesive for the next steps. Good luck!
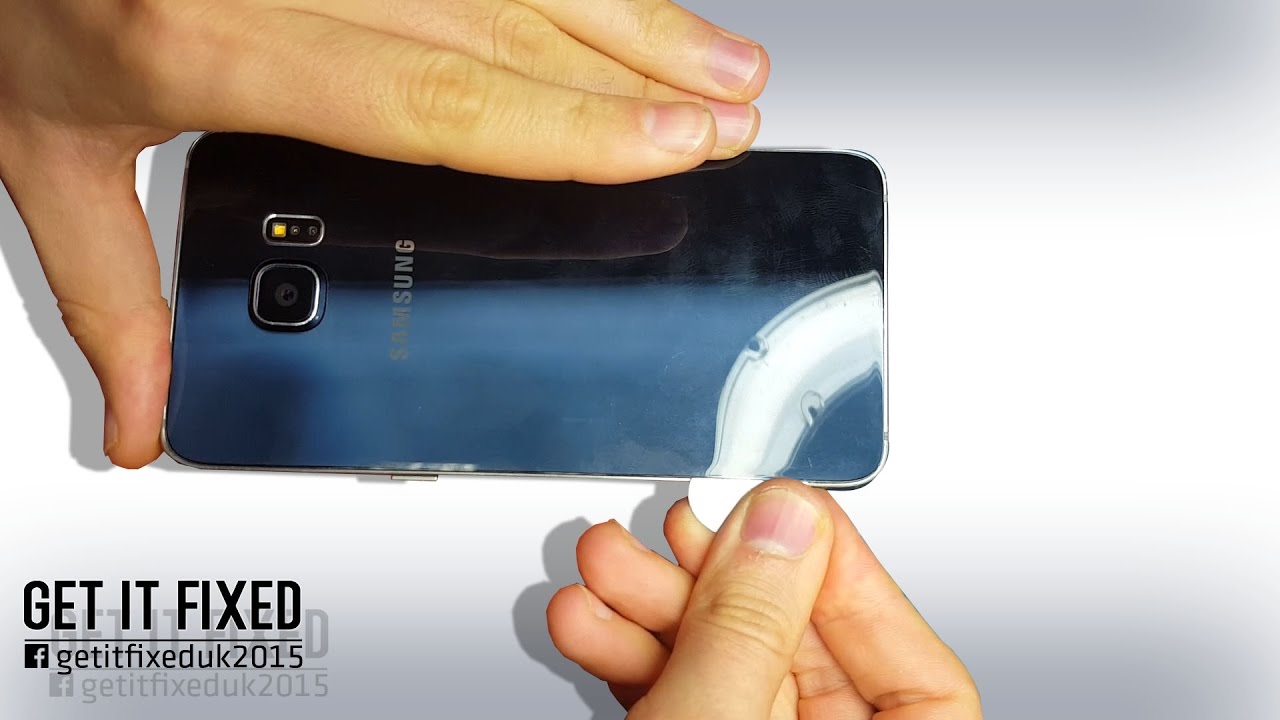
– Once the back glass feels warm, place a suction cup close to the lower edge of the glass.
– Gently pull up on the suction cup to make a small space under the back glass, then slide in an opening pick.
Step 9


To keep things smooth sailing, consider leaving the pick in place while you grab a second one for the next step. This little trick can help stop that pesky glue from sticking back together.
Don’t forget to give the rear glass a little heat boost as needed to keep the glue from cooling off and getting all hard on you.
– Gently glide the pick along the bottom edge of your phone, cutting through the adhesive that holds the rear glass in place. You’re doing great!
Step 10


– Heat and cut the remaining three sides of the phone.
– Leave an opening pick under each edge to stop the adhesive from sealing back up.
Step 11


– Grab your trusty opening pick and carefully slice through any leftover adhesive like a pro.
– Now, let’s gently lift off that rear glass and reveal the magic inside!
Step 12


– Ready to give your device a fresh look with some new rear glass? Let’s get started!
– If you’re putting back the old rear glass or using a new piece without adhesive already on it, check out this guide.
– Grab your tweezers and gently remove any leftover adhesive from the phone’s chassis. We want a clean slate!
– Next up, clean those adhesion areas with some high concentration isopropyl alcohol (at least 90%) and a lint-free cloth. Remember to swipe in one direction only—no back and forth! This will prep the surface perfectly for the new adhesive.
– Now, peel off the backing from the new rear glass, align one edge with the phone chassis, and press it down firmly. You’ve got this!
Tools Used

Step 13

– Get ready to say goodbye to the thirteen 3.3 mm Phillips #00 screws lurking in the midframe.


Step 15


– Time to bust a move with the spudger! Use the flat end to give that battery ribbon cable a well-deserved break from the motherboard.
Tools Used


Step 17


– Grab your trusty spudger and gently use the pointed end to disconnect those two antenna interconnect cables from the motherboard. You’ve got this!
Tools Used
Step 18


– Hey there, tech aficionado! Let’s disconnect that display ribbon cable from the motherboard using the goofy yet effective spudger. This will make the world of difference, and if you get stuck, you can always schedule a repair!
Tools Used
Step 19


– Pop off that earpiece ribbon cable from the motherboard. If you need help, you can always schedule a repair.
Step 20


Hey there, just a friendly reminder that the motherboard is a delicate little creature and needs some TLC! We recommend rocking an anti-static bracelet when you’re handling it to keep things safe and sound.
And remember, don’t go yanking that motherboard out just yet; you’ve got to disconnect the ribbon cable on the underside first. Take it easy and go step by step!
– Hold the motherboard securely by its sides near the top of the device.
– Gently lift the motherboard up and away from the display, being mindful not to put too much pressure on the daughterboard ribbon cable.
Step 21


– Unplug the daughterboard ribbon cable from the bottom side of the motherboard. Time to get those connections loose!
Step 22

While you’re hanging tight, why not check out the next step? It’ll give you a sneak peek on where to start prying. Keep your spirits up!
– Grab your trusty iOpener and place it on the left edge of your phone for around a minute. Give it a little time to work its magic!
– If things aren’t warming up as expected, don’t hesitate to reheat and reapply the iOpener a few times. Just remember to follow the iOpener instructions to keep things cozy without going overboard.
Tools Used
Step 23


Step 24


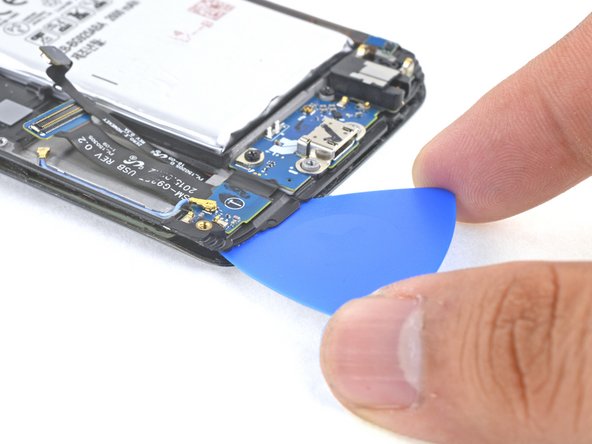
Just a heads up: the display cable runs through the midframe right above the midpoint of the right edge. If your pick goes in too deep, it might put a damper on your cutting game.
Make sure your pick glides smoothly under the plastic while staying above that shiny copper-colored shielding.
– Slide an opening pick into the warmed-up edge of your phone, right between the plastic frame and the display.


Step 26


Hey, just a heads up! Be a bit extra gentle near the top edge so you don’t mess up the front-facing sensors and earpiece speaker. If you need help, you can always schedule a repair
If you’re finding it tough to cut through, warm up an iOpener and gently press it against the edge. You’ve got this!
– Time to go for a second round of cutting at the top edge.
– Keep a trusty opening pick in the part you’ve already tackled to make sure it doesn’t stick back together.
Tools Used
Step 27


– Keep going and slice through the adhesive on the other long side of your phone. Aim to cut deep enough to break that pesky double-sided tape free.
– Once you’ve made the cut, pop a pick in the gap to keep it from sealing back up. You’ve got this!
Step 28

– Get cozy with a heated iOpener on the bottom edge of the display for approximately one minute.
– Ever so gently slide an opening pick between the display and the ‘back’ button, just about 0.5 (that’s around 12 mm) inches deep to keep things groovy and avoid any display mishaps.
– Let the pick hang out there to make sure the edge stays chill and doesn’t seal up on you.
Tools Used
Step 29


– Repeat the same steps for the ‘recents’ button, and keep rocking!
Step 30


Step 32

– First things first, let’s get that frame squeaky clean! Grab some 90% (or higher) isopropyl alcohol and a lint-free cloth or coffee filter. Wipe the adhesion areas gently in one direction—no back and forth, please! We want to make sure everything is prepped perfectly for the next step.
– Now it’s time to secure that shiny new screen! The secret weapon here is a sheet of custom-cut double-sided tape. Stick it to the back of the screen, then carefully guide the display cable through the frame. Once that’s done, align the screen just right and give it a gentle press to lock it into place. You’ve got this!