Samsung Galaxy S6 Edge Teardown
Duration: 45 minutes
Steps: 19 Steps
Step 1

- This snazzy new device has some serious style! Check out these awesome upgrades:
- 5.1" Super AMOLED capacitive touchscreen (1440 x 2560, ~577 ppi, 16M colors) - your eyes will thank you!
- Samsung Exynos 7 Octa 7420 Processor with integrated Mali-T760 GPU and a cool 3 GB of memory to keep things zipping along.
- 16 MP rear camera with HDR, LED Flash, and the ability to record in stunning 4K video. Your selfies are about to get a serious upgrade!
- Built-in support for Qi and Powermat wireless charging, so say goodbye to tangled cords.
- Choose from 32/64/128 GB storage options (just a heads up, there's no microSD slot, but you're gonna love it!).
- Corning Gorilla Glass 4 backing - because your phone deserves to be tough!
Step 2


Now, when it's resting on a table, you'll be able to catch a glimpse from some quirky new angles. Welcome to the future!
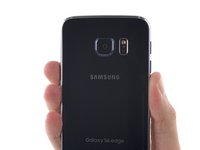
- The Edge has arrived, and we’re definitely digging the vibes. With its smooth curves and crisp display, the S6 feels like you’re holding a tiny luxury pool in your hand.
- Take a look from either side and you'll spot the Edge's info stream, sliding your news, weather, and notifications right onto the edge of your screen.
- Check out the proximity and gesture sensors, plus the front-facing camera—all tucked neatly behind the Edge’s Gorilla Glass.
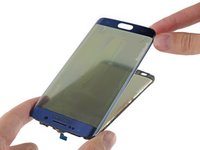
- ...with one catch: it’s not the most comfortable to hold, and it loves collecting fingerprints like it’s a hobby.
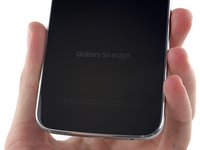
Step 3


- The phone's key features sit along the edges—like the speaker, microphone, audio jack, and USB 2.0 port—ready for action. Down below, the heart rate monitor peeks out just below the LED flash, conveniently next to the rear camera. Up on the top edge, you'll find another microphone, along with the IR blaster and the SIM tray, all hanging out and doing their thing. It's a familiar layout, but heads up: some folks are already noticing issues with the sensor. If you need help, you can always schedule a repair.
Step 4


Samsung really upped the style game with the S6 and S6 Edge by going for a sleek, screw-free glass back. It's a design choice that's becoming quite the trend these days!
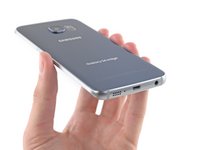
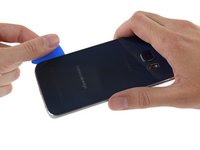
- Alright, let’s flip this sleek gadget over and check out the back! We’ve spotted the model number—SM-G925T—and it’s time to tackle that back cover.
- The rear panel is stuck on there like it’s in a strong relationship—very tight and super glued in! Even after we carefully worked on the adhesive, we had to bring in our Heavy Duty Suction Cup to sneak in an opening pick. Not the easiest task, but we’re up for the challenge!
- Remember the good old days when Samsung made battery replacements a breeze? Those were the days—RIP to those user-friendly designs.
Step 5


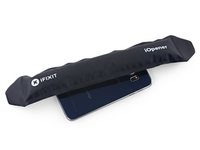
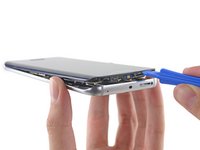
- Our trusty Opening Picks are key to uncovering the secrets inside your Edge.
- With a bit of assistance from our iOpener buddy—and a healthy dose of patience—we'll skillfully navigate around the edges.
- The back panel is mostly off now! What lies beneath is a bit sticky... but don't worry, we've got this covered.
- Even our slim picks find it a challenge to tackle the edges of this glass.
Tools Used

Step 6


- A little persuasion and some muscle, and the glued-down panel pops right off the phone.
- With the panel out of the way, the adhesive comes off the glass pretty smoothly, though it leaves a bit of sticky mess behind on the metal midframe.
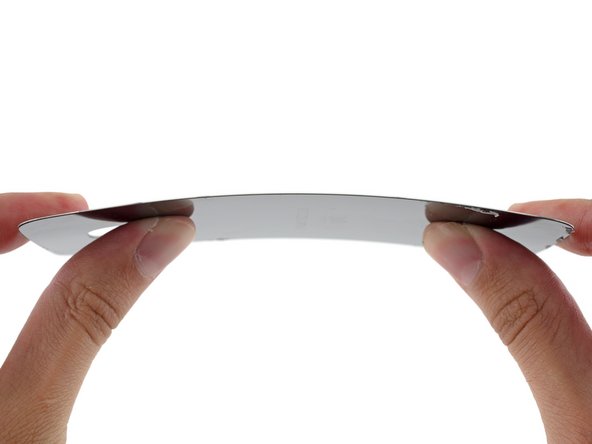
- When we heard the S6/S6 Edge had a glass panel, we had a retro flashback to 2011. But after putting it through its paces, it turns out glass has toughened up a lot in four years.
Step 7


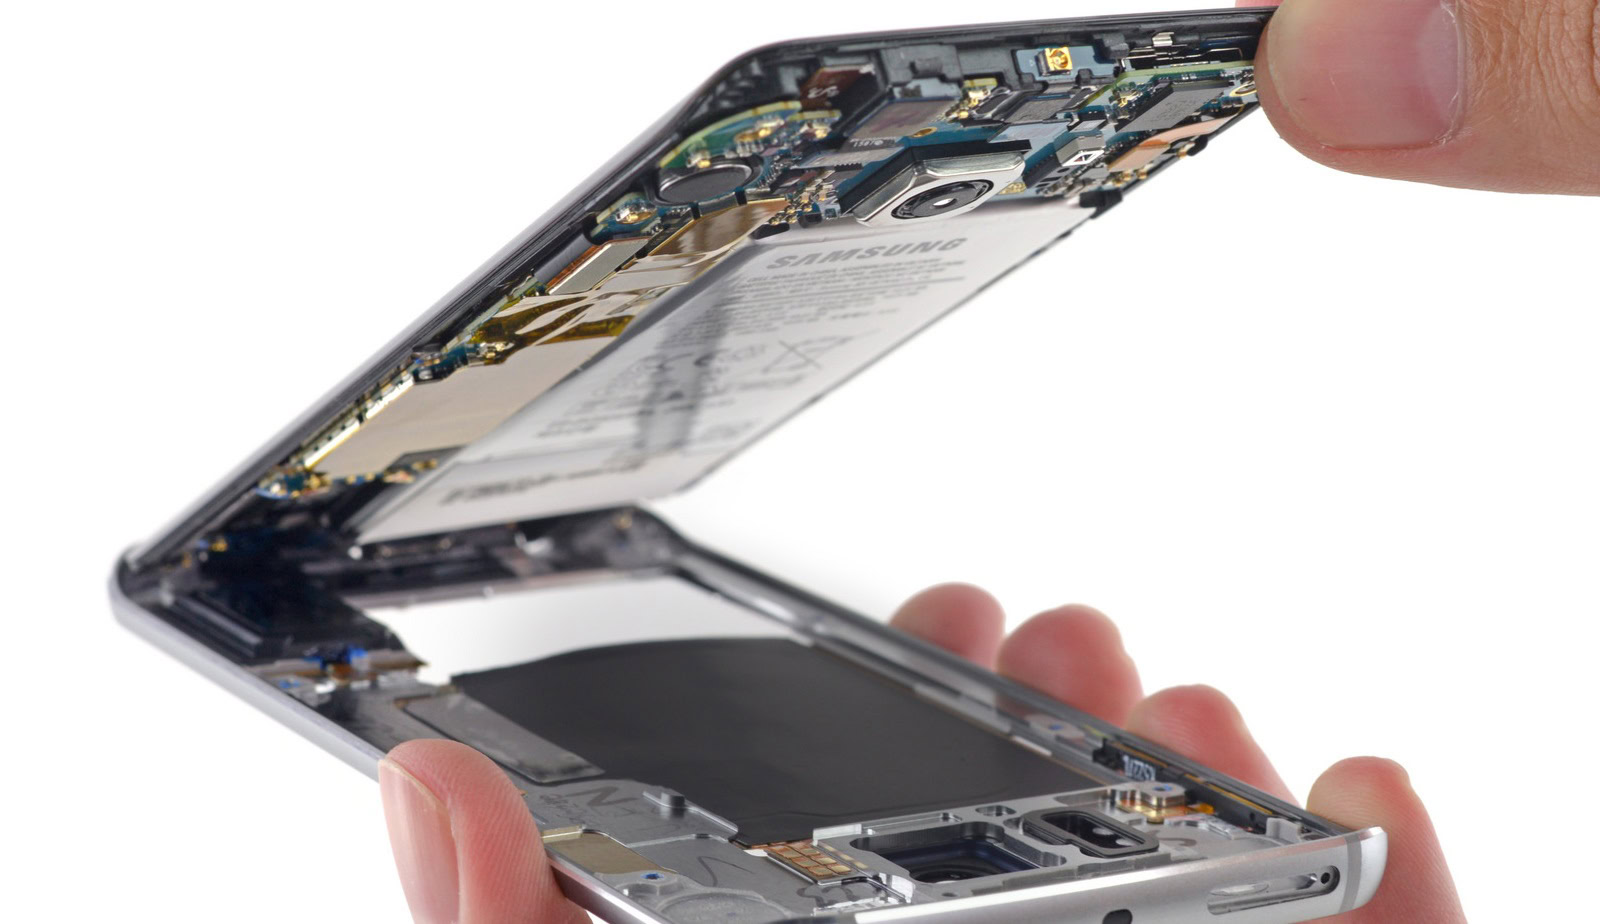
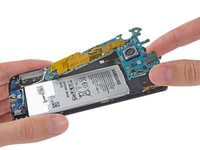
It looks like Samsung made things a bit tricky by placing the battery behind the midframe. But don't worry, we've got you covered! Let's dive in and get that battery replaced.
- Just like in every previous Galaxy phone—including the notoriously tricky Galaxy S5 from last year—this is the moment where we get to elegantly pop out the battery with a simple fingernail.
- Our trusty sidekicks, the screwdriver and plastic opening tool, are ready to lend a hand. Thankfully, it seems we've said goodbye to the adhesive drama—the midframe comes off quite smoothly, revealing all the exciting components waiting just beneath the surface.
Step 8


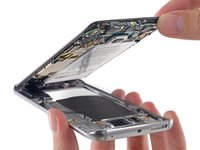
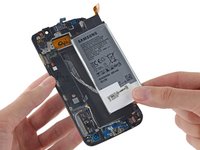
No surprises here—the battery is still tucked away securely beneath the motherboard.
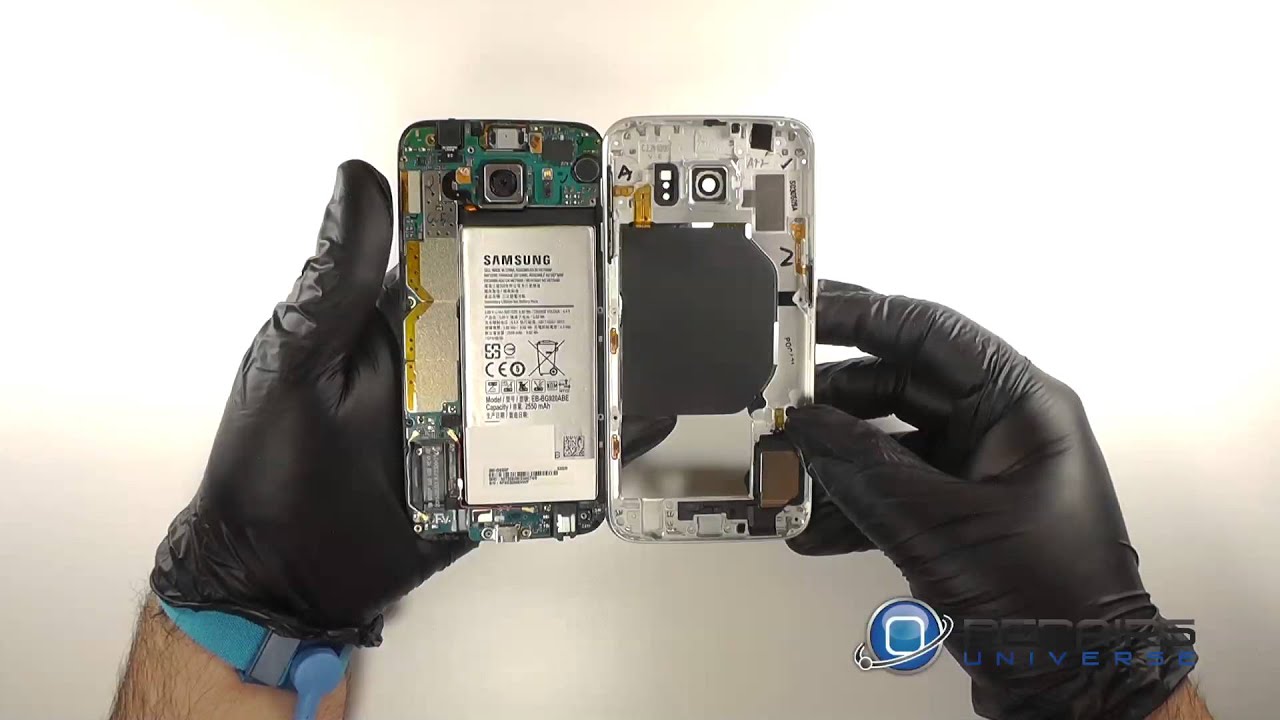
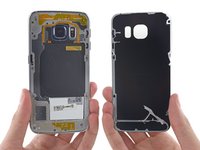
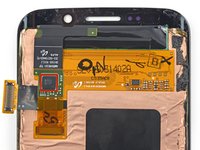
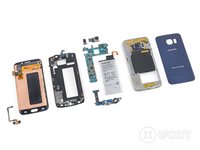
- Now that we've sent the midframe on its way, we're treated to a sneak peek of the battery and motherboard. How exciting!
- The midframe is a treasure trove—filled with all sorts of fun components, including a bunch of spring contacts, an NFC/wireless charging coil, and a speaker. What a delight!
- While we’re itching to pop that battery out and take a closer look, for now, we’ll just disconnect it from the motherboard. Patience is key!
- At this stage, we're used to accessing expandable memory via a MicroSD card. But wait—where did it go? Oh right, Samsung decided to make it a no-show. If you're in need of extra storage, make sure to grab it at the outset; you won’t be able to add it later.
Step 9


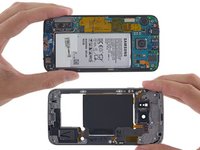
- Check out those labeled antennas on the midframe—adorable, right?
- It turns out the antennas are snugly welded to the midframe using ultrasonic welding. This not only keeps everything stable but also saves some precious space.
- Oh, and we stumbled upon a little void in the midframe for the power button. It's like a tiny portal waiting for action!
Step 10


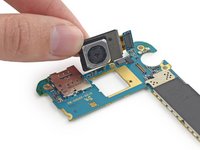
- Almost there! With all the connectors popped, the motherboard is nearly free from the display - and we're seeing that same quirky IO board connection we first spotted in the Galaxy S5.
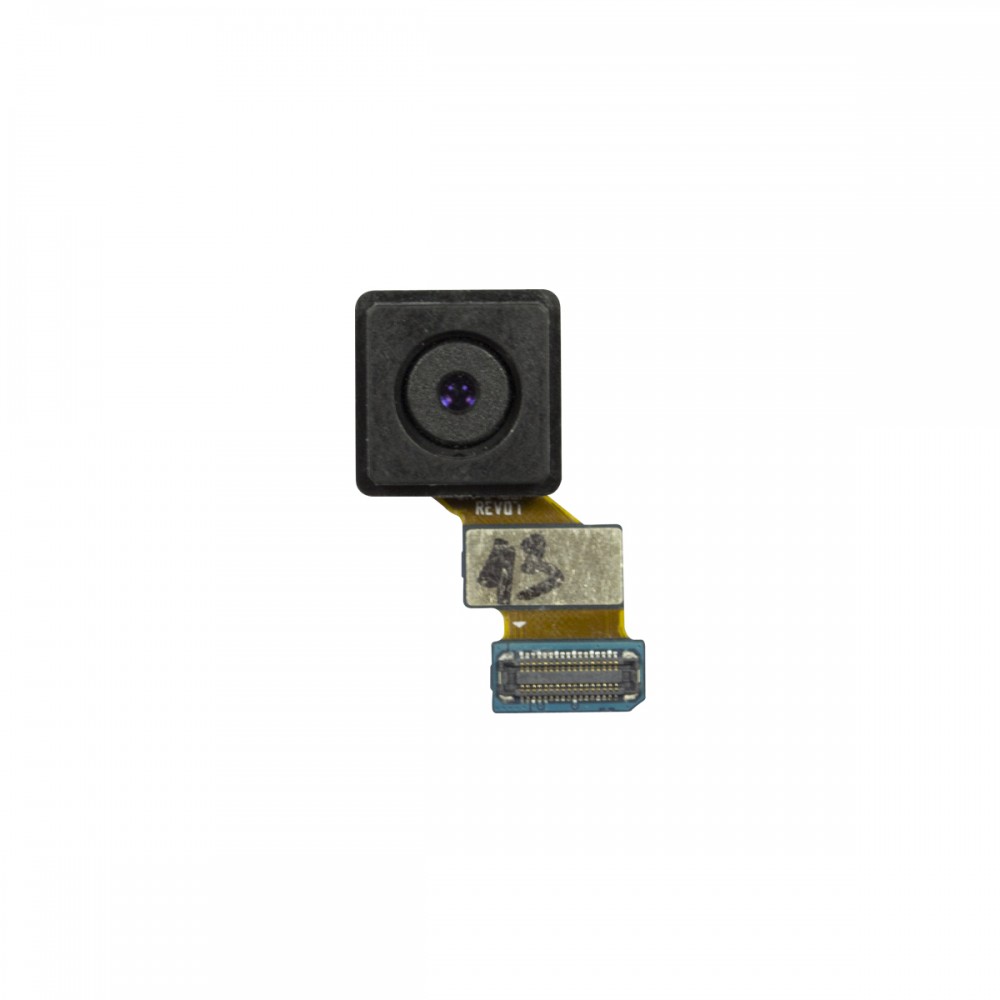
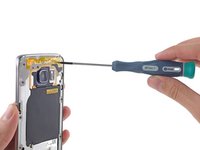
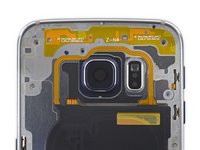
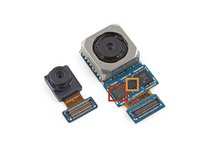
- Now, let's gently remove the main camera from the motherboard to get a closer look at the hardware on its PCB:
- Check out how the 16 MP OIS rear-facing camera dwarfs the 5 MP selfie cam - quite a size difference!
- We've got a Winbond W25Q32FW Serial Flash Memory chip on our hands
- And look, an InvenSense IDG-2030 dual-axis gyroscope for optical image stabilization - nice!
Step 11

- Let’s check out what’s under the hood on the front side of the motherboard—Samsung is definitely flexing its in-house chip game here. You’ll spot:
- Samsung Exynos 7420 Octa-core Processor (64-bit, 2.1 GHz Quad + 1.5 GHz Quad) paired up with 3 GB LPDDR4 RAM (K3RG3G30MM-DGCH)
- Samsung KLUBG4G1BD 32GB NAND Flash for your storage needs
- Skyworks 78041 Hybrid Multimode Multiband (MMMB) Front-End Module (FEM) keeping your connections smooth
- Avago AFEM-9020 PAM working its magic
- Wolfson Microelectronics WM1840 Audio Codec teamed up with a Maxim MAX98505 Class DG Audio Amplifier—sound check, anyone?
- Samsung N5DDPS3, which is likely the NFC Controller (looks a lot like its cousin from the S6)
- InvenSense MP65M 6-Axis Accel + Gyro for all your tilting and twisting, plus a Samsung C2N89U (probably your image processor)
Step 12

- Flipping over the motherboard reveals a treasure trove of control hardware and a bunch of power management ICs that are just waiting to be discovered:
- Samsung Shannon 928 RF Transceiver
- Broadcom BCM4773 GNSS Location Hub
- Avago ACPM-7007 PAM
- Maxim MAX77843 Companion PMIC
- Various Samsung Shannon PMICs
Step 13


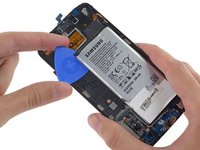
We like to think Samsung is aware of the little headaches this can cause, especially with those markings hanging out next to the battery.
- Glass back? Glued-in battery? Samsung’s clearly taking notes from the competition.
- But the Apple playbook stops there—no pull tabs to bail you out. Time to tackle that stubborn adhesive, peeling it away strip by strip. Slow and steady wins this sticky race!
Step 14
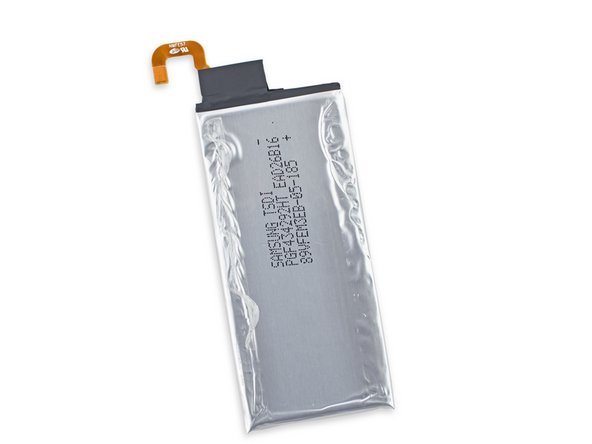

Even with a smaller battery, the Edge manages to squeeze out a bit more juice than its previous flat version—talk about an overachiever!
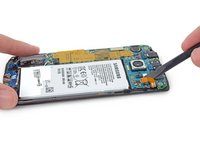
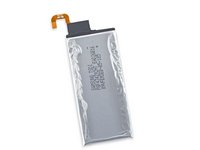
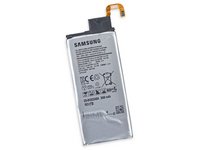
- With the sticky stuff out of the way, we can get a clearer view of the 3.85 V, 10.01 Wh battery.
- Samsung says the Edge’s battery should keep you going for 12 hours of LTE web browsing, 26 hours of 3G talk time, and up to 58 hours of music.
- And it’s fresh off the presses! Seriously, check out the date!
- Samsung has downgraded from the 2800 mAh battery in the Galaxy S5 to a 2600 mAh one, just like the S4.
Step 15


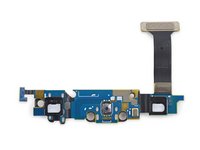
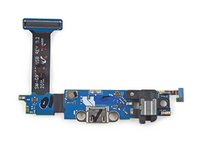

Micro-B USB 3.0 ports are like the cool kids—they work with the classic USB 1.x/2.0 micro-B cable plugs without any fuss! While they do save a bit of space, it’s hard to see what else they bring to the party. Honestly, a nearly 90% drop in data transfer rates? That’s a tough sell! But don't worry, if this gets tricky, you can always schedule a repair.
- Looks like the Galaxy S6 Edge took a step back from the lightning-fast Micro-B USB 3.0 port found on the Galaxy S5, switching to the more common microUSB 2.0. No worries—this is a straightforward change, but it’s worth noting if you’re planning your repair or upgrade. If you need a hand with anything tricky along the way, you can always schedule a repair.
Step 16


Samsung's got this cool curved glass made through a nifty process called 3D thermoforming, where they heat and shape the glass. Looks super stylish, but it comes with a price tag that’s eight times higher! What used to be a $3 part is now costing Samsung around $26, all thanks to those tricky low yields.
A recent report suggests that their curved-glass supplier is only hitting a 50% yield, which is pretty rough on Mother Earth. Manufacturing can be a tough gig on the environment, and this means they have to produce two screens for every phone. Yikes!
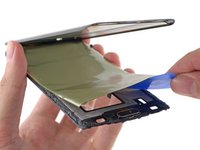
- Time to give the Edge a little warm-up session in an iOpener nest - fingers crossed the adhesive will loosen up nicely!
- Now, let's carefully lift the glass and... hmm, is that supposed to happen?
- Whoops, looks like we accidentally separated the display a bit while trying to pry into the curved part. No big deal, let's keep moving!
Tools Used
Step 17


Samsung's Super AMOLED display is what gives this screen its sleek curves.
Just a heads up, those stylish curves might shave a bit off your display's lifespan. While AMOLED screens in modern devices let us enjoy thinner designs, they might not last as long as you'd hope.
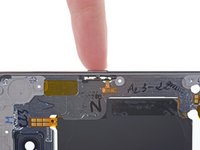
- This phone display is pretty flexible! Peeling it back reveals how Samsung's display curves smoothly around the edges of the device. On the back of the screen, you'll find the usual touchscreen controller—this time, an STMicro FT6BH. Keep your cool and take it step by step, and if you need a hand, you can always schedule a repair.
Step 18


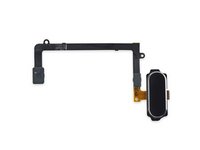

This fingerprint sensor is all about touch, leaving last year's swipe-to-unlock feature in the dust!
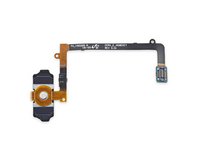
- First up, it's time to liberate the modular home button from the display assembly. It's the last piece to come off, so give it your best shot!
- And guess what? Unlike the S5, we’re skipping the secret trap doors this time. No hidden surprises here!
- Thanks to the new approach that tosses aside the display-out-first antics from last year, we’ve got a fresh route to the home button. Is it better? Well, that’s up for debate. But hey, at least it’s probably not worse!
Step 19
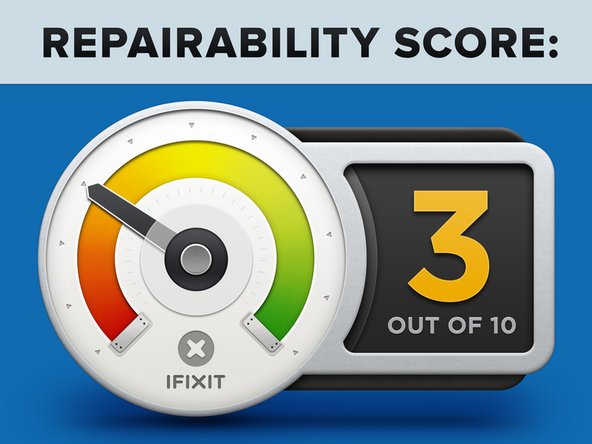


- Samsung Galaxy S6 Edge Repairability Score: 3 out of 10 (with 10 being the easiest fix out there).
- You'll find lots of modular parts inside, so some stuff can be swapped out on its own.
- Unlike the S5, you don't need to peel off the display just to get inside and reach the motherboard. Nice upgrade!
- Both the front and back are glass—double the potential for cracks, and the back glass is stuck down with some seriously stubborn adhesive, so opening it up is a real challenge.
- The battery's glued tight to the back of the display, and it's hidden under both the midframe and motherboard.
- Swapping out just the glass without damaging the display is going to test your patience and skills. If that sounds like a headache, you can always schedule a repair.