Samsung Galaxy S7 Display Adhesive Replacement
Duration: 45 minutes
Steps: 4 Steps
Ready to swap out that display adhesive on your Samsung Galaxy S7? This guide will walk you through the process with ease. Just follow along with the Galaxy S7 screen replacement guide to get your phone back in action. If you hit a tough spot, don’t hesitate to schedule a repair for a hand.
Step 1
Leaving behind any glue or glass bits is a big no-no! It could cause the new display to fit like a square peg in a round hole, and nobody wants that. Let's keep it clean and safe for a smooth installation!
- Scrape away all leftover adhesive and gunk from the phone’s frame. Then, give the surface a good clean with some high concentration isopropyl alcohol (90% or higher) and wipe it down using a lint-free cloth.
- Carefully peel off the clear plastic backing from the pre-cut adhesive strip to reveal one sticky side ready to stick.
Tools Used
Step 2
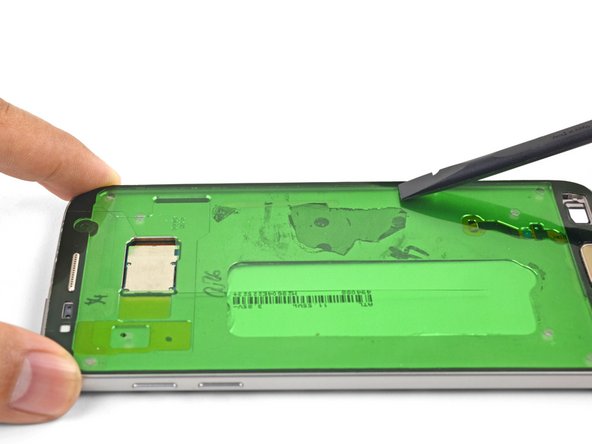
- Line up one edge of the adhesive with the matching edge of the phone frame, ensuring it's oriented correctly. Gently lay the adhesive onto the frame without pressing too hard. Check that the adhesive's cutouts align with the phone's camera and sensors and aren't covering them. If things aren't sitting quite right, carefully peel the adhesive back up and try again. Need a hand? You can always schedule a repair for extra help.
Step 3
- After lining up the adhesive on the frame, take the flat end of a spudger and gently trace around the edges to press it down nicely. Don’t worry, your fingers work just as well if you prefer!
Tools Used
Step 4
If you can, give your screen a little test run before you permanently seal the deal!
- Start putting your device back together until you're ready to add the screen.
- Peel off the green plastic liner from the adhesive strip to reveal the sticky side that’ll hold the screen in place.
- Carefully align the screen and gently set it down onto the adhesive, making sure it’s in the right spot.
- Press around the edges with your fingers to ensure the adhesive sticks securely all around the perimeter.
- Place a few books on top of the screen and let it sit for an hour—this will help the adhesive bond firmly. Just relax, let gravity do its thing!


