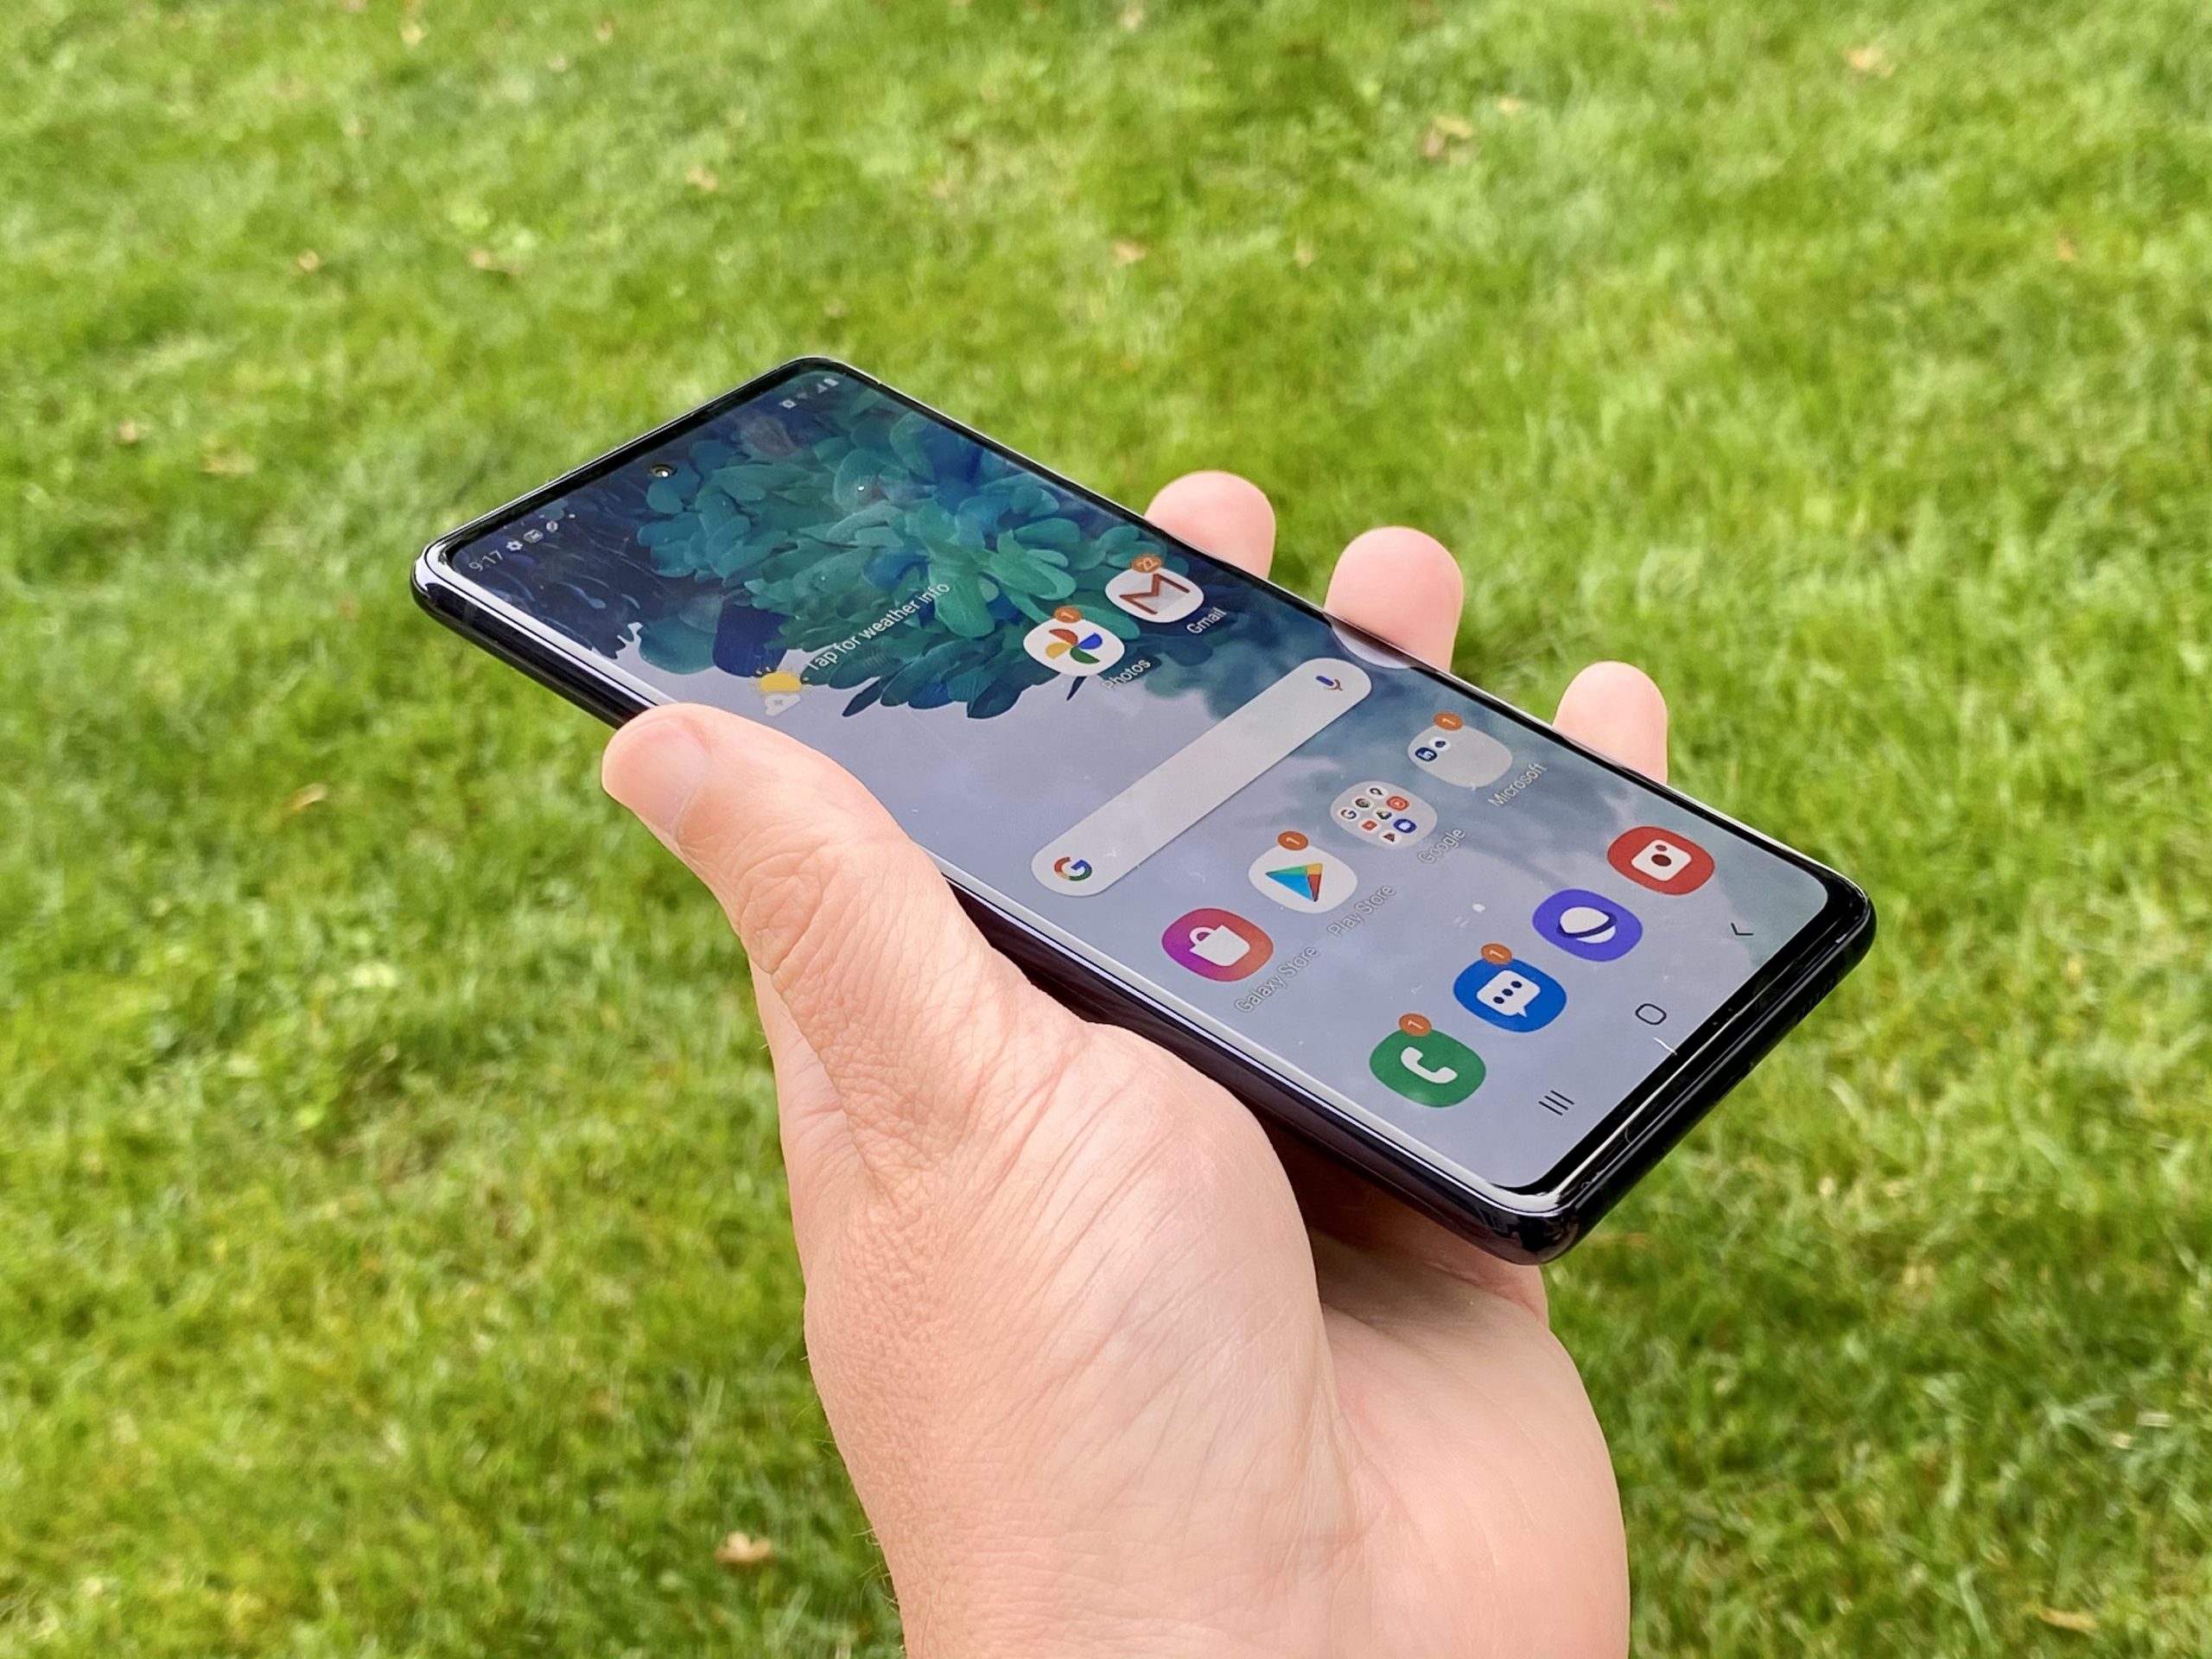
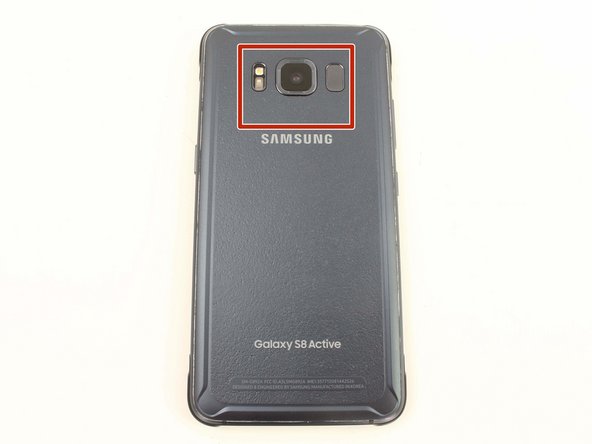
Samsung Galaxy S8 Active Display Replacement
Duration: 45 minutes
Steps: 14 Steps
Get ready to tackle your Samsung Galaxy S8 Active display replacement! This guide will walk you through the exciting journey of removing the back cover. Just a heads up—you'll need some fresh adhesive to seal that back cover back on snugly. Before diving in, make sure your battery is below 25% charged. A battery can be a bit of a drama queen if it's punctured or damaged, leading to potential fire or explosion, so let's keep it chill by keeping it under 25%. And don’t forget, check out the iOpener Heating guide for a handy walkthrough on using the iOpener. Let’s get this fix done!
Step 1


- Grab your SIM card ejector tool (or, let’s be real, a trusty paperclip) and poke it into the tiny hole on the left side at the top of your phone.
- Give it a gentle push until the SIM tray pops out like magic.
- Lift the SIM card tray out—no need for muscle, just a little finesse.
- Ready to put it back? Make sure the SIM card’s gold bits are facing up and the notch is hanging out at the bottom right. Slide the tray back in, pressing softly, and you’re good to go!
Step 2


Popping off the S8 Active's back cover means saying goodbye to its waterproof magic—unless you slap on some fresh adhesive when putting it back together. If you skip the adhesive, keep your device away from any splash zones.
- Start by grabbing your TR6 Torx Security Screwdriver. Remove the four black 3mm screws around the edges that keep those rubber bumpers in place. Once they're out, gently peel off the rubber bumpers from the top and bottom edges of the device. If you get stuck or need a hand, you can always schedule a repair.
Tools Used

Step 3

- Grab your trusty heat gun and give the edges of the back cover a gentle warm-up! This will help loosen the adhesive that holds the back cover snugly to the frame, making it easier to get in there and do your thing.
Warm things up with a heat gun, hair dryer, or hot plate—just keep in mind, the metal frame gets pretty toasty, so handle with care. But don’t go overboard—excessive heat can damage the OLED display, battery, and internal parts. About a minute should do the trick to soften the adhesive, just enough to loosen things up without risking damage. If you need a hand, you can always schedule a repair.
You can also try using an iOpener, hair dryer, or a hot plate to warm up those edges. A little heat goes a long way to make things easier!


Step 4


With the back cover's textured surface, your trusty suction handle just can't get a grip. Time to use another technique!
- Gently slide the Jimmy tool underneath the edge of the back cover. Once it's in place, wedge an opening pick into the seam to keep it from snapping shut if the Jimmy slips or you need a breather. Carefully cut around the top edge of the device, taking your time to avoid messing with the fingerprint sensor and camera cables. Be cautious not to pry too deep at the top to keep everything safe. Then, glide the Jimmy tool down the sides, working to loosen the adhesive as you go. If you need help, you can always schedule a repair.
Tools Used


Step 5

The fingerprint sensor cable runs toward the top of the phone, just near the front-facing camera. To keep that delicate cable safe, gently lift the back cover without yanking on it. If you need help, you can always schedule a repair.
Got some replacement adhesive strips? Awesome! Now, let's tidy up that device frame by using the Jimmy tool to scrape away any leftover sticky stuff. You're doing great!
- Grab your opening pick and glide it along the edge to slice away any leftover adhesive.
- Gently lift the back cover just enough to spot the fingerprint sensor flex cable connector—no need for acrobatics here!
Tools Used
Step 6


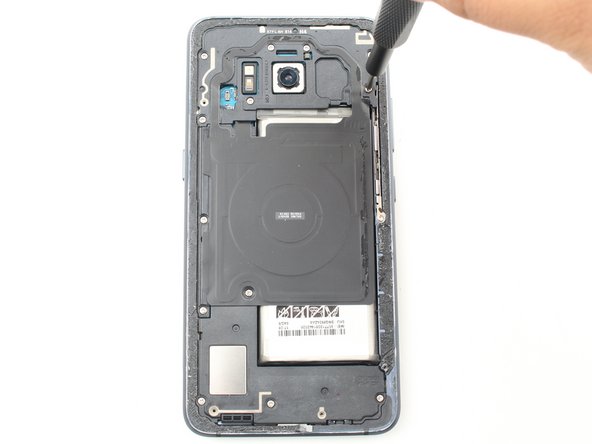
- Gently flip the cover over and set it down atop the device, like turning a page in a book. Next, use the flat end of a spudger to carefully disconnect the fingerprint flex cable—think of it as unplugging a tiny, delicate ribbon. Remove the back cover completely. When it's time to reconnect the fingerprint sensor cable, angle the back cover just right so the flex cable lines up over its socket. Then, use the flat end of your spudger to gently press straight down, snapping the cable into place with a reassuring click. Need a hand? You can always schedule a repair.
Tools Used

Step 7


- Time to get those screws out! Grab your trusty Phillips #00 screwdriver and remove eleven 3.5 mm screws. You've got this!
- Now, let's tackle two more screws! Use that same Phillips #00 screwdriver to remove the two 2mm screws. Almost there!
Tools Used

Step 8


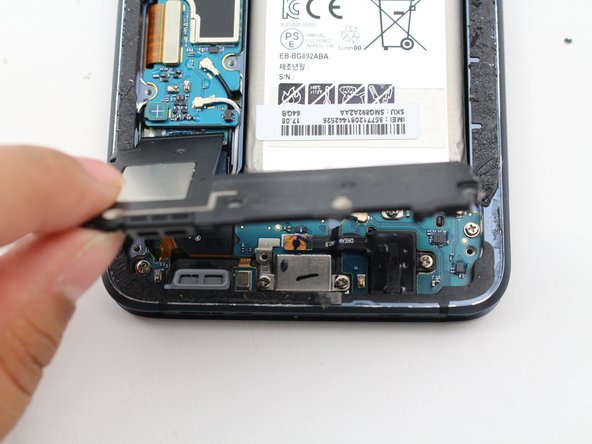
- Pop out the NFC antenna and charging coil assembly with the flat end of your spudger. Take it easy—no rush, just a little gentle prying action.
Tools Used
Step 9

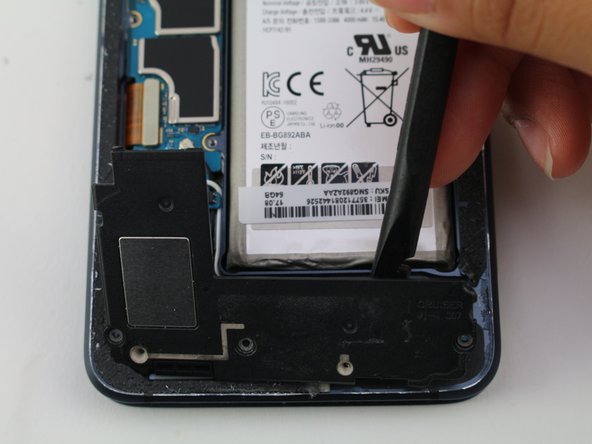
- Gently pry off the loudspeaker assembly using the flat end of a spudger. You've got this!
Tools Used
Step 10
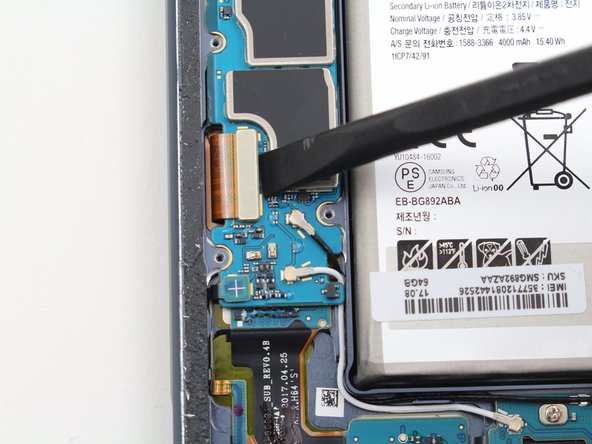

- Gently pop off the display flex cable from the motherboard with the flat end of your spudger—like you're unplugging a tiny, stubborn headphone jack.
Tools Used
Step 11


A hair dryer or heat gun works great for softening the adhesive. Just a heads-up – these tools will heat up the metal frame, so be careful and give it a cool down if needed. Take your time, and remember, if it gets tricky, you can always schedule a repair.
Step 12
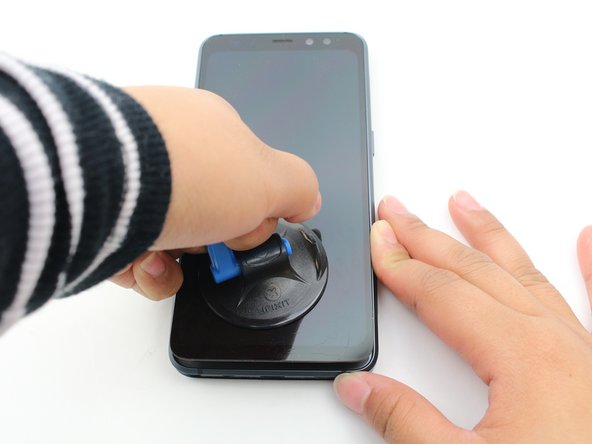

Even if your screen looks like it lost a fight with gravity, the suction cup will still lift the whole display as one piece.
- Place a suction cup in the center of the bottom half of the screen to get started.
- Gently pull up on the suction cup until a small gap forms between the display and the frame.
Tools Used
Step 13

- Slide your opening pick into that little gap between the screen and the frame—made by giving the suction cup a gentle pull.
Step 14

- Now that you’ve taken your device apart, just retrace your steps to put it all back together. If things get tricky, you can always schedule a repair with the pros.