Samsung Galaxy S8 Volume Buttons Cable Replacement Guide – DIY Tutorial for Repairing Volume Buttons
Duration: 45 minutes
Steps: 16 Steps
Let’s kick this repair into high gear! If you’re feeling a bit stuck, we’re always here to help. Just reach out to our awesome team schedule a repair and we’ll have you back to Crushing Life in no time!
In this guide, we’re diving into the fun task of swapping out the volume button cable on your Samsung Galaxy S8. To get to that cable, we’ll need to roll up our sleeves and tackle a few screws, disconnect some cables, and shift around a couple of parts. Don’t worry, you’ve got this!
Step 1

Want to add a little heat? A hair dryer, heat gun, or hot plate can do the trick! Just remember to play it cool—our OLED display and internal battery are heat sensitive. Don’t want those to feel the burn!
Hey there! Just a heads up, popping open your phone means those waterproof seals are going to be compromised. Make sure you have some replacement adhesive on hand before diving in, or be extra cautious about keeping liquids away if you decide to reassemble without it.
While you’re waiting for that adhesive to get all nice and soft, feel free to check out the next step to get a better idea of where to start prying. You’ve got this!
– Warm up your iOpener and stick it on one of the long edges of your S8 for about 2 minutes. Let’s get that phone ready for some TLC!
Tools Used

Step 2


– Get ready to tackle that rear glass panel! In the next steps, we’ll be slicing through the adhesive that’s holding it tight around the edges.
– Take a glance at the first image to see how the adhesive is arranged on the rear case.
– Now, let’s talk about how to pry it open! The pattern you’ll follow from the outside of the phone is outlined below:
Step 3


– Heat up that back panel until it’s nice and toasty, then grab a suction cup and stick it close to the warmed edge. Just keep clear of the curved part.
– Now give that suction cup a lift and slide an opening pick under the rear glass.
Step 4

– Alrighty, now that your tool is snug n’ tight in that glass, go ahead and give it another heating and reapplying of the iOpener. This’ll help soften up the adhesive all nice and easy-like. If you’re feeling stuck, just let us know at schedule a repair and we’ll be happy to assist!
Tools Used
Step 5


Take it easy and keep that tool steady so it doesn’t pop out of the seam. If you hit a snag while cutting, don’t sweat it—just reheat the iOpener and give it another go!
– Gently slide the opening pick down the edge of your phone to break free that pesky adhesive.
Tools Used
Step 6


– Time to show those adhesive seals who’s boss! Repeat the previous heating and cutting tricks on the remaining three sides of the phone. Keep a nifty opening pick handy on each side as you groove your way through, preventing that sticky stuff from sneaking back in. You’re on fire!
Step 7


Before you proceed, take a quick peek to make sure the orange cable with a blue connector is waving goodbye.
In case the fingerprint sensor cable is playing hard to get or decides to stay put, don’t panic! Just gently disconnect it using the pointy end of a spudger before moving on.
The fingerprint sensor cable hangs out near the rear glass by the main camera, making its job super short and sweet! Just a heads up: as you lift off that rear glass, this little cable is ready to say goodbye, so be gentle!
– Grab those opening picks and gently slice through any leftover adhesive—just enough to crack the phone open slightly.
– Reassembling? To reconnect the fingerprint sensor cable, first angle the back cover until the cable connector is perfectly aligned over its socket. Then, use the flat end of your spudger to press it straight down and snap that connector back in place.
– Carefully remove the glass from the phone.
Tools Used

Step 8

Feel free to pop that back cover back on without stressing over new adhesive! Just make sure to clear away any big lumps of old glue that might keep it from sitting nicely. Once it’s in place, give it a little warmth and some gentle pressure to make sure it stays put. It might not be fully waterproof, but don’t worry—this glue usually has your back and is strong enough for the job.
– To put on a fresh new back cover:
– Just follow this cool guide to pop on the old back cover like a pro, or to work your magic with a back cover that’s missing its sticky charm.
– You might also have to move the camera bezel over to your new buddy. If that’s the case, check out our camera bezel swap guide.
Step 9

– Gently wiggle the spudger to release the fingerprint scanner cable from the motherboard. You’re doing great!
Tools Used
Step 10

– Unscrew all 14 screws using your trusty Phillips #00 screwdriver. You’ve got this!
Tools Used


Step 12

– Use your trusty spudger to carefully disconnect all seven cables from the motherboard. You’ve got this!
Tools Used
Step 13

– Pop that SIM card tray out by gently inserting the ejector tool into the tiny hole. It’s as easy as pie!
Step 14

– Go ahead and gently take out the motherboard. It’s like giving your device a little hug goodbye!

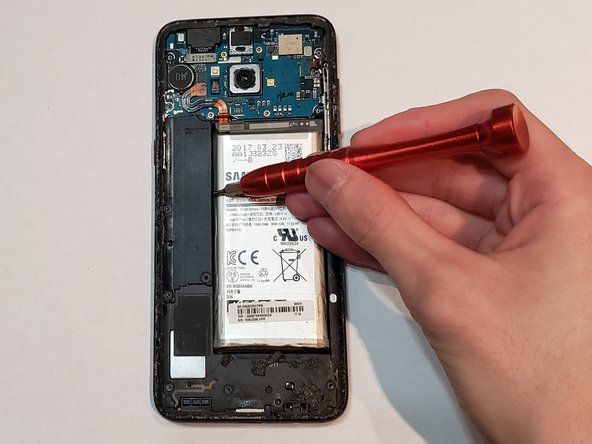
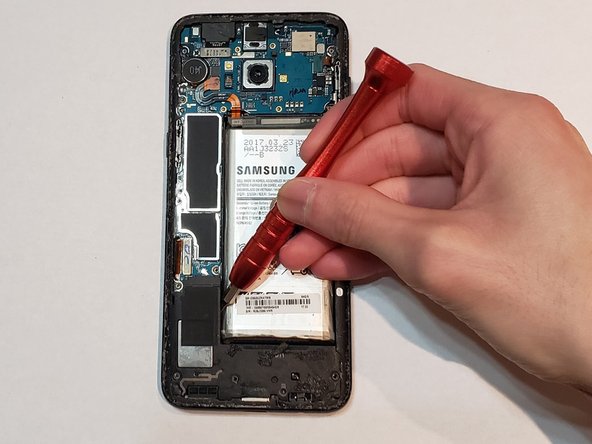
Step 16

– Pop off the rest of the volume button cable with your trusty spudger.
– Carefully lift and remove the volume button cable from the phone. If you need help, you can always schedule a repair
Tools Used


