Samsung Galaxy Stardust Battery Replacement Guide – DIY Tutorial
Duration: 45 minutes
Steps: 5 Steps
Ready to give your Samsung Galaxy Stardust (SM-S766C(GP)) a new lease on life? This step-by-step guide will show you how to swap out its battery, keeping your wallet happy and your phone running smoothly! Remember, batteries are a bit delicate, so be sure to handle them with care. No need to worry about anything too crazy – just follow these steps and you’ll be good to go! If you need help, you can always schedule a repair. And when it’s time to say goodbye to the old battery, make sure to dispose of it properly.
Step 1


– Press and hold the power button on the right side of your phone like you’re giving it a little pep talk.
– After about five seconds, your screen will light up with three options. Go ahead and tap on the ‘power off’ option to give your device a well-deserved break.
Step 2


– Let’s get this party started! Stick your finger or a trusty opening tool into that little hole on the side of your phone.
– Now, gently pull the back casing away from the phone, making sure to keep things nice and steady. We don’t want any accidents happening, do we?
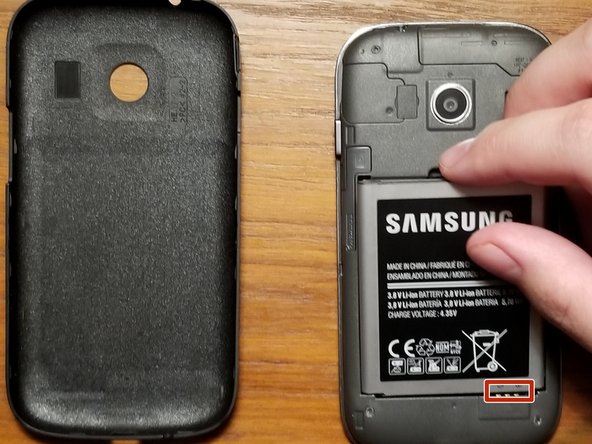
Step 3


– Get your phone and its casing side by side, with the battery facing up – let’s get this repair started!
– Now, gently lift the battery out from the indent above it, and place it next to your phone. If you need help, you can always schedule a repair


Step 5

– First, let’s get the back of the phone aligned – match up that circular hole with the camera lens.
– Now, gently push the back case onto the phone until it clicks into place and feels secure. If you need help, you can always schedule a repair
