Samsung Galaxy Tab 4 10.1 Front and Rear Camera Replacement
Duration: 45 minutes
Steps: 10 Steps
Get ready to tackle the replacement of both the front and rear cameras on your Samsung Galaxy Tab 4 10.1 Android tablet! It’s all about giving your device a fresh perspective. Remember, if you hit a snag, don’t hesitate to schedule a repair for some extra help!
Step 1


– Gently wedge the nylon spudger in and shimmy it between the front and back panels until the back pops off. Keep it smooth and easy, and you’ll be on your way to repair success!
Tools Used

Step 2

– Carefully lift off the green tape that’s hiding the connectors for the three black strips.
– Gently use the tip of a spudger or your fingernail to pop up the tiny retaining flaps.
Tools Used
Step 3

– Grab your trusty Phillips #00 screwdriver and let’s get those four 3.2mm screws out of there!
Step 4
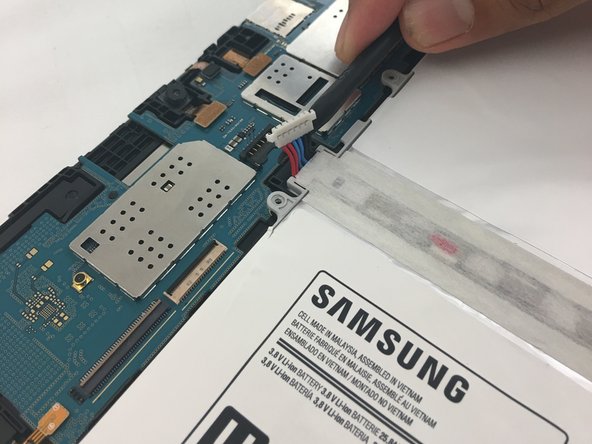
Hey there! Just a friendly reminder to take it easy when you’re working with that connector on the circuit board. Too much tugging can cause some serious damage. Grab a spudger or tweezers, gently press down on the black connector while carefully prying the battery connector loose. Remember, this connector is a bit delicate and can break quite easily, so let’s treat it with care!
– Gently lift the white connector from the motherboard to disconnect the red, blue, and black cables. A little prying goes a long way!
– If you’re using your fingers, just give the cables an even pull across their width to avoid any unnecessary stress on the wires.

Step 5

– Grab your trusty nylon spudger and gently pry up on the edges to pop that battery out. You’ve got this!
Tools Used
Step 6
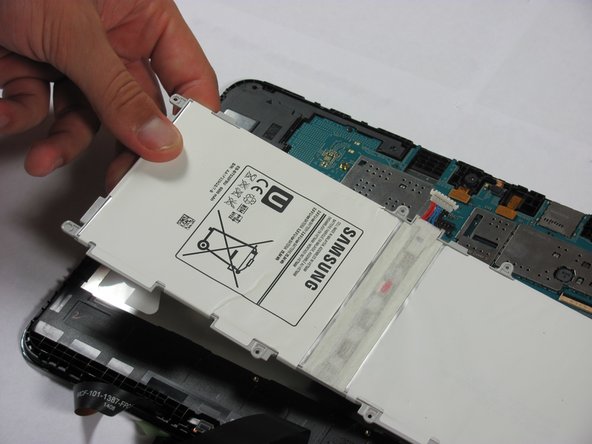
– Once the battery is feeling a bit loose, gently lift it out of the device.
Step 7


– Grab your trusty screwdriver and take out the two 2.7mm Phillips #00 screws securing the motherboard in place. You got this!
Step 8


– Grab your trusty spudger and use its flat end to gently lift and disconnect those five press-fit connectors from the motherboard. You’ve got this!
Tools Used
Step 9


– Grab your trusty spudger and gently nudge the motherboard upward, then lift it out of the device with care.
Tools Used


Success!