Samsung Galaxy Tab 4 8.0 Verizon Motheboard Replacement
Duration: 45 minutes
Steps: 23 Steps
Get ready to dive into the world of tablet repair as we tackle the exciting task of replacing the motherboard—the heart and soul of your device! We know it sounds a bit daunting, but don’t sweat it! The process may take some time, but it’s a breeze to follow with our step-by-step guide. Just grab a solid set of tools and let’s get this motherboard swap underway! And remember, if you need any assistance, you can always schedule a repair.
Step 1


Alright, before you dive into disassembling your Samsung Galaxy Tab 4 8.0, make sure it’s completely powered down and give those SIM and Micro SD cards a little farewell wave as you remove them.
When you’re prying open those clips and separating the casing, remember to go easy on them! A gentle touch goes a long way, since they can be a bit delicate and might break if you’re too rough.
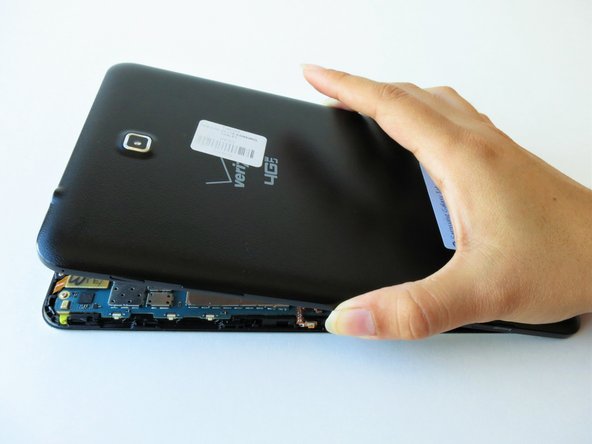
– At the top of the tablet, gently slide the blue plastic opening tool between the back casing and the metal rim of the front panel. You’ve got this!
Step 2


If you’re right-handed, you’ll find it super easy to twist clockwise and give a little extra oomph around the corners to make things go smoothly.
Get ready for some fun sounds! Those popping noises you’re hearing? That’s just the plastic clips saying goodbye as they come loose.
– Keep sliding that blue plastic tool around the edges of your tablet to gently pop the back plastic casing away from the front assembly. You’re doing great!
Step 3

– Be kind to that screen! Carefully place the tablet face down with the LCD screen on a soft surface, ensuring no pressure is applied.
– Grip the back plastic casing with confidence, then gently lift it off the front assembly panel. Don’t rush – a steady hand goes a long way.
Step 4

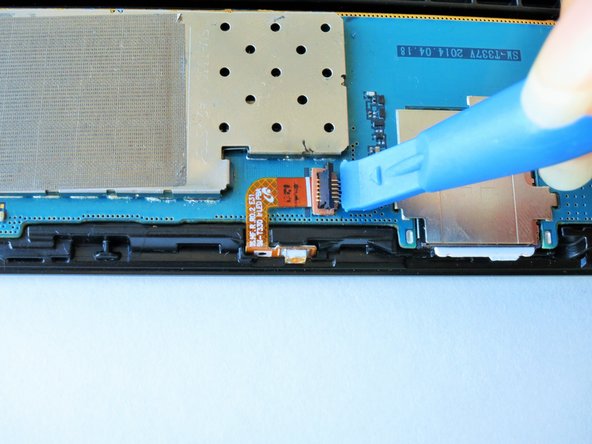
– The front camera’s ribbon cable is tucked just above the battery, a little to the left. You’ll want to keep an eye out for it!
– Gently slide the flat end of the blue plastic opening tool underneath the connector at the end of the ribbon cable. Go slow and steady!
Step 5

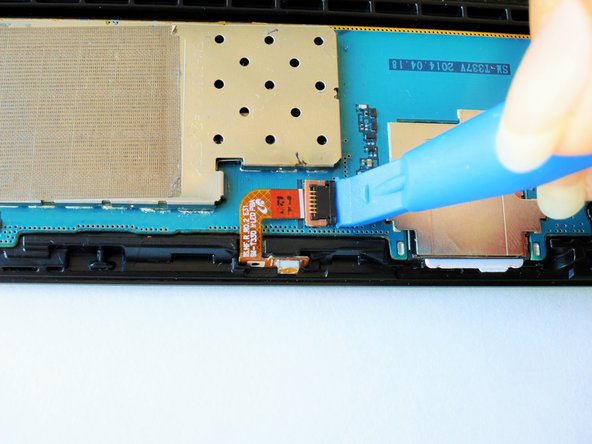
– Gently press down and glide the blue plastic opening tool downward to nudge the front camera’s shiny gold connector out of its cozy spot on the motherboard.
Step 6

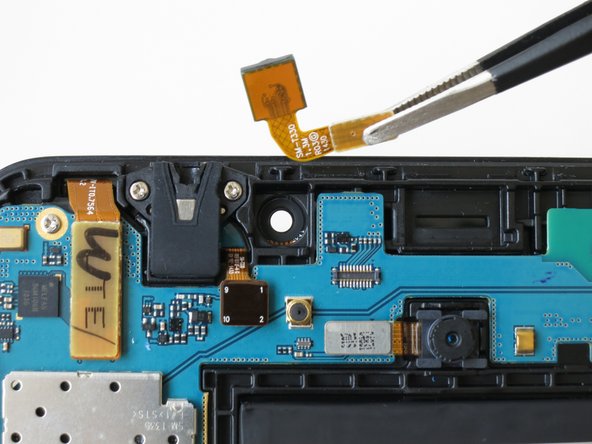
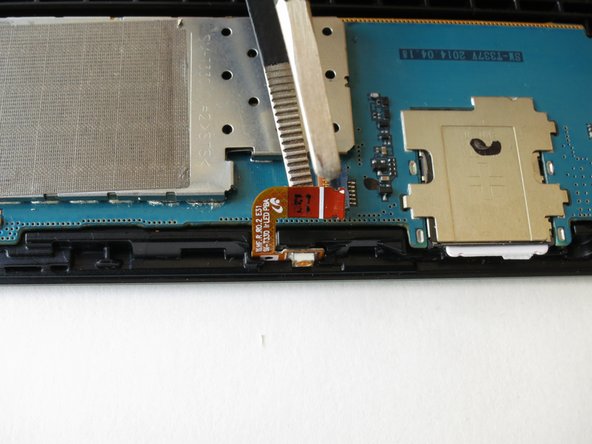
– Gently pinch that shiny gold rectangle with your tweezers and lift it out of its cozy little home. You’ve got this!
Tools Used

Step 7

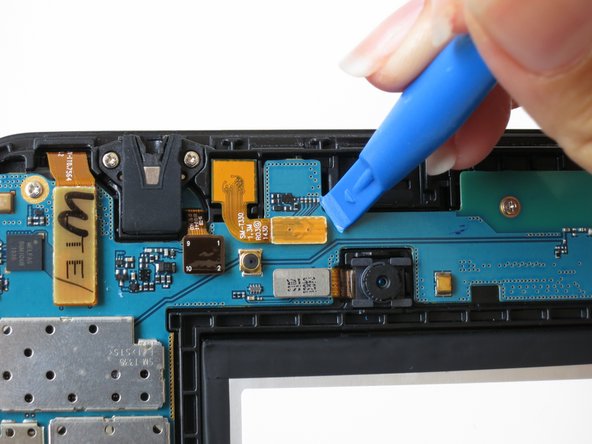
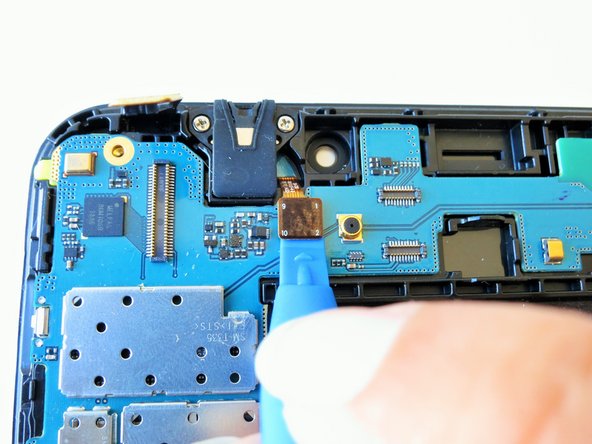
– The back camera can be found near the top of your tablet, right in the center just above the battery.
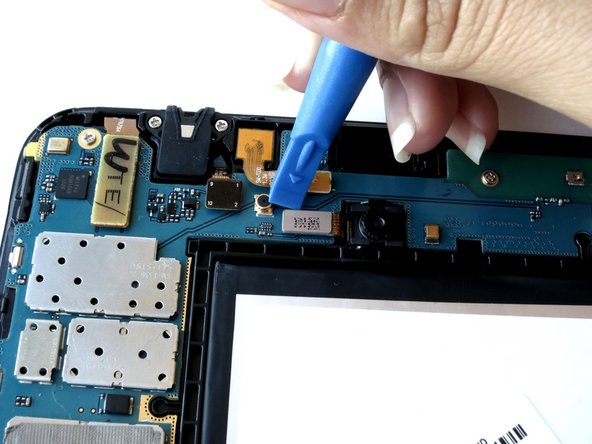
– Gently slide the flat end of your trusty blue plastic opening tool under the metal rectangular part of the back camera’s cable connector. A little patience goes a long way!
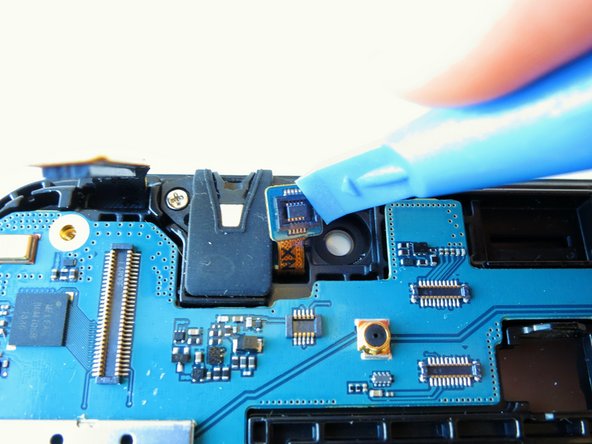
Step 8

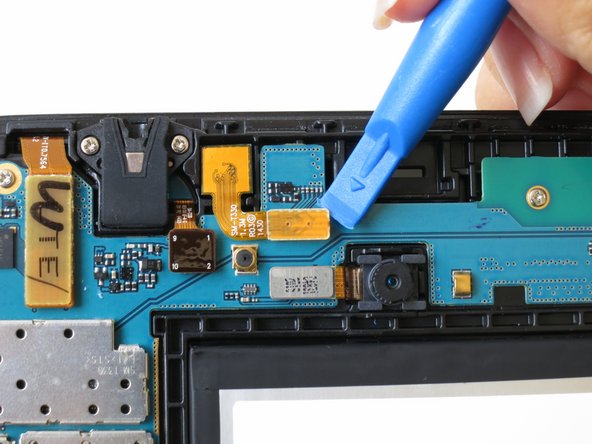
– Gently press down and slide the blue plastic opening tool downward to release the back camera’s metallic rectangular connector from its cozy spot on the logic board.
Step 9

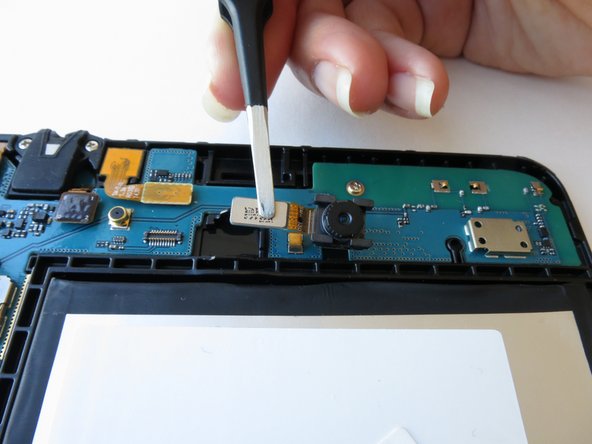
– Gently give that metallic rectangular piece a little squeeze with your tweezers, just enough to lift it out of its cozy little pit. You’ve got this!
Tools Used
Step 10
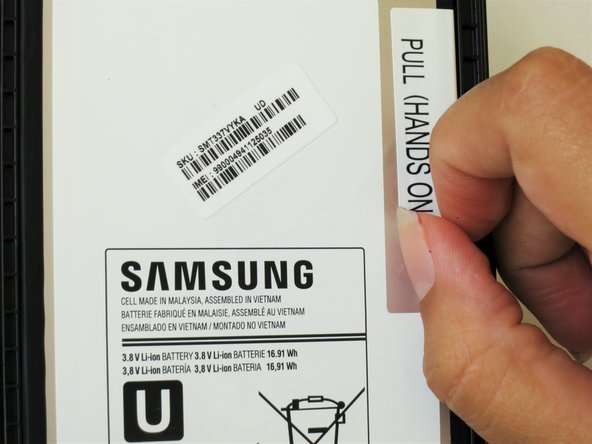


Peel off the sticker to create a handy tab.
– Gently lift the corner of the white plastic sticker that says ‘pull (hands only).’ You’ve got this!
Step 11

Hold your horses on fully detaching the battery! If you do, those red and blue cables hanging out at the bottom could get a bit cranky and suffer some damage.
If you hit a snag with battery resistance thanks to some stubborn adhesive, grab the flat end of your trusty spudger and gently slide it between the battery and the front panel assembly. You’ve got this!
– Grab that tab with your thumb and index finger, give it a gentle pinch, and pull it up to liberate the top right corner of the battery from the front panel assembly. You’ve got this!
Step 12


Keep that green tape handy if your new battery didn’t come with one—you’ll want to reuse it!
– Begin by carefully peeling away the green tape from the bottom left corner of the battery. Take your time and be gentle with it!
Step 13
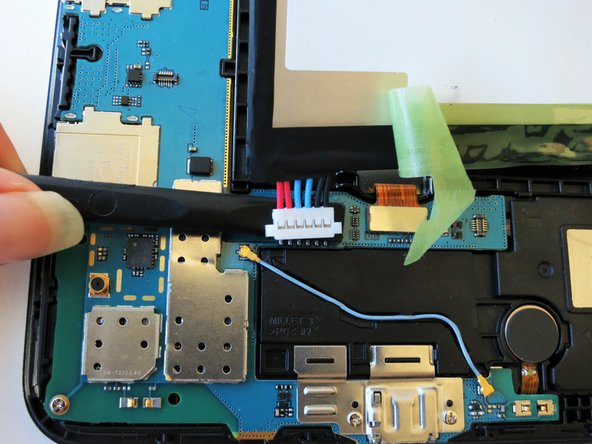

– Gently slide the spudger under the battery to detach the red and blue cable connector from the circuit board.
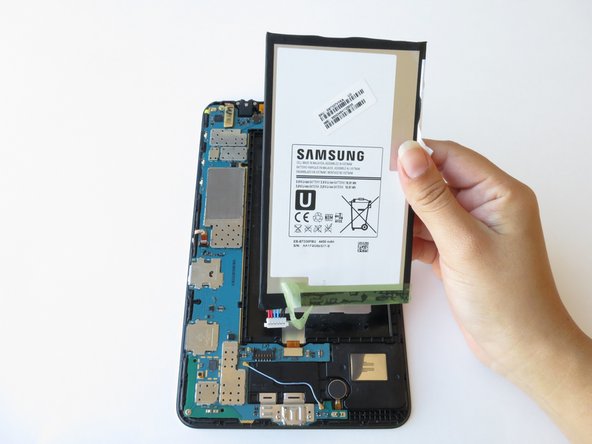
– Carefully lift the battery towards you, away from the front panel, like you’re giving it a little freedom.
Step 14


– Gently press down and slide the blue plastic opening tool downward to release the metallic rectangular connector from its cozy spot on the motherboard.
Step 15


– Gently press and glide the blue plastic opening tool downward, giving a little nudge to release the gold rectangular connector from its cozy spot on the motherboard. It’s like giving it a friendly tap to say, ‘Time to move on!’
Step 16

– Gently press down and slide the blue plastic opening tool downwards to carefully release the gold square connector from its spot on the motherboard.
Step 17

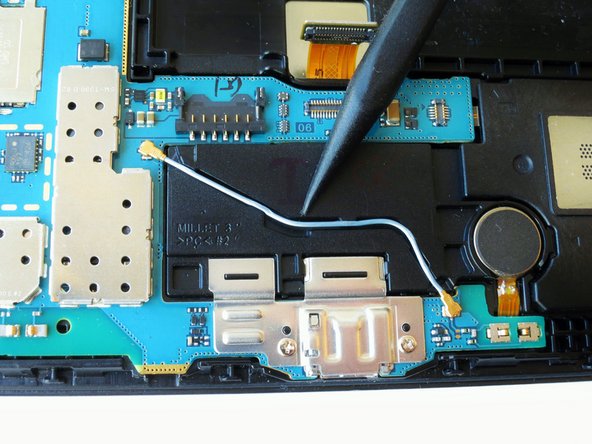
– Carefully use the spudger to ease the blue wire out of its spot. Take your time and don’t rush – it’s a smooth move!
Step 18

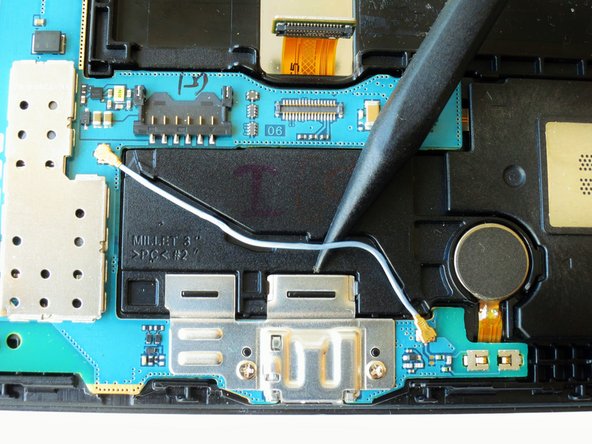
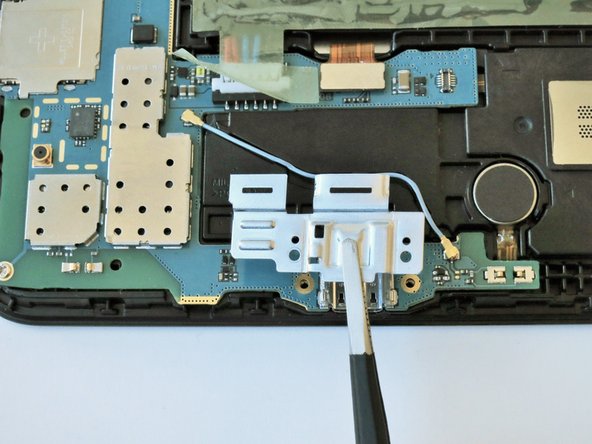
– Get ready to say goodbye to those two 2 mm #000 Phillips screws holding the metallic charger port cover in place! Carefully remove them to free the cover from both the logic board and the front panel. You’re doing great!
Step 19
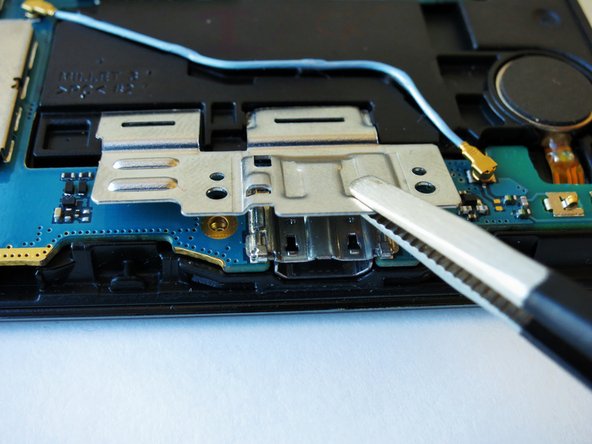

– Use your tweezers to give the metal charger port cover a gentle squeeze, then carefully lift it off. It’s like giving it a little nudge to say, ‘Time to move!’
Tools Used
Step 20

Give your tablet a little twist to the left; it’ll make things a whole lot easier!
– Gently slide the flat end of that trusty blue plastic opening tool beneath the black plastic fastener and give it a little lift.
Step 21

The golden cable is super delicate, so be gentle with it. A little care goes a long way!
– Gently grip the golden cable with your tweezers, then give it a gentle pull to the left to release the end. Easy does it—you’re almost there!
Tools Used
Step 22

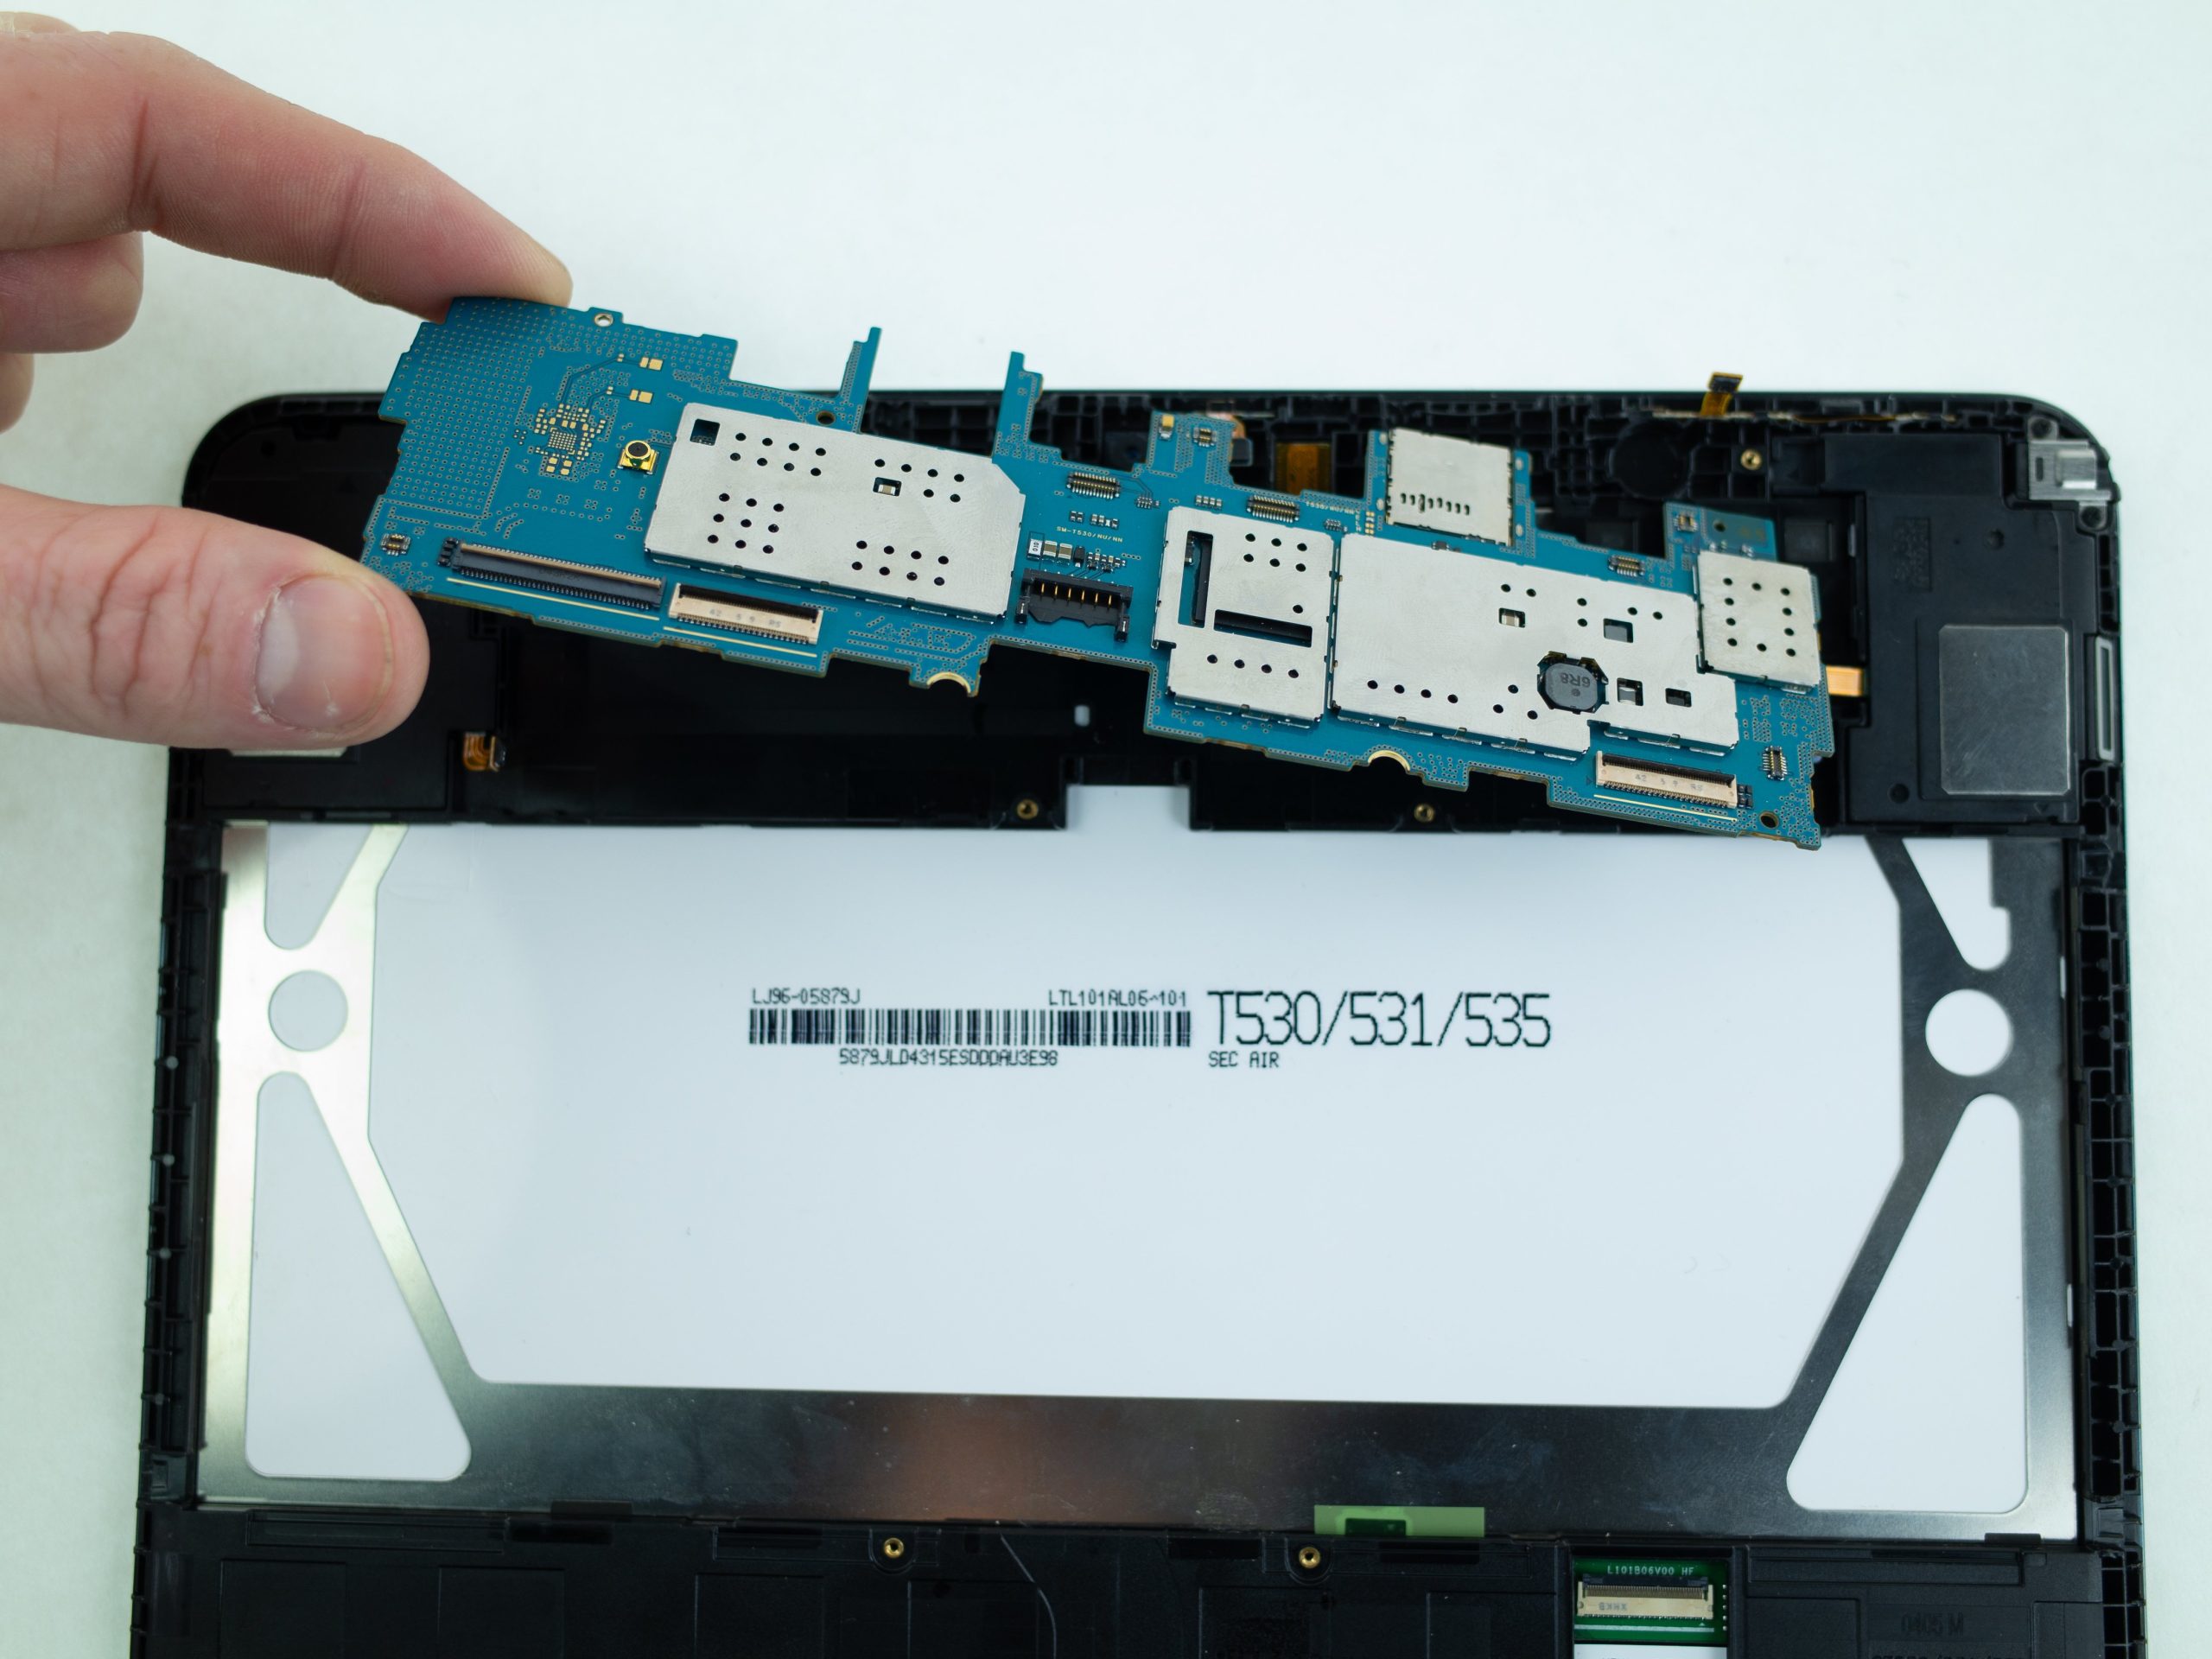
– Take out the three 2 mm #000 Phillips screws holding the motherboard in place on the front panel.
Step 23


– Grab the opposite corners of the motherboard with your hands and gently lift it up.
Success!