Samsung Galaxy Tab 4 8.0 Vibration Motor Replacement
Duration: 45 minutes
Steps: 19 Steps
Having some vibe-less troubles with your Samsung Galaxy Tab 4 8.0? If the vibration motor’s gone quiet, don’t worry just yet. First, double-check that your device isn’t set to Do Not Disturb or Silent Mode, as these can mute the vibrate notification. The vibration motor’s a small but mighty electric motor designed to last, with an industry standard of 100,000 cycles of 1 second on and 1 second off. Before diving into this repair, make sure your device is powered off and the battery’s removed. If you’re not feeling confident, remember that help is available – you can always schedule a repair if you need a hand.
Step 1


Before you get started with disassembling your Samsung Galaxy Tab 4 8.0, make sure it’s turned off and you’ve popped out the SIM and Micro SD cards. Trust us, it’s a step you don’t want to skip!
Be gentle when you’re prying those clips apart or putting the casing back together – they’re more delicate than they look and can break easily with too much force.
– Start at the top of the tablet and gently slide the blue plastic opening tool between the back plastic shell and the metal edge of the front panel.
Step 2


To make this step a breeze, try moving clockwise – it’s usually easier for right-handed folks. Don’t be shy to apply a bit more pressure around the corners to help things along.
As you work your way around, you might hear some popping sounds. That’s just the plastic clips releasing, so don’t worry – it’s all part of the process!
– Keep gently working the blue plastic opening tool around the edges of the tablet, carefully loosening the back casing from the front panel. Patience is key here, but you’ll be one step closer to opening it up!
Step 3

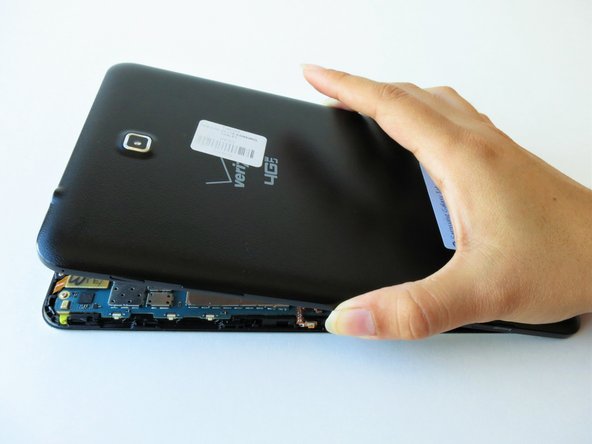
– Carefully place the tablet down with the LCD screen facing the surface to keep it safe from any mishaps.
– Grab the back plastic casing with confidence and peel it away from the front assembly panel like you’re unveiling a secret.
Step 4
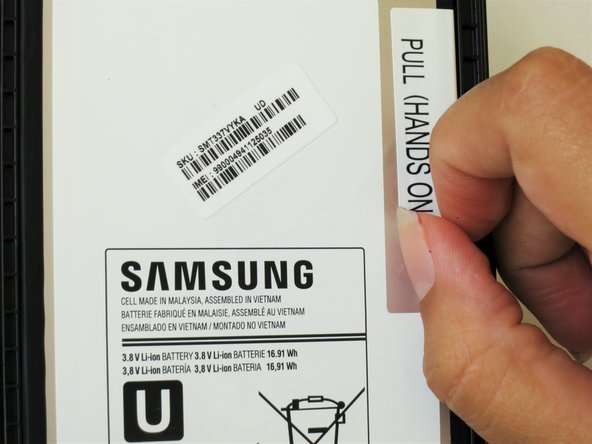


Peel off the sticker carefully to create a handy little tab.
– Gently lift the corner of the white plastic sticker labeled “pull (hands only)” — no tools, just your fingers!
Step 5

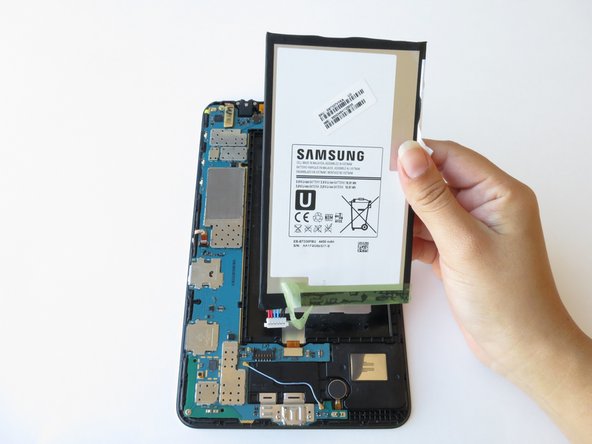
Hold your horses on fully disconnecting that battery! Pulling it away too soon might just give those colorful red and blue cables a rough time at the bottom. Let’s keep everything safe and sound!
If you find that the battery is stubbornly sticking due to adhesive, take the flat end of a spudger and gently slide it between the battery and the front panel assembly. You’ve got this!
– Gently pinch the tab between your thumb and index finger, then lift it up to free the top right corner of the battery from the front panel assembly. Take your time, and remember, you’ve got this!
Tools Used

Step 6


If your new battery doesn’t come with that nifty green tape, don’t toss the old one! Keep it safe for reuse.
– Begin by gently peeling back the green tape from the lower left corner of the battery. Take your time and be careful; you’ve got this!
Step 7
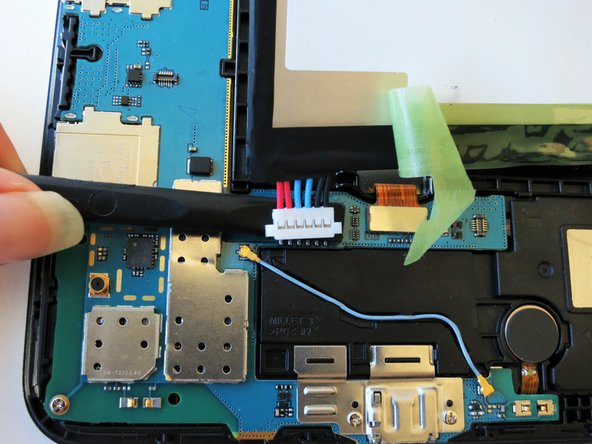

– Gently slide the spudger under the battery to detach the red and blue cable connectors from the circuit.
– Now, carefully lift the battery towards you, moving it away from the front panel.
Tools Used
Step 8


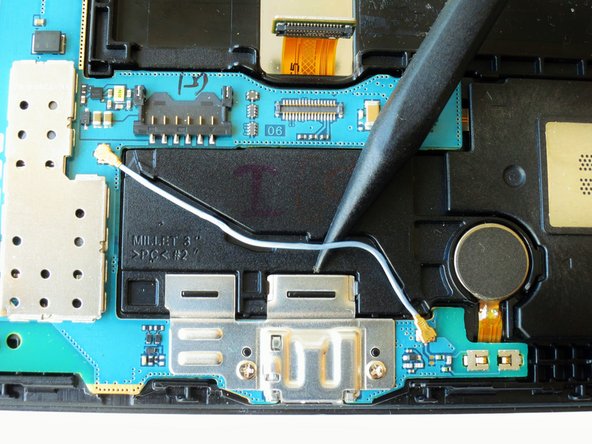
– Gently press down with the blue plastic opening tool and slide it downward to disconnect the metallic rectangular connector from its spot on the motherboard. Take it slow and steady!
Step 9


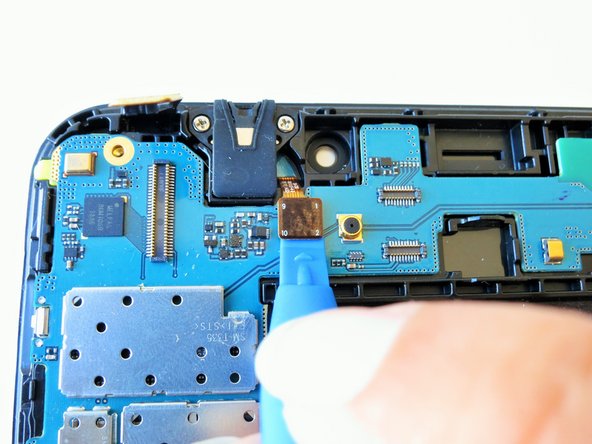
– Gently apply a little pressure and guide the blue plastic opening tool downward to free the gold rectangular connector from its snug spot on the motherboard. It’s a quick move, so no need to rush—just give it a smooth nudge.
Step 10

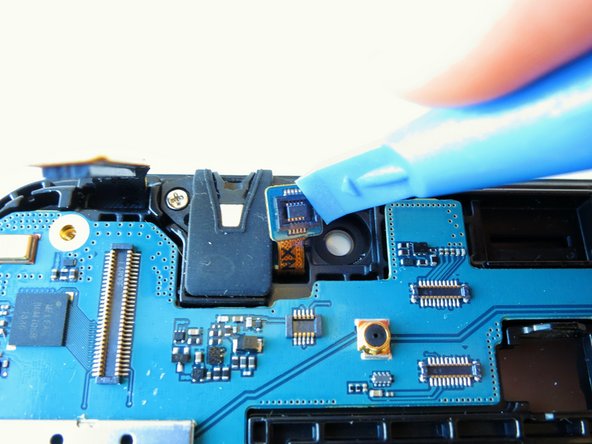
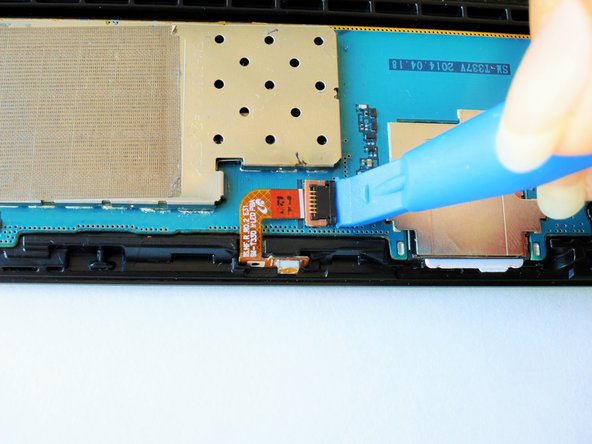
– Gently press down and slide that nifty blue plastic opening tool downward to gently release the gold square connector from its cozy spot on the motherboard.
Step 11

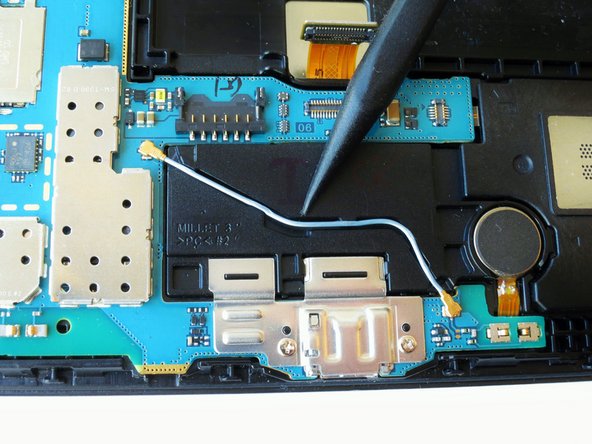
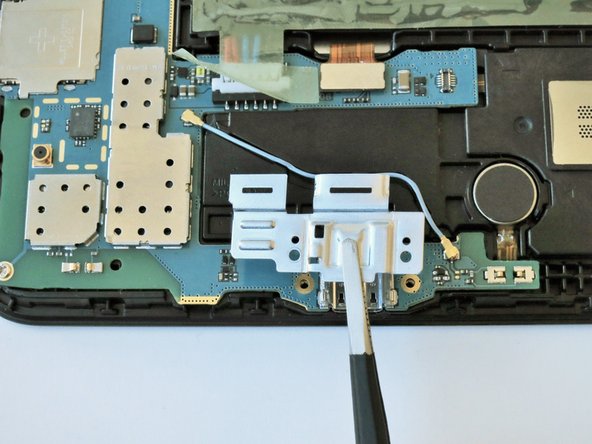
– Take the spudger and carefully lift the blue wire out of its spot. Be gentle—this step doesn’t need too much force, just a little nudge to get it free.
Tools Used
Step 12

– Unscrew those two 2 mm #000 Phillips screws holding the shiny charger port cover snugly to the logic board and the front panel. You’ve got this!
Step 13
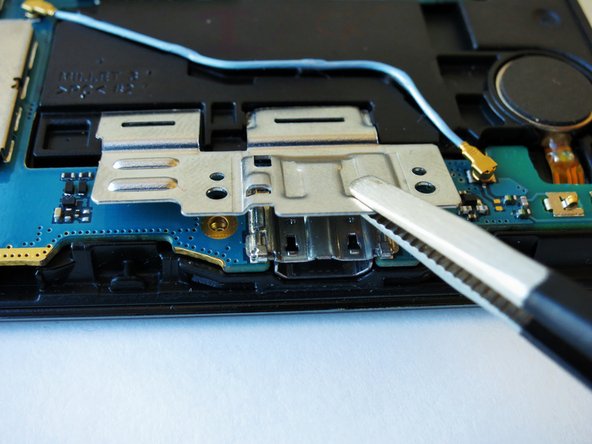

– Grab your tweezers and give the metal charger port cover a gentle squeeze to lift it up from its cozy spot.
Tools Used

Step 14

Give your tablet a little spin to the left—it’s going to make things a whole lot easier!
– Gently slide the flat end of the blue plastic opening tool beneath the black plastic fastener and give it a little lift. Easy does it!
Step 15

The golden cable is a bit on the delicate side, so handle it with care and apply light pressure.
– Grab the golden cable with your tweezers, and give it a gentle tug to the left. This will free the end of the cable so you can move on to the next step.
Tools Used
Step 16

– Unscrew the three 2 mm #000 Phillips screws that are holding the motherboard to the front panel. Easy, right? Just a couple of twists and you’re one step closer!
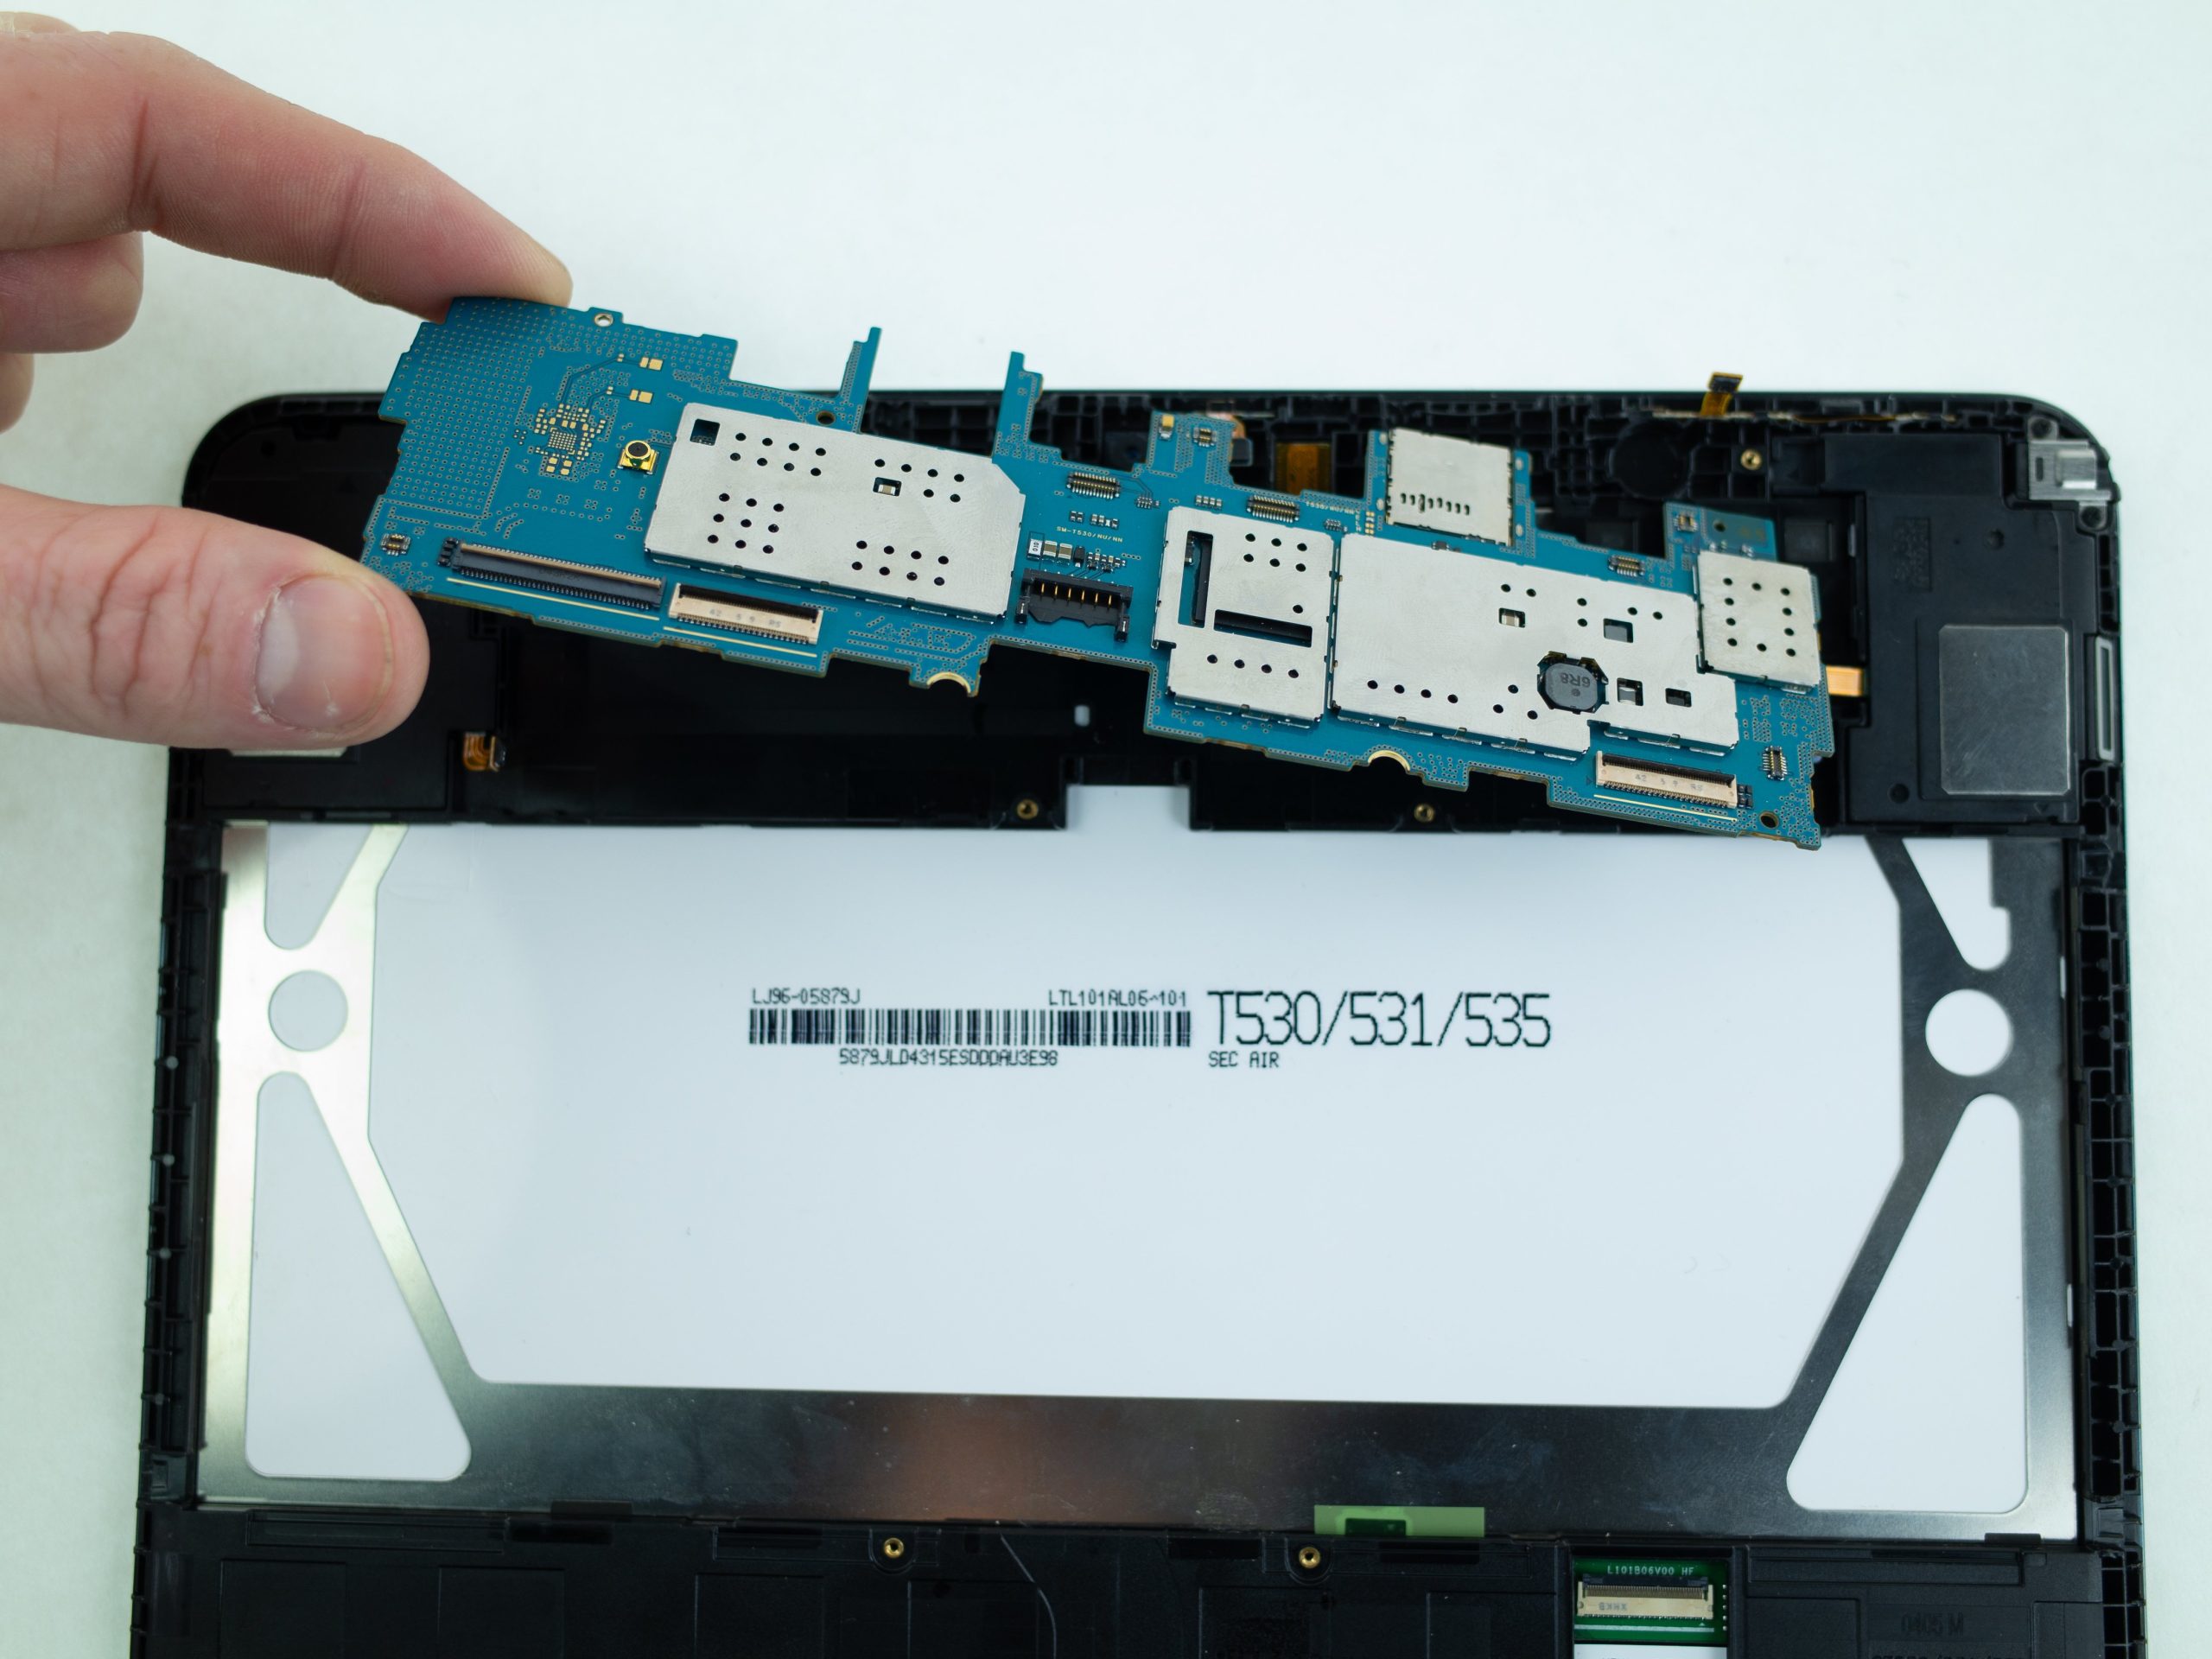
Step 17


– Grab the motherboard gently by its corners, one hand on each side, and lift it up with care.
Step 18

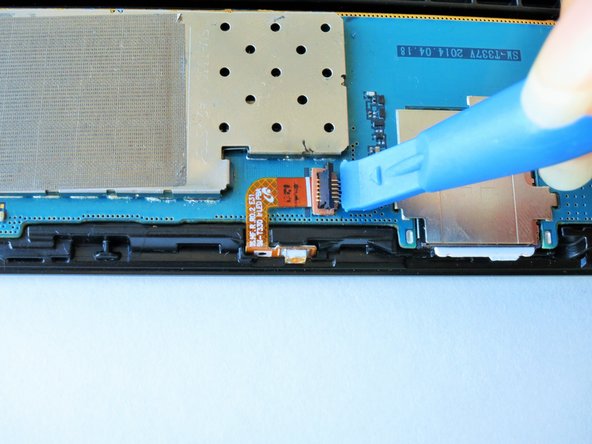
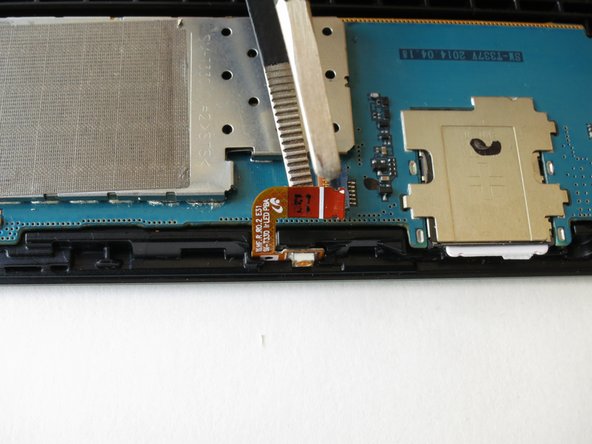
– Grab those angled tweezers and gently lift the orange rectangular electrical connector. This little move will disconnect the vibration motor from the motherboard. You’re doing great!
Tools Used
Step 19

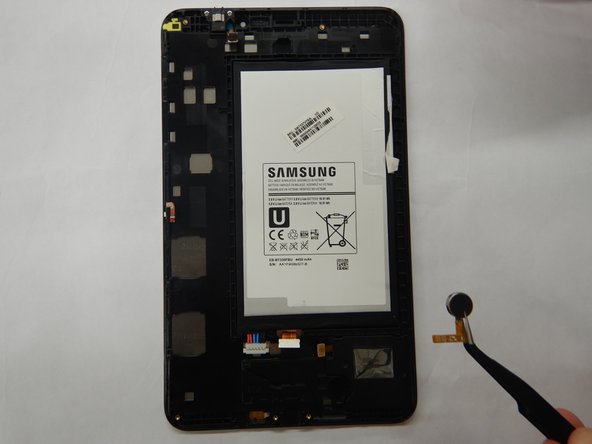
– To wrap things up, simply reverse the steps you followed to take your device apart.
– If you need help or want some extra guidance, you can always schedule a repair with the experts at Salvation Repair.
Tools Used
Success!