Samsung Galaxy Tab 4 8.0 Wi-Fi Motherboard Replacement
Duration: 45 minutes
Steps: 21 Steps
Replacing the Motherboard is a big job, but don’t worry, you’ve got this. It’s like a puzzle that uses pieces from other guides, like removing the battery, front facing camera, and rear facing camera. You’ll be a pro in no time.
Step 1

Take it easy with the force here! The plastic clips are a bit delicate and could break if you push too hard.
Make sure your tablet is totally powered off before diving into the replacement process.
If you’re right-handed, prying with a clockwise motion might feel more natural; lefties might prefer going counterclockwise.
As you pop off the rear case, you might hear some clicking sounds—no worries, that’s just the case saying goodbye to the device.
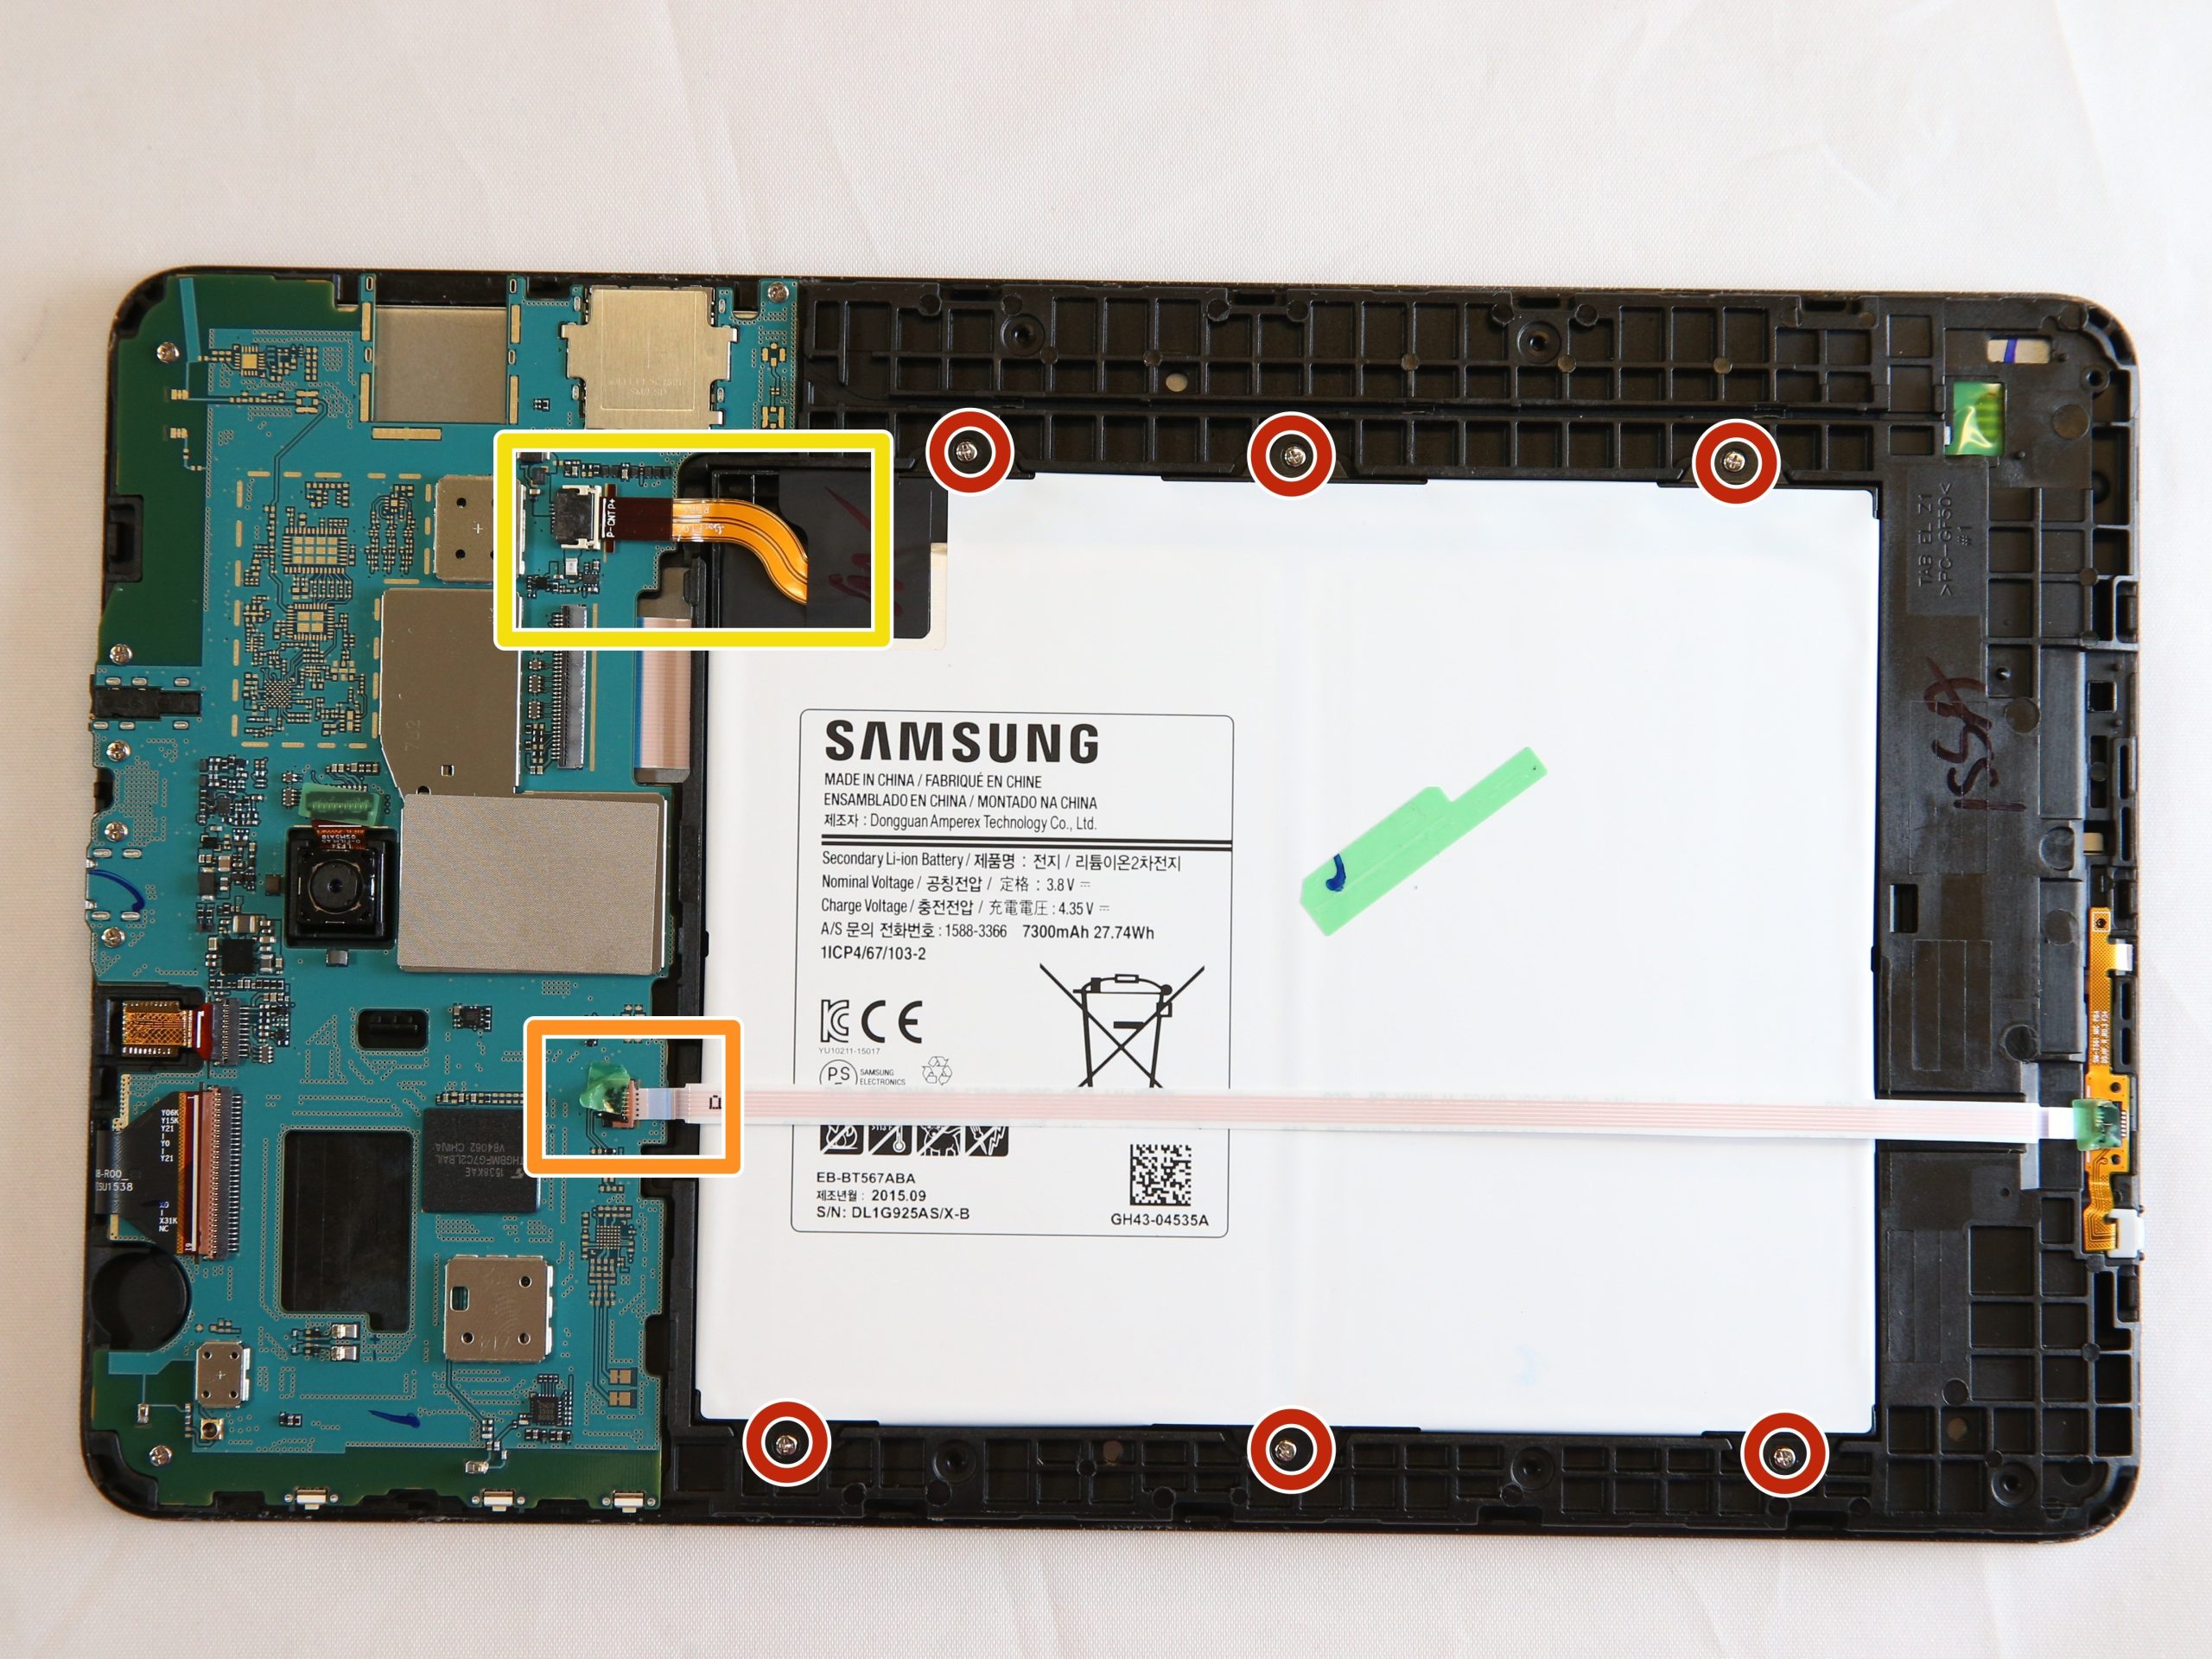
– Start by carefully sliding the plastic opening tool between the metal rim and the back plastic casing at the bottom of the tablet. Gently pry the back casing away from the device, giving it a little wiggle. Keep working your way around to detach the back panel from the front assembly. Patience is key here – just take it slow and steady!
Step 2

– Lay the tablet face down on a spotless surface to keep things nice and tidy.
– Grab the back panel firmly and give it a gentle lift off the device.
Step 3

– Alright, let’s find that front-facing camera’s ribbon cable! It’s hanging out at the top edge of the motherboard, just a smidge left of the center.
– Now, grab your trusty blue plastic opening tool and gently slide the flat end underneath the connector at the end of that ribbon cable. You’ve got this!
Step 4

– Gently apply a bit of pressure and slide the blue plastic opening tool downward to carefully detach the front camera’s gold rectangular connector from its spot on the motherboard. Take your time and don’t rush this step!
Step 5

– Use your tweezers to gently pinch the gold rectangular piece and lift it out of its spot. Take it slow, and you’ll have it free in no time!
Tools Used

Step 6

– The rear-facing camera is hanging out just to the right and below the front-facing camera, chilling near the top and center of the motherboard.
Step 7

– Gently slide the flat end of your blue plastic opening tool under the rear camera’s rectangular metal connector.
– Carefully nudge it outward just enough for the metal connector to pop free from its spot on the motherboard.
Step 8

– Gently lift the camera out of its housing using your tweezers. Take your time and be careful not to damage anything.
Tools Used
Step 9

Your device has taken a little spin and is now facing 90 degrees to the left!
– Gently slide the opening tool under the connector and give it a little upward and outward nudge until the metal connector pops free from its cozy spot on the motherboard.
Step 10
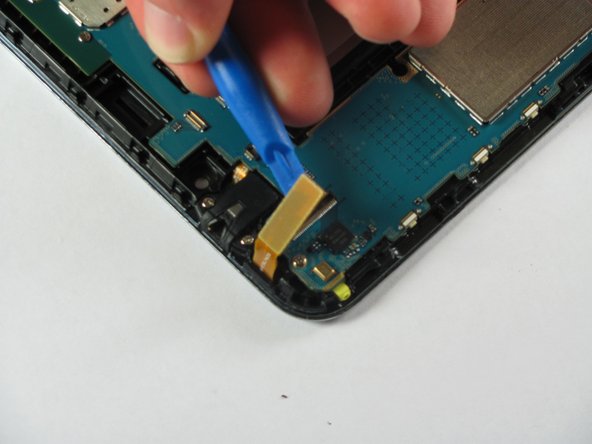

Looks like the device took a little spin—it’s been flipped 180 degrees. No worries, just keep this in mind as you move forward!
– Gently slide your opening tool under the connector and apply a little outward pressure until the gold connector pops right out of its socket on the motherboard.
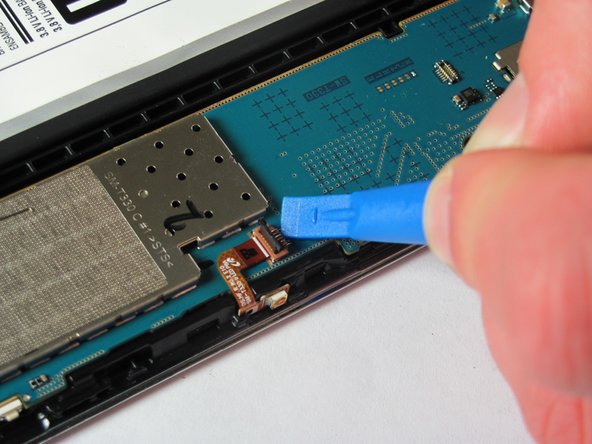
Step 11

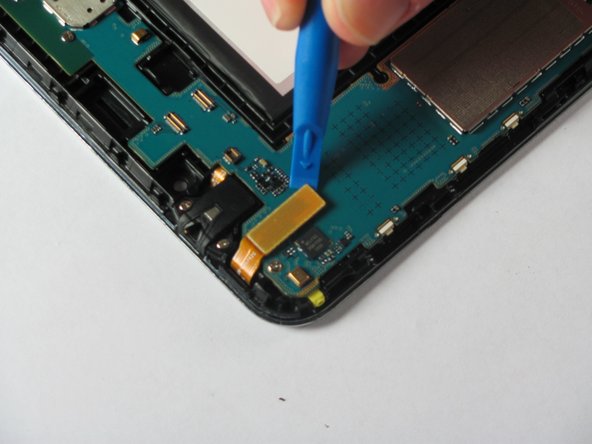
– Gently slide the opening tool under the connector and apply a little outward pressure until you hear that satisfying ‘pop’ as the bronze connector releases from the motherboard socket.
– Now, rotate the device 90 degrees counter-clockwise. Easy peasy!
Step 12
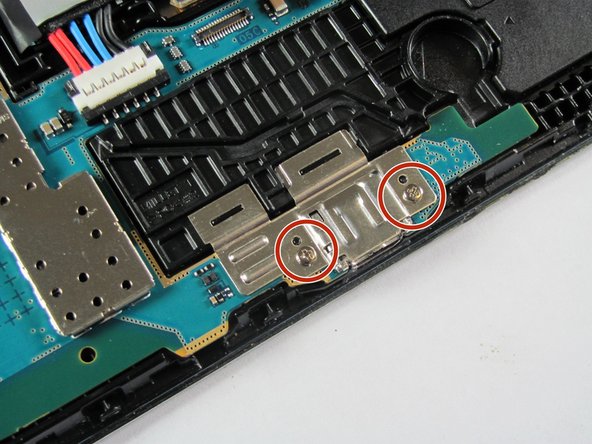

– Unscrew the two 2 mm #000 Phillips screws holding down the metal charger port cover. They’re small, but no worries—you’ve got this!
Step 13

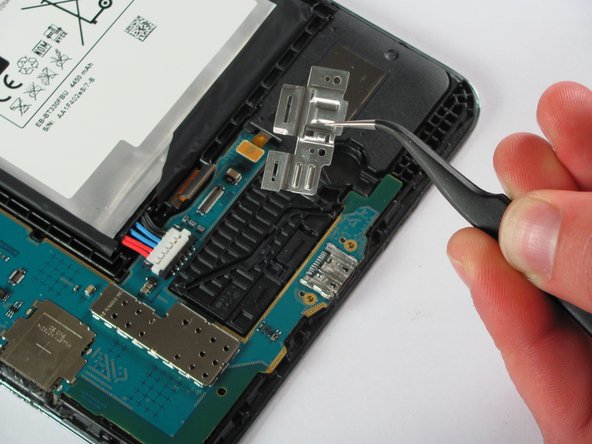
– Gently grab the metal cover with your tweezers and lift it off with care. No rush, just steady hands.
Tools Used
Step 14

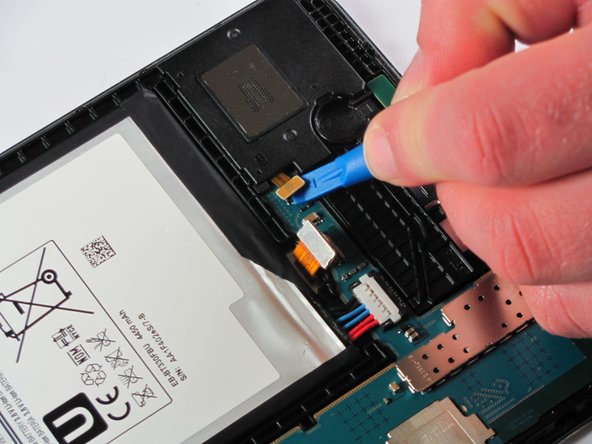
The device has been rotated 90 degrees counter-clockwise. Get ready for the next move, we’re almost there!
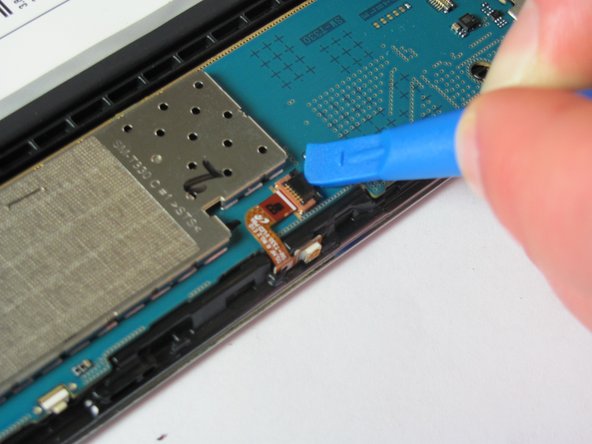
– Gently slide the flat end of the opening tool under the black plastic fastener. Apply a little outward pressure, and watch it pop free!
Step 15

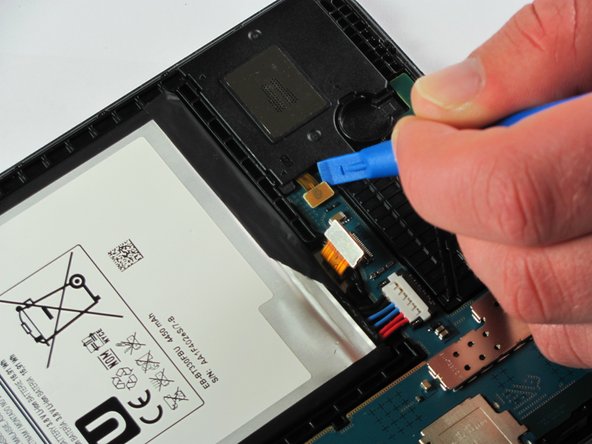
Handle that cable with care; it’s a bit delicate! Take your time when unplugging it.
The device has been turned 90 degrees to the right. Keep up the good work!
– Grab your trusty tweezers and gently coax that golden cable out from its cozy spot beneath the black fastener. You’ve got this!
Tools Used
Step 16


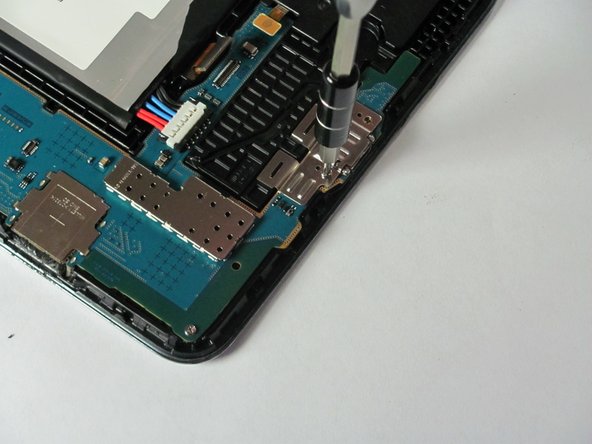
– Unscrew all three 2 mm #000 Phillips screws securing the motherboard to the front panel.
Step 17

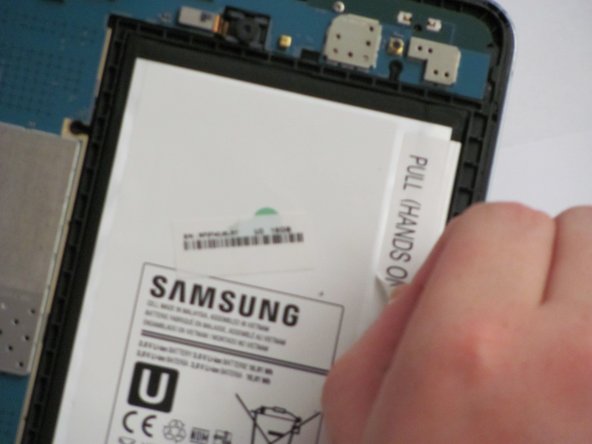
– Gently lift the sticker labeled “PULL (HANDS ONLY)” from the battery, starting at the corner designed to come off.
Step 18

Hey there! Just a friendly reminder: don’t go taking out the battery entirely, as it might lead to some unwanted damage to the motherboard and those nifty cables connected to the battery. Keep it safe and sound!
If your battery is stuck in there with some adhesive, grab the flat end of your trusty spudger and gently slide it between the battery and the front panel. You’ve got this!
– Gently grip the top right corner of the battery and give it a little pull to lift it out of the device. Nice and easy!
Tools Used

Step 19

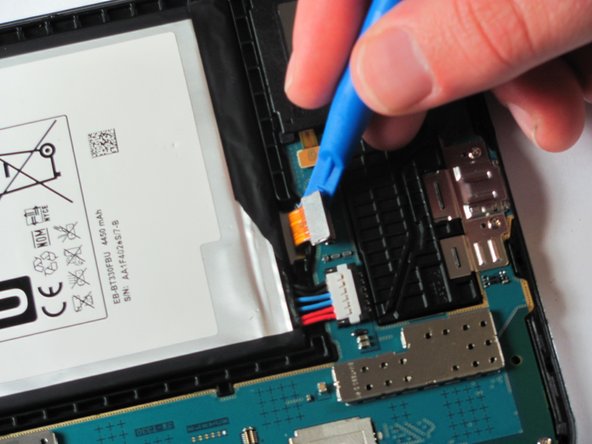
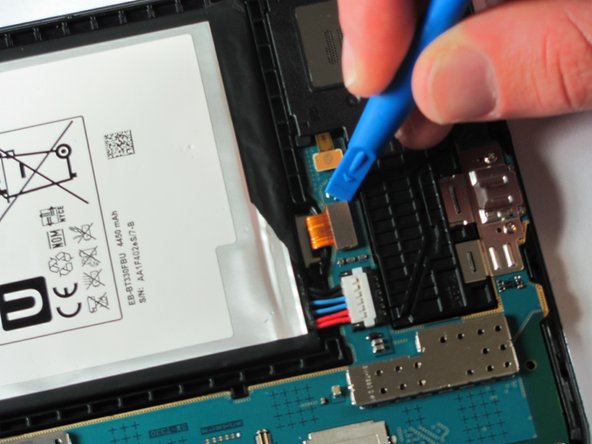
– Gently peel off the green tape, starting from the bottom left corner. You’ve got this!
Step 20

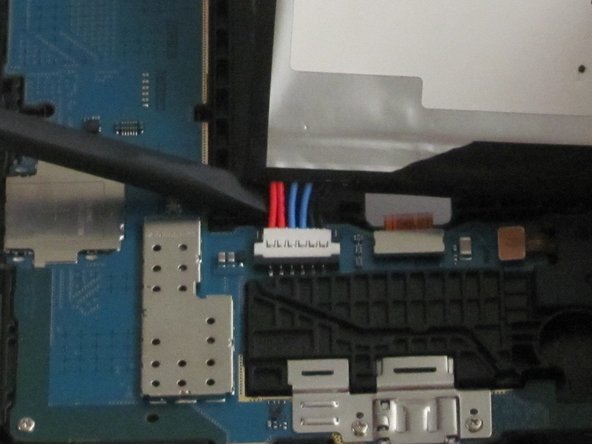
– Grab your trusty spudger and gently slide it along the bottom of the battery connector to free it. A little nudge is all it takes!
– Now, carefully lift the battery out of its cozy spot in the assembly. Just a bit of finesse, and it’ll come right out!
Tools Used
Step 21

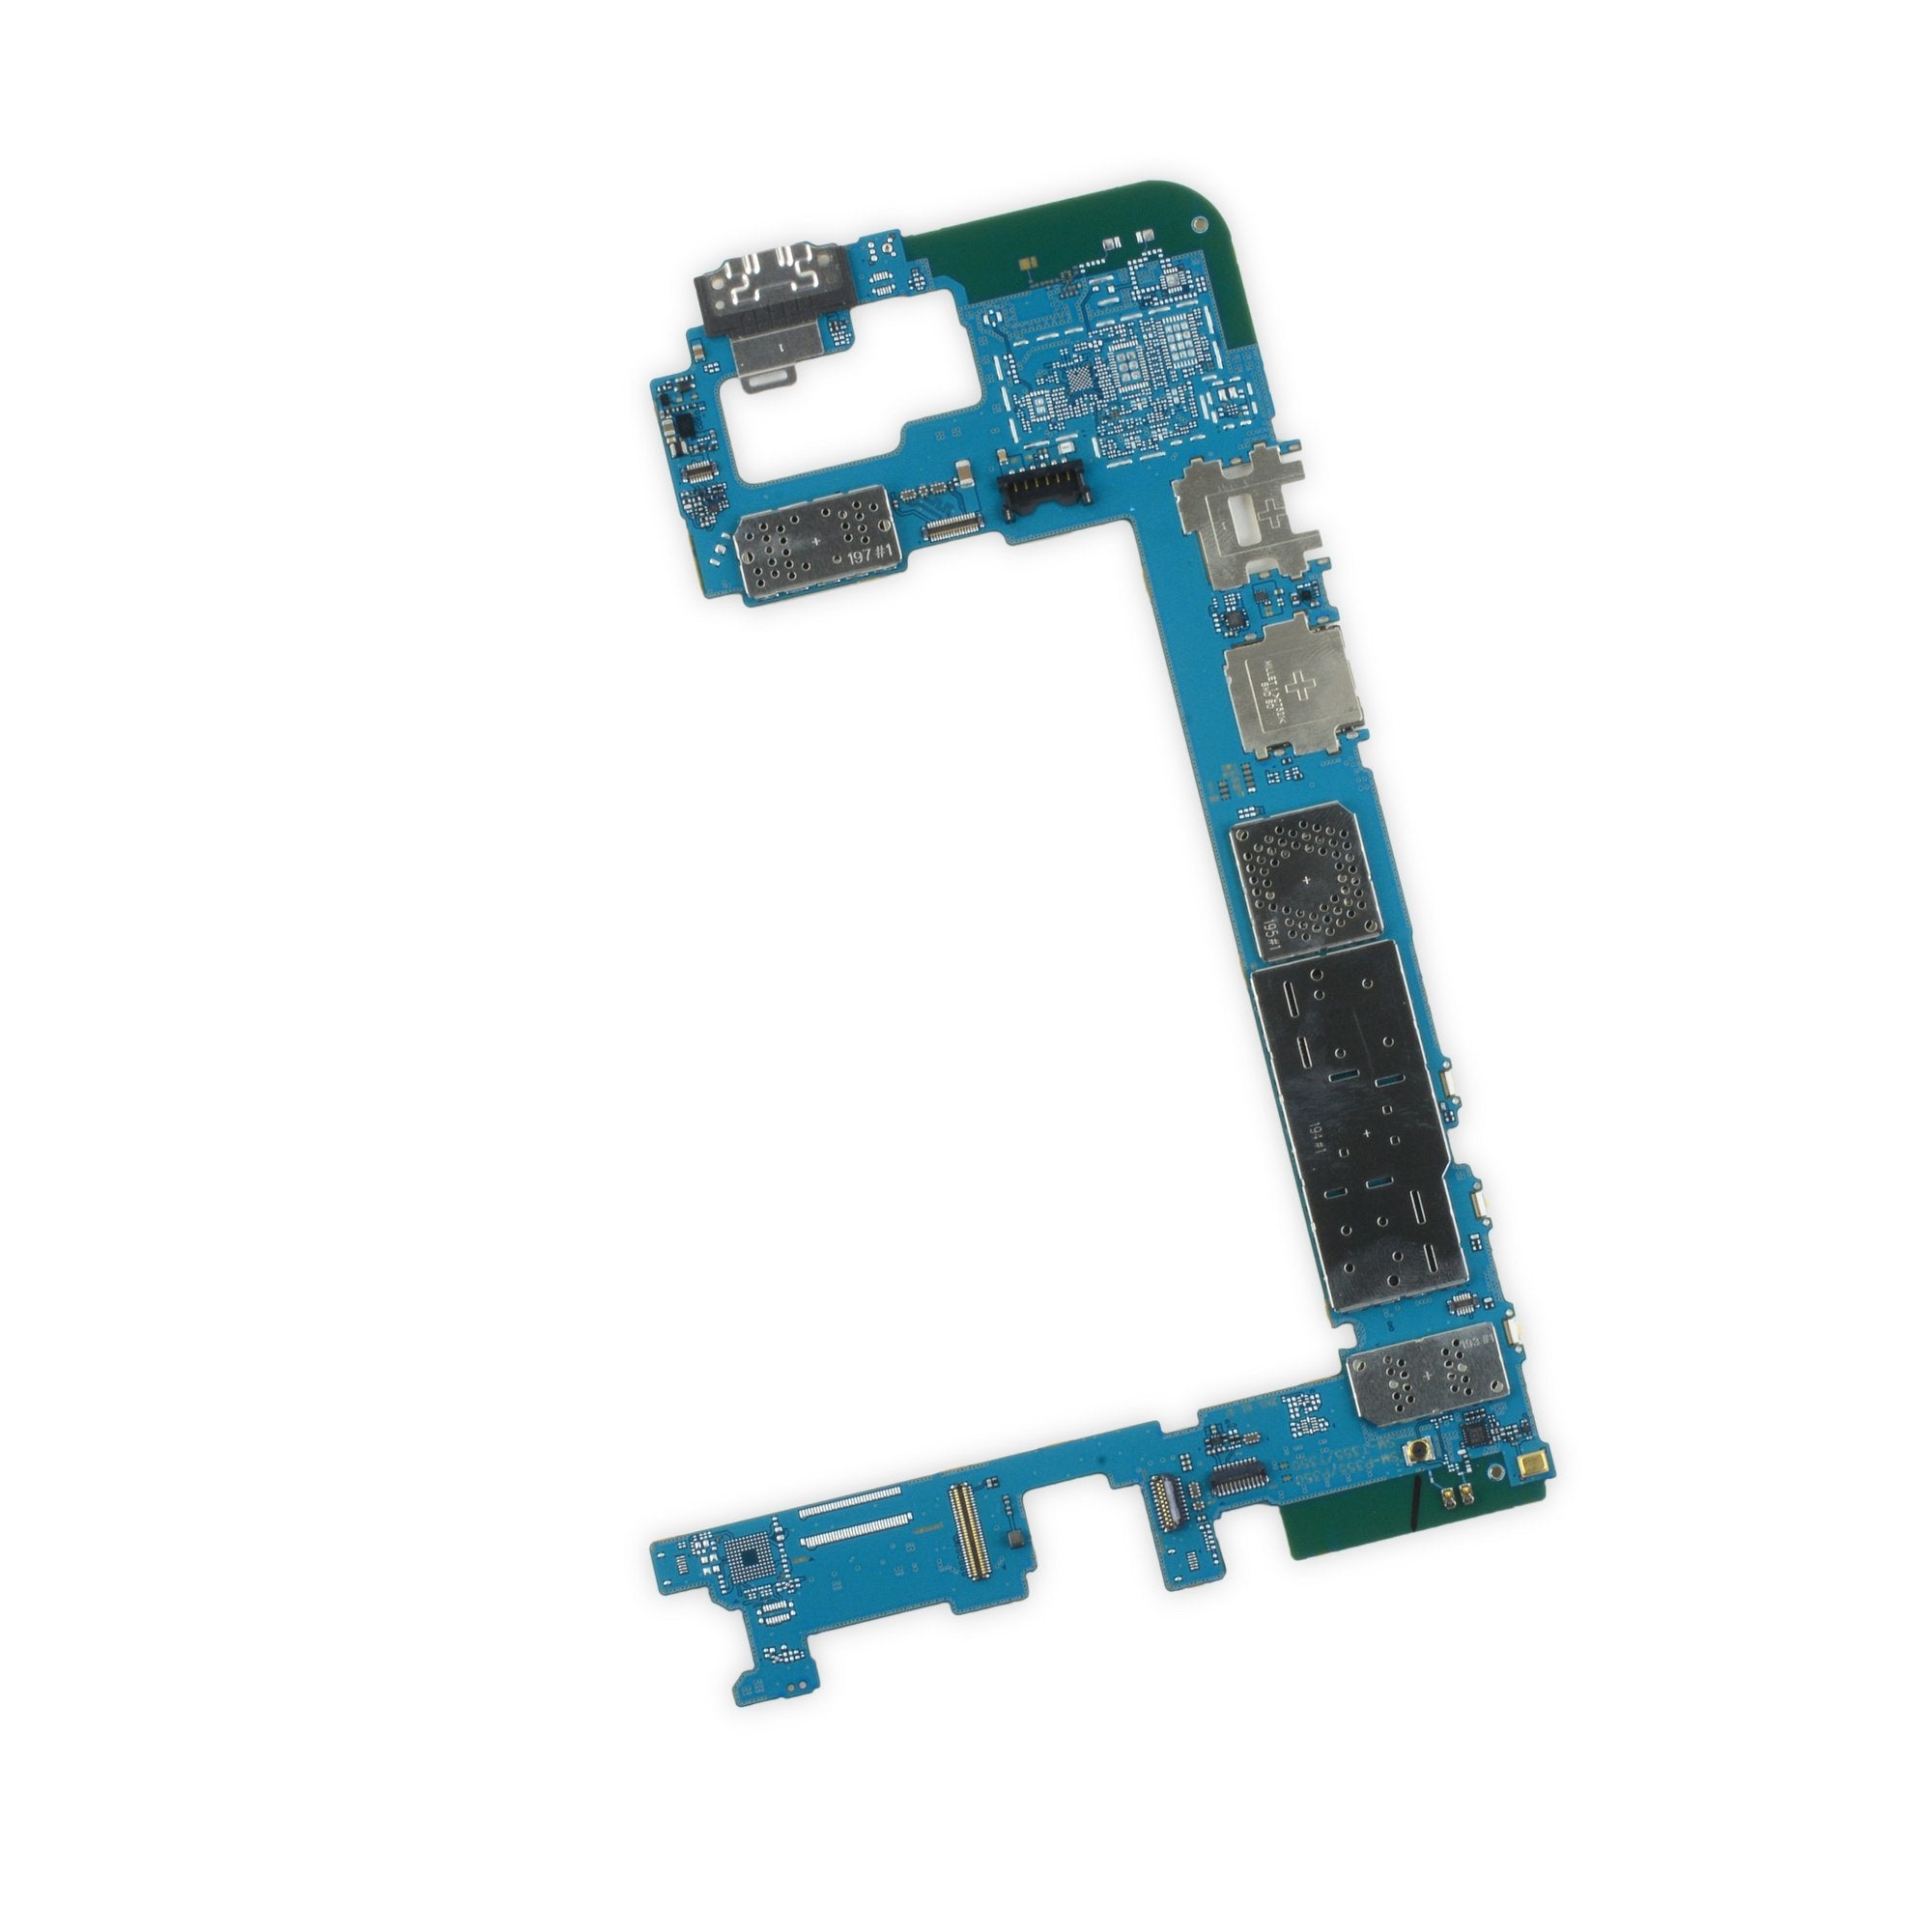
Make sure to set the motherboard down on a surface that’s free from static—like a trusty paper towel—so it stays safe and sound. We don’t want any unwanted damage showing up, right?
– Gently grab the motherboard with both hands, one on the top corner and one on the bottom. Then, carefully lift it away from the device, like you’re lifting the lid off a treasure chest. No rush, just take your time and ensure everything’s free and clear.
Tools Used

Success!