Samsung Galaxy Tab 4 8.0 Wi-Fi Rear Facing Camera Replacement
Duration: 45 minutes
Steps: 5 Steps
Ready to swap out the rear camera on your Samsung Galaxy Tab 4 8.0 Wi-Fi? Follow along with this straightforward, step-by-step guide to get it done smoothly and have your tablet snapping pics like new again.
Step 1

Take it easy and don’t go all Hulk on those plastic clips – they break pretty easily. A little finesse goes a long way!
Before you kick off the replacement, double-check that the tablet is powered down completely.
If you’re right-handed, prying in a clockwise direction will probably feel smoother; lefties might find a counterclockwise twist more natural.
As you pop off the back cover, you might hear some clicking sounds—no worries, that’s just the case saying goodbye to the device.
– Carefully slide the plastic opening tool between the metal edge and the back plastic cover at the bottom of your tablet and gently pry the back casing away from the device. Keep going to detach the back panel from the front assembly.
Step 2

– Place the tablet screen face down on a nice, clean surface. We don’t want any dirt ruining your day!
– Grab the back panel and gently lift it away from the device. It’s like peeling off a sticker, but better.
Step 3

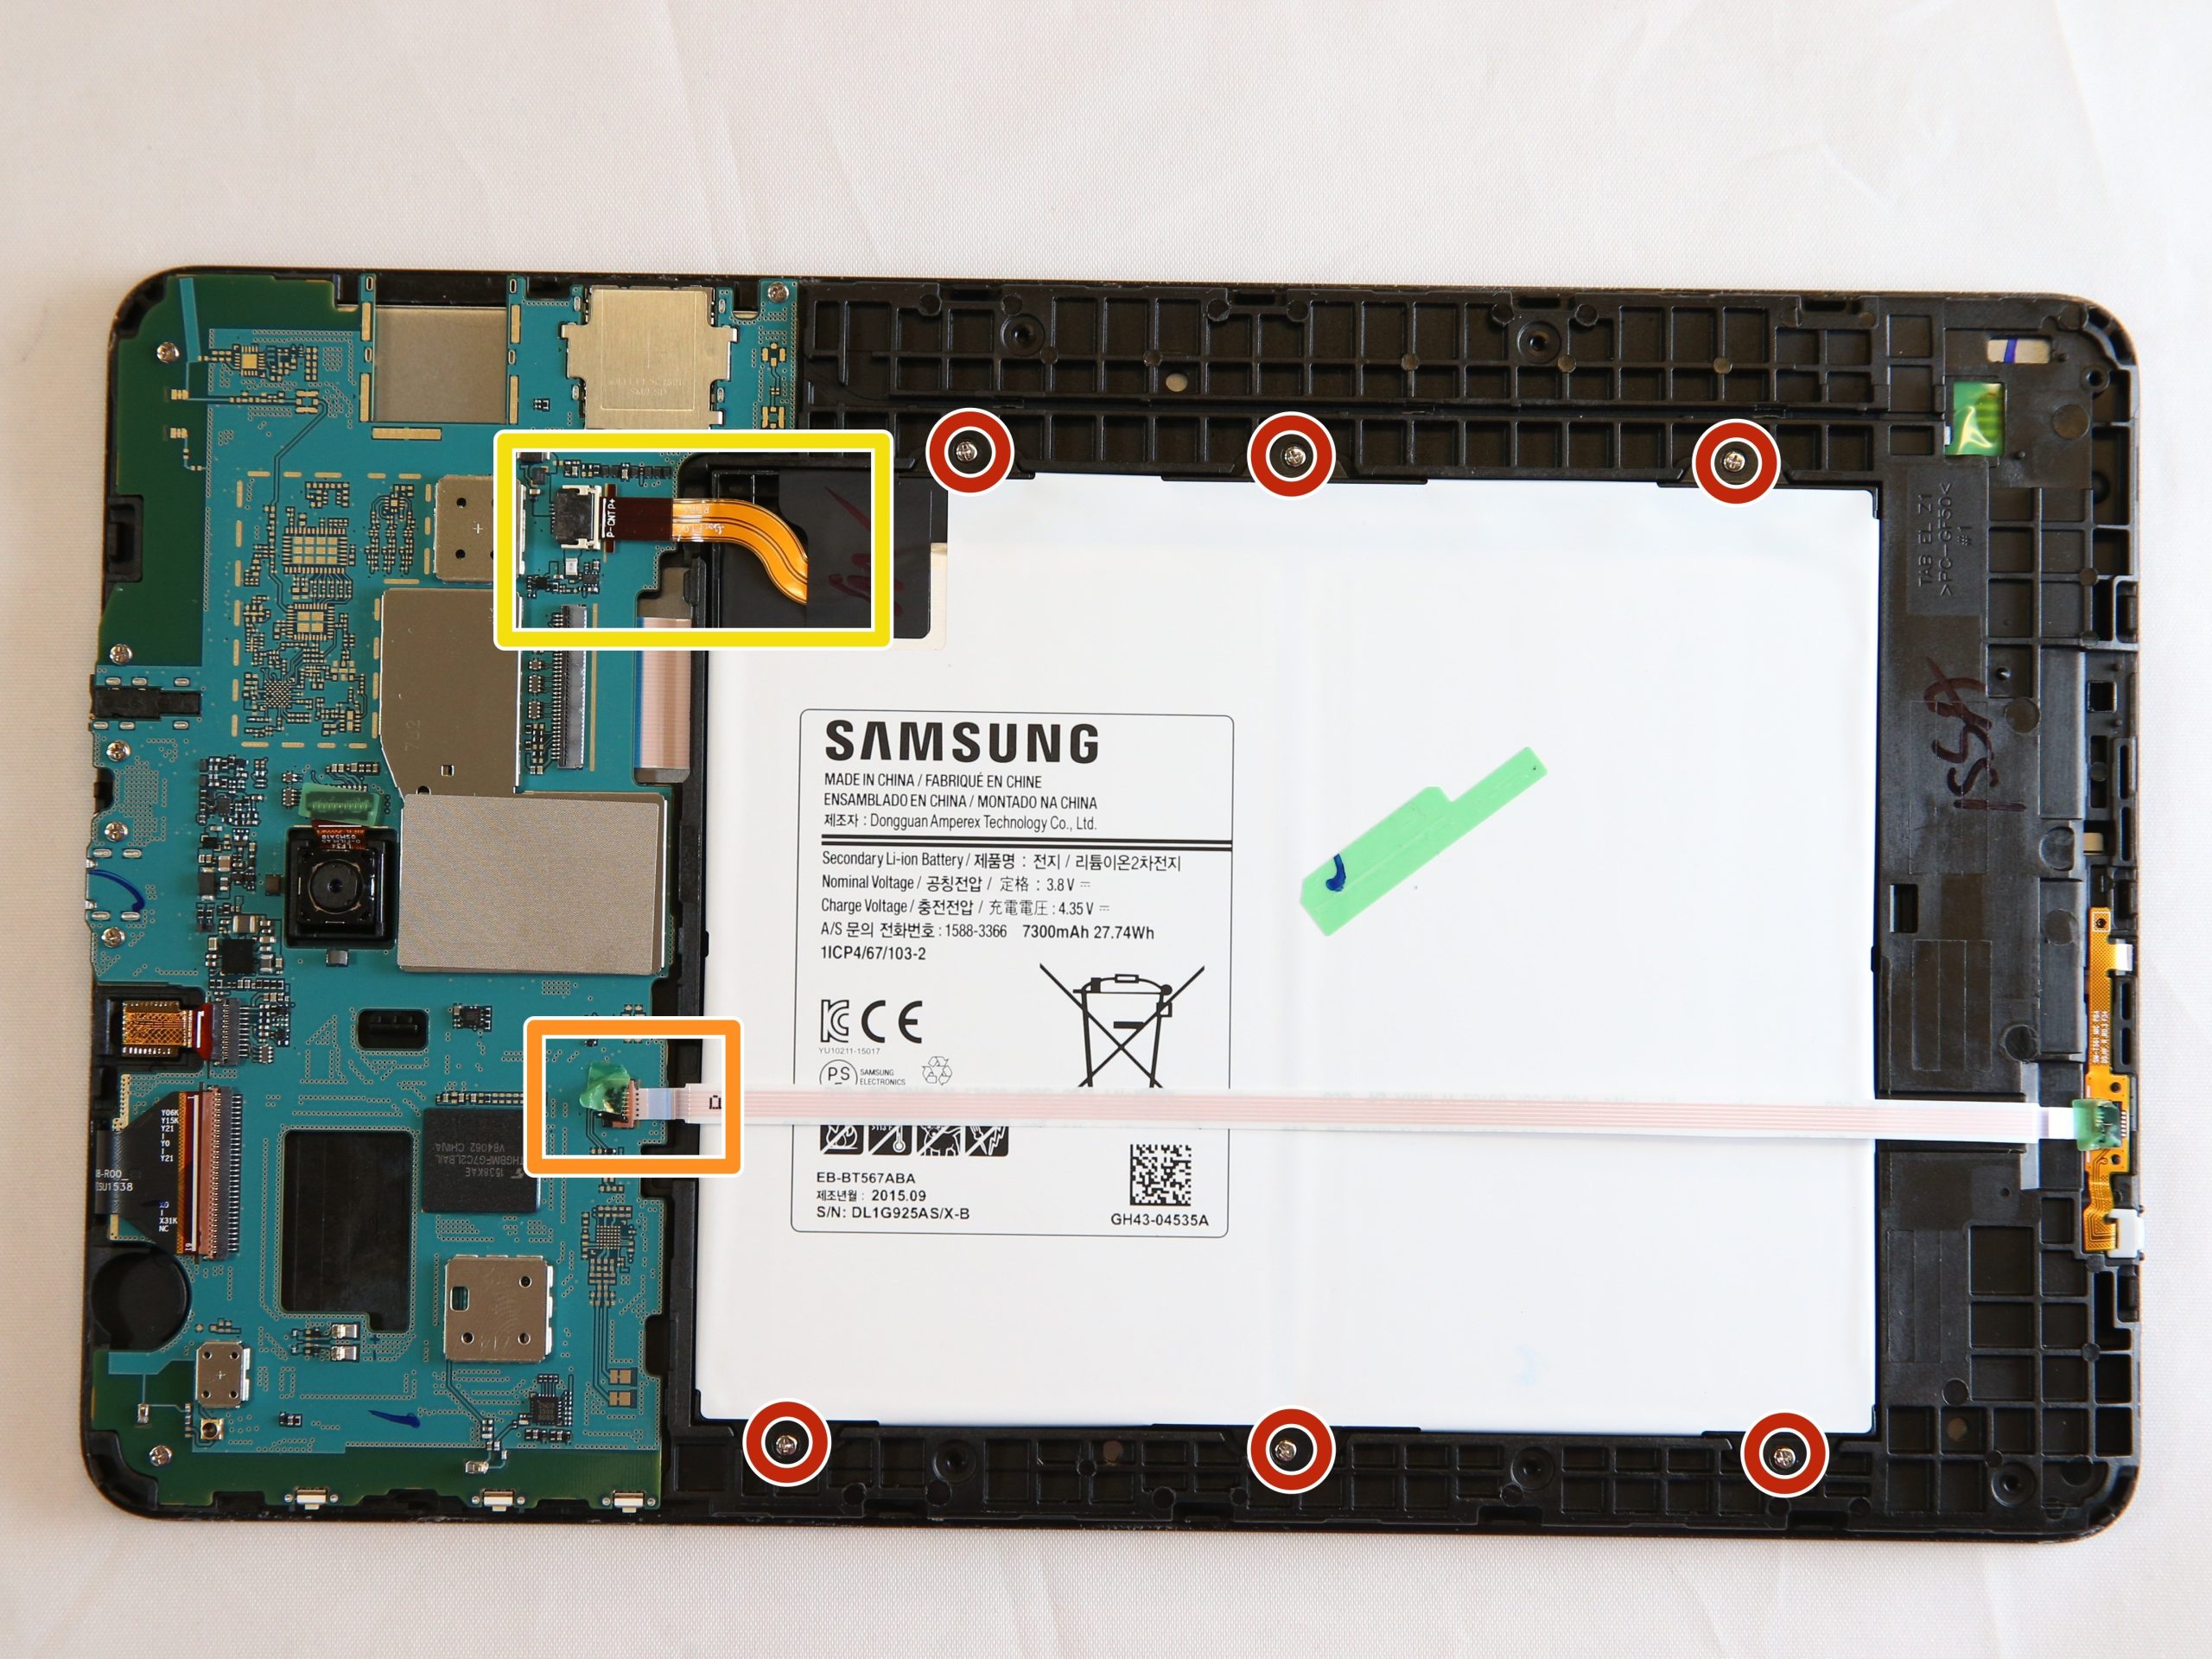
– You’ll find the rear-facing camera hanging out just to the right and a bit below the front-facing camera, cozying up near the top and center of the motherboard.
Step 4

– Carefully slide the flat edge of your trusty blue plastic opening tool right under the rectangular metal connector of the rear-facing camera.
– Gently push outward with just the right amount of pressure until the camera’s metal connector gives a little pop and releases from its cozy spot on the motherboard.
Step 5

– Gently lift the camera out of its spot using your tweezers—nice and easy does it!
Tools Used

Success!