Samsung Galaxy Tab 7.0 Front Panel Replacement
Duration: 45 minutes
Steps: 9 Steps
Get ready to swap out that cracked front panel! Follow this guide to bring your device back to life with a fresh look. If you hit a snag along the way, remember, you can always schedule a repair for some extra help!
Step 1

– Grab the flat end of a metal spudger and carefully pop off the two plastic tabs near the dock connector from the rear case.
Step 2

– Let’s get started! Remove the two 4.1 mm Tri-Wing screws located near the edges of the dock connector. This is the first step in giving your device a brand new lease on life!
Step 3

Alright, here’s the game plan: you’re about to pop off several clips (yep, those red-highlighted ones) that go all around the edge of the rear case. These little guys are super delicate, so take it slow and steady—you’re doing great!
Step 4
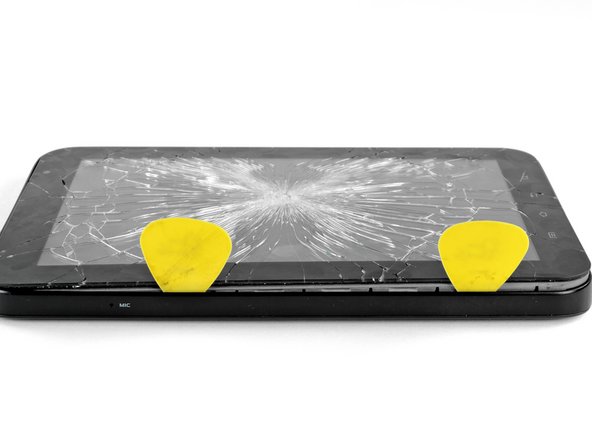

– Quick heads up: The Galaxy Tab we’re working with had a cracked front glass when we started, but don’t worry, this guide works the same whether your front panel is intact or shattered.
– Grab your trusty plastic opening tool and carefully slide it in near the bottom left corner of the rear case.
– Gently wiggle the plastic opening tool to create a small gap between the front and rear panels at the bottom left edge.
– Run the plastic opening tool along the left side, making the gap a little bigger to make things easier as you go.
– Now, take two guitar picks and gently slide them into the gap you just made. You’re almost there!
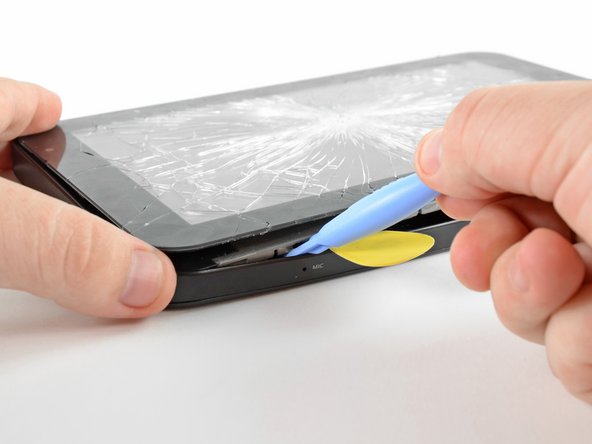
Step 5


– Slide that plastic opening tool into the dock connector and gently nudge it under the front panel/motherboard assembly.
– Give a little push with the plastic opening tool downwards to open up a gap near the lower left corner of the front panel assembly.
– Now, grab a guitar pick and slide it into the fresh gap you just made at the lower left edge of your Galaxy Tab.
Step 6

When you’re working on separating the front panel from the top left corner of the Galaxy Tab, watch out for that sneaky microphone ribbon cable (it’s highlighted in red in the first picture). It’s super thin and can easily get torn, so handle it with care!
Ensure you tuck it under the inner framework to maximize your leverage while popping those clips free. Let’s get this done!
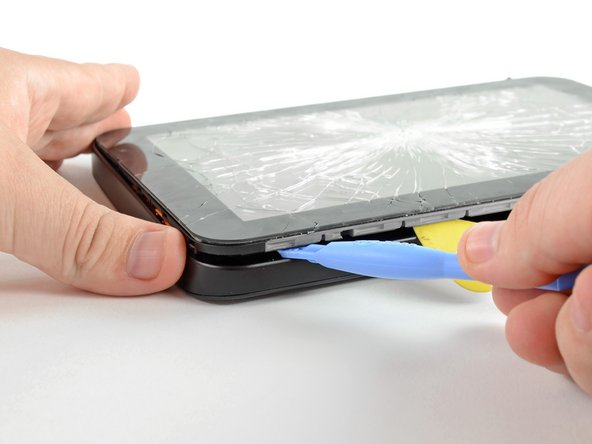
– Take it easy when you get to the top left corner of your Galaxy Tab. This next step requires a little focus, so pay attention!
– Slide a plastic opening tool into the gap right next to the left side of your trusty guitar pick.
– Now, gently lift upwards while sliding the plastic opening tool along the top left corner. This will help you free the Front Panel Assembly from the clips holding it in place. Smooth sailing from here!
Step 7

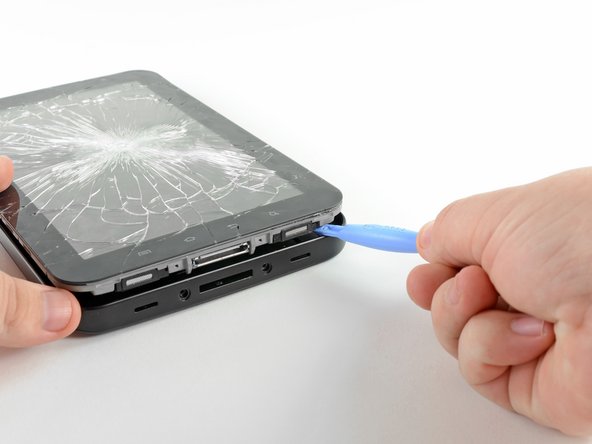
Easy does it! Don’t yank the front panel up just yet—it’s still held in place by clips around the top, bottom, and right sides. Lifting it too forcefully could spell disaster, so go slow and steady.
– Gently lift up the left edge of the front panel assembly, just enough to ease it free from its snug spot in the rear panel housing.
Step 8

– Gently slide the flat edge of your trusty opening tool between the front panel and rear panel, right by the dock connector. It’s like giving your device a little nudge!
– Now, grab that plastic opening tool and carefully pry the bottom right corner out of its snug home in the rear panel. You’re doing great!
Step 9

– Put everything back together by working through the steps in reverse—it’s like rewinding a cool DIY movie!
– If you need help, you can always schedule a repair.
Success!