Samsung Galaxy Tab 7.0 Teardown: Step-by-Step Guide
Duration: 45 minutes
Steps: 20 Steps
Dive into the world of Samsung’s 7-inch Android tablet with us! This hardware is something special, and we’re here to help you stand up for your right to repair. Say goodbye to devices designed to expire early—grab your tools and join the movement against planned obsolescence with our Self-Repair Manifesto!
Step 1

– The Samsung Galaxy Tab has made its grand entrance at Salvation Repair!
– Often dubbed the ‘iPad Killer,’ let’s dive in and see if this tablet lives up to the hype and where it truly fits in the tablet universe.
– Tech Specs:
– 1 GHz ARM Cortex-A8 Hummingbird Multimedia Applications Processor, rocking the ARMv7 architecture.
– Choose between 16 or 32 GB of internal storage, plus a microSD slot for all your expansion needs.
– 512 MB of DDR RAM to keep things running smoothly.
– Capture moments with a 3.2 MP rear camera and a 1.3 MP front-facing camera.
– Running on Android 2.2 (Froyo) with Samsung’s TouchWiz for that extra flair.
Step 2


– All-screen gadgets are tough to tell apart these days, but Samsung nailed it by giving the white back cover some serious personality against that iPad-style front. Slick move, Samsung!
– Down at the front panel’s bottom edge, you’ve got the classic Android capacitive controls—your trusty sidekicks on pretty much every touchscreen phone out there.
– The 3.2 MP rear camera with LED flash might not be groundbreaking, especially when smaller devices like the Droid 2 are flexing with a 5 MP shooter. But hey, it gets the job done!
Step 3


– The Galaxy Tab is equipped with handy ports for your headphones, SIM card, microSD (with support for up to 32 GB), and a USB dock connector.
Step 4

– Comparing the Galaxy Tab and the iPad side by side.
– At 190.1 x 120.6 x 12.0 mm, the Galaxy Tab is definitely more compact. Meanwhile, the iPad stretches out to 242.8 x 189.7 x 13.4 mm.
– Volume-wise, the Galaxy Tab is at 275.1 cm³, while the iPad takes up 617.2 cm³.
Step 5


– Alright, enough staring! It’s time to hunt down some screws.
– Gently prying off the plastic pads on either side of the Apple-like dock connector will expose two tri-wing screws.
– Tri-wing screws are a pretty basic way to keep things tamper-proof. We’ve got a handy 26-piece bit driver kit (complete with the tri-wing bit) ready for action.
– Curious about just how Apple-like that dock connector is? Check out a side-by-side comparison of the USB cables and see for yourself.
Step 6


– Grab a trusty plastic opening tool and a guitar pick, then work your magic by gently prying up the front panel all the way around its edges. The goal is to pop it free from the plastic rear case—take your time and keep it steady!
– Good news! The Galaxy Tab doesn’t come with those sneaky self-destructing copper clips like the iPad, so this step is a bit less nerve-wracking. You’ve got this!
Step 7


– Once you’ve popped all those plastic tabs free, it’s time to slide off the rear case of your Galaxy Tab like a pro!
– On the inside of the rear case, you’ll find a hefty strip of EMI shielding snugly situated against the processor and memory chips on the motherboard. It’s like a cozy blanket for your tech!
– Thanks to its plastic design, the rear case is all about boosting wireless reception. Samsung cleverly sidestepped the creative tricks used by Apple’s iPad designers to keep those signals strong and steady.
Step 8

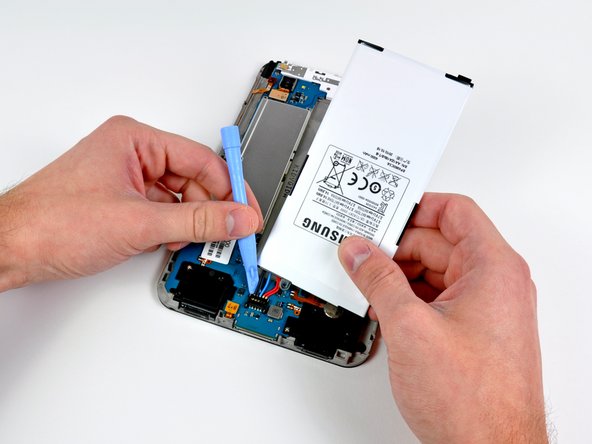
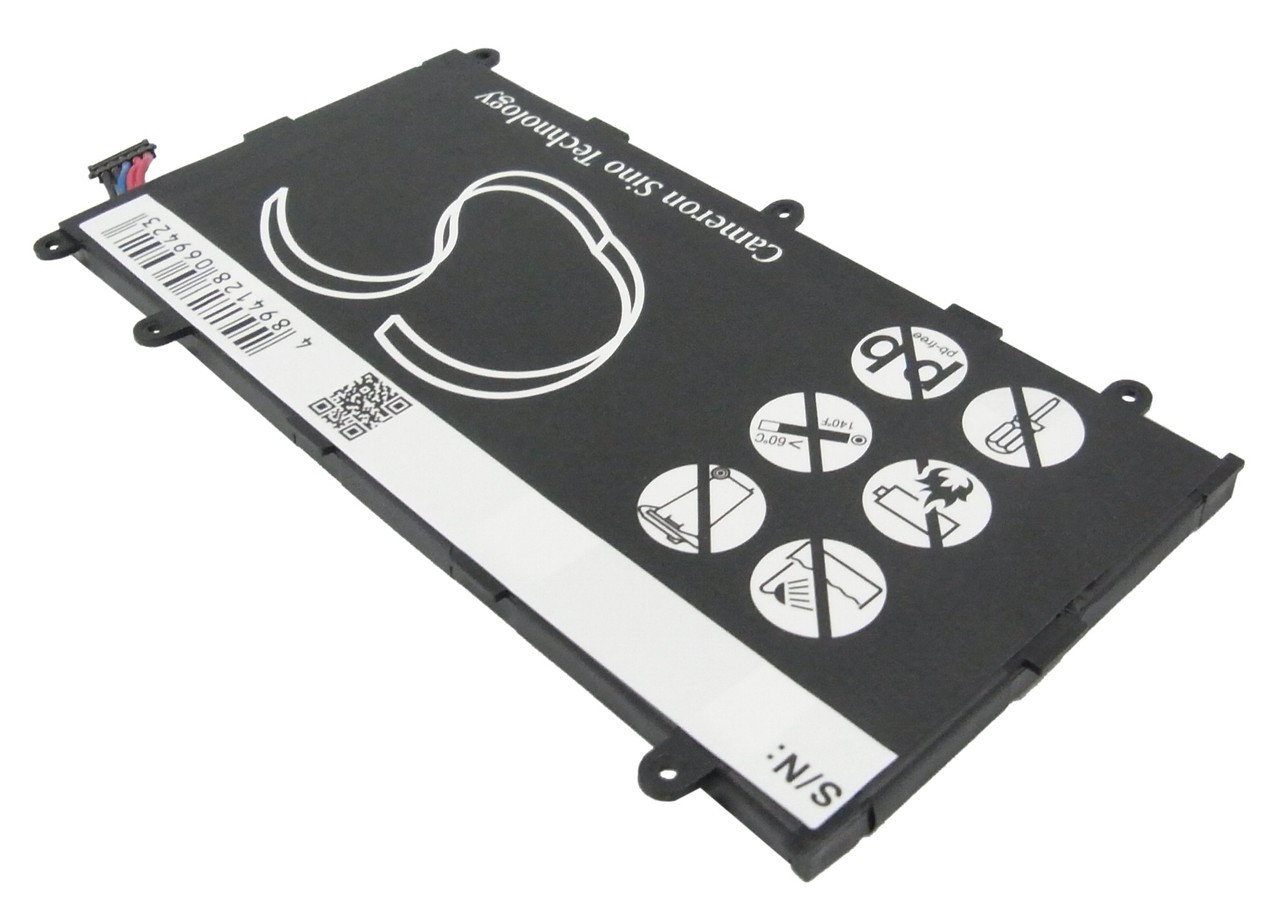
– The battery takes up a big chunk of the Galaxy Tab’s space—almost half of it, in fact!
– It’s held snugly to the back panel with a single Phillips screw, just waiting for you to release it.
– To disconnect the battery, gently pry the battery connector from its cozy spot on the motherboard.
Step 9


Seven hours of battery life is a good start, but let’s be real – it’s not quite enough to get you through that epic movie marathon. Luckily, with a little TLC from Salvation Repair, you can get your device back to handling your favorite films with ease.
– Inside the Galaxy Tab, you’ll find a 3.7V Li-Ion battery boasting a capacity of 14.8 Watt-hours, or 4000 mAh. Not too shabby, right?
– Samsung tells us this battery has enough power to keep the movie marathon rolling for up to seven hours. So grab some popcorn!
– Weighing in at just 81 grams, the Galaxy Tab’s battery is a lightweight champion, tipping the scales at about 55% of the iPad’s hefty battery while delivering around 60% of its power.
– Check out the third picture for a visual treat—the Galaxy Tab’s battery is roughly half the size of its iPad counterpart. Compact and efficient!
Step 10


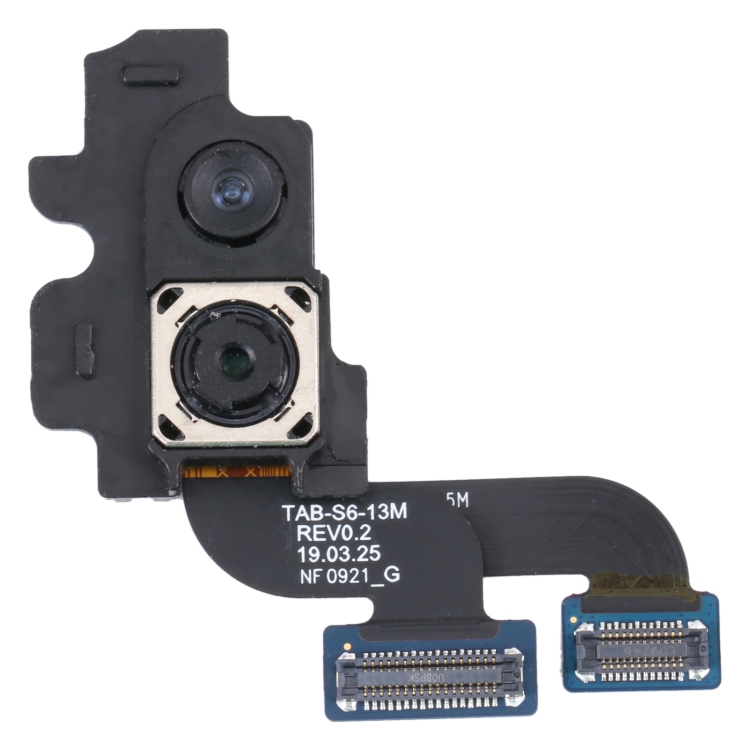
– Gently pop the rear-facing camera connector out of its socket on the motherboard using the edge of an opening tool—careful now, no need to rush!
– Wave a fond farewell to the rear-facing camera as you set it aside. It’s time for a well-deserved break for this little piece of tech.
Step 11


– To free the motherboard, you’ll need to disconnect a few connectors. Here’s what you’ll need to do:
– The motherboard is held in place by seven Phillips screws on the rear panel. Time to unscrew them!
– Once those screws are out, gently lift the motherboard away from the rear panel. It might take a little wiggle to get it loose, but nothing too tough.
– Don’t forget to disconnect these important cables as you go:
– Headphone jack/microphone cable
– Volume control cable
– Touchscreen cable
– Control button LED cable
– Display data cable
Step 12


– Time to get up close and personal with the front facing camera – it’s super easy to detach from the motherboard assembly.
– Now, let’s get a glimpse of the Galaxy Tab’s inner workings by carefully lifting that EMI shield. It’s like uncovering a treasure trove of circuitry!
Step 13

Take a look at the front side of the motherboard. These identifications come courtesy of UBM TechInsights.
– Alright, let’s take a stroll through the hardware lineup:
– SanDisk SDIN4C2-16G — a solid 16 GB MLC NAND Flash storage champ.
– Maxim 8998 — the power management wizard keeping things running smoothly.
– Samsung S5PC110A01 + Samsung KB100D100YM — the dynamic duo! A 1GHz Hummingbird multimedia processor paired with 8 Gb of MLC Flex OneNAND, 1 Gb of OneDRAM, and 3 Gb of mobile DDR. Quite the powerhouse!
– Infineon PM9801 — the modem solution that makes HSDPA/HSUPA/EDGE connections happen like magic.
– Wolfson Microelectronics WM8994 — the audio codec giving your device its sound groove.
– Infineon PMB5703 — the RF transceiver that keeps your signals on point.
Step 14

– Flip it to the backside of the motherboard. That’s where the magic continues!
– Here’s the chip squad lineup, keeping things running smooth:
– Two thumping loudspeakers near the dock connector make sure your Galaxy Tab’s audio is on point.
– Broadcom BCM4329: The ultimate Bluetooth/FM/WLAN receiver, doing all the heavy lifting.
– STMicroelectronics L3G4200D: This gyroscope keeps your device steady and balanced.
– ATMEL MXT224: The touchscreen controller making your swipes and taps feel like a breeze.
– Broadcom BCM4751: The GPS receiver ensuring you never lose your way!
Step 15

– So, what gives the Samsung Galaxy Tab the edge to compete with the iPad? Spoiler alert: it’s all about the processor!
– The Galaxy Tab boasts the Samsung S5PC110A01 Multimedia Applications Processor under its hood.
– Similar to the iPad’s A4 processor, the 1 GHz Hummingbird processor is an ARM processor that cleverly uses package-on-package construction to amp up the speed and efficiency of all its internal shenanigans.
– Samsung makes the most of this Package-on-Package setup by cramming in 8Gb of MLC Flex OneNAND, 1 Gb of OneDRAM, and 3Gb of Mobile DDR right into the processor.
– Meanwhile, the iPad’s A4 processor has not one, but two layers of RAM (Samsung K4X1G323PE) nestled within its three layers.
Step 16


– A single Phillips screw is holding the headphone jack and microphone assembly to the rear panel. Just unscrew it—it’s like opening a jar of cookies.
– Once you lift the assembly off some adhesive (don’t worry, it’s not too sticky), you can gently remove it from the Galaxy Tab.
– Good news! The headphone jack is a totally independent part from the motherboard, so if you ever break it—like, say, from dropping your Tab with headphones plugged in—replacing it is super straightforward.
– Apple had a similar setup on the iPad, but let’s focus on your Galaxy Tab for now!
Step 17

– Lift the display data interconnect cable from the chassis with care, then pop open the ZIF socket to release it from the front panel assembly. Smooth moves, my friend!
Step 18


It seems like the Galaxy Tab could also serve as a shield!
– Alright, here’s the deal—getting the front panel off takes a good bit of heat, so get your heat gun ready for action.
– After a few rounds of warming things up and some careful prying, the front panel will start to loosen up and separate from the chassis. Take your time and stay patient!
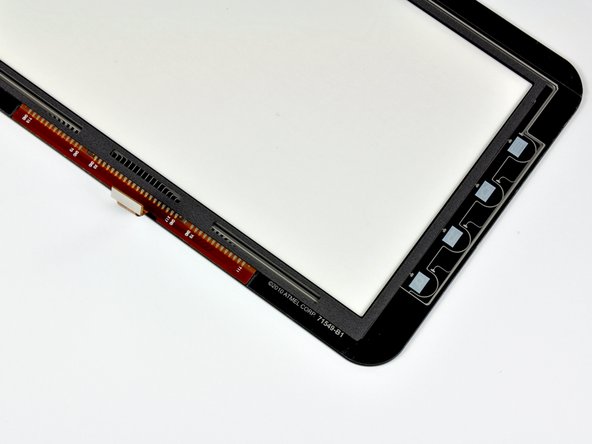
– The digitizer, crafted by Atmel, is seamlessly bonded to a tough-as-nails Corning Gorilla Glass front panel. Pretty neat, right?
Tools Used

Step 19


– Get ready to dive into the wonderful world of screen repair! The Galaxy Tab’s Super TFT LCD screen is a real treat, offering better image quality and a wider viewing angle than your average LCD.
– Now, let’s talk turkey – the resolution. While the Galaxy Tab’s 1024×600 resolution might not be the highest on the market (we’re looking at you, iPad, with your 1024 x 768 resolution), it still packs a punch with 169 pixels per inch. That’s nothing to sneeze at, especially when compared to the iPad’s 132 ppi.
– But, let’s be real, 169 ppi is just the beginning. We’re spoiled by the likes of the iPhone 4’s stunning 326 ppi retina display. Still, the Galaxy Tab’s screen is no slouch, and with a little TLC, it’ll be looking good as new in no time. If you need help, you can always schedule a repair with the pros at Salvation Repair.
Step 20


– Samsung Galaxy Tab Repairability Score: 6 out of 10 (10 means a breeze to fix!)
– Just like its rival, the iPad 3G, the Samsung Galaxy Tab couldn’t escape the skilled hands of repair experts.
– And that’s a wrap! Thanks for sticking around.
– Good news: all the components are accessible without needing to solder anything.
– Even better, the battery is replaceable by the user—no pro tools required!
– Sure, tri-wing screws were used to discourage repairs, but don’t worry, they’re no match for a proper screwdriver set.
– Heads up! You’ll need a heat gun to safely get to the LCD.
– Opening up the Galaxy Tab can be a bit tricky—plastic opening tools alone won’t cut it. Get ready to put in a little extra effort!
Tools Used
Success!