Samsung Galaxy Tab A 10.1 S-Pen Screen Replacement
Duration: 45 minutes
Steps: 5 Steps
Get ready to breathe new life into your Samsung Galaxy Tab A 10.1 tablet by replacing the screen. This step-by-step guide from Salvation Repair will walk you through the process. If you’re not feeling confident, don’t worry – we’ve got you covered. Just follow along and you’ll be enjoying your tablet’s new screen in no time. And if you need help, you can always schedule a repair.
Step 1


– First, make sure to unplug your tablet and turn it off – safety first!
– Now, carefully insert a plastic opening tool between the screen and the rear casing. This is where the magic happens!
– Gently pry the screen and rear casing apart. Take your time, and don’t worry if it takes a little bit of effort – you’ve got this!
Step 2


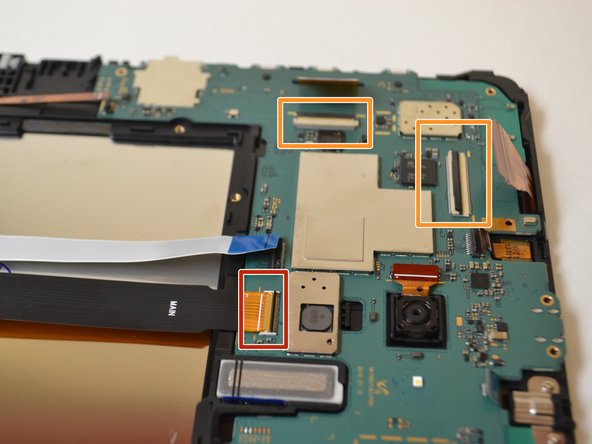
– Peel off the three green tape strips holding down the white, black, and gold ribbon cables—time to set them free!
– Grab your spudger and gently flip up the little locking flaps on the ZIF sockets securing those ribbon cables.
– Carefully slide the ribbon cables out of their sockets—smooth and steady wins the race.
Tools Used

Step 3
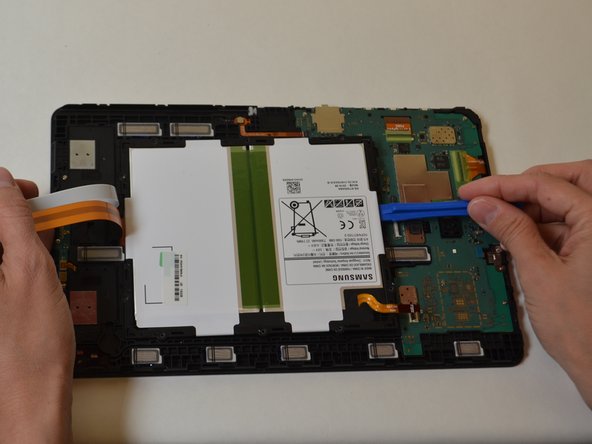

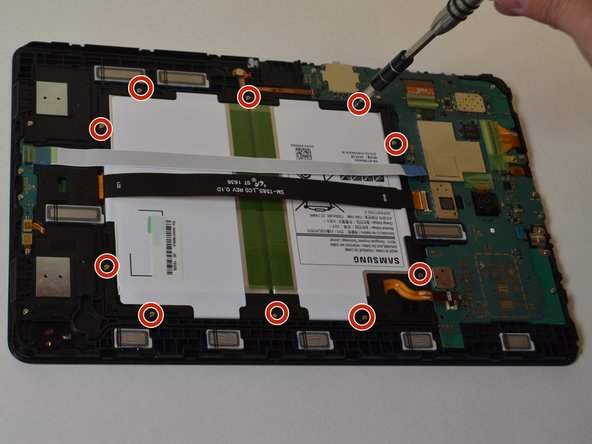
– Unscrew the ten 4mm Phillips #000 screws holding the battery in place.
– Carefully slide a plastic opening tool underneath the battery to give it a little lift.
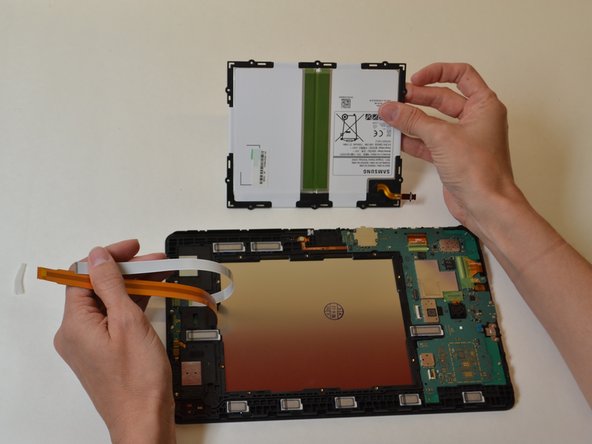
– Gently remove the battery from its spot.
Step 4

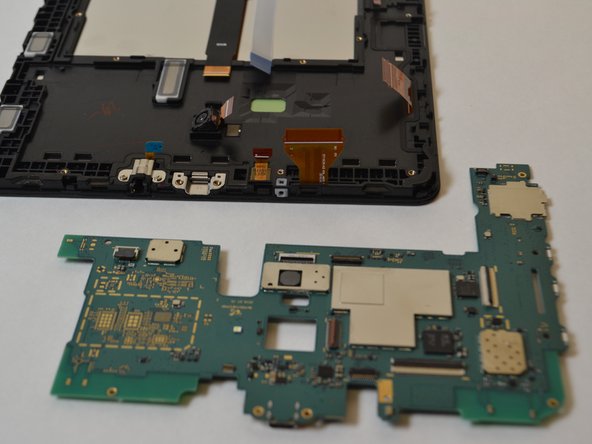
– Grab your trusty screwdriver and take out the six 4mm Phillips #000 screws from the motherboard.
– Take your spudger and carefully lift the retaining flap on the ribbon cable ZIF sockets. Be gentle, it’s like a little flap dance.
– Use a plastic opening tool to carefully pop the motherboard out of the case. It might take a little wiggle, but it should come free without too much trouble.
Tools Used
Step 5


Heads up! There’s a chance the screen could crack during this step, so keep an eye out for any sharp edges or glass pieces. Stay safe!
A little heat might just do the trick to break up that stubborn glue. Give it a try, and see how it goes!
– You’re almost done! To put everything back together, just follow these steps in reverse. Easy peasy!
– If you need help or want to make sure everything is done correctly, you can always schedule a repair
Success!