Samsung Galaxy Tab A 9.7 Charging Port Replacement
Duration: 45 minutes
Steps: 7 Steps
Is your device refusing to charge? Don’t worry, it’s probably just a case of dirt or debris getting in the way. If left alone, this gunk can cause permanent damage to your charging port, making it impossible to power up. Luckily, this step-by-step guide from Salvation Repair will walk you through the process of safely removing the charging port to get your device up and running again. Follow along and we’ll have you charging like normal in no time.
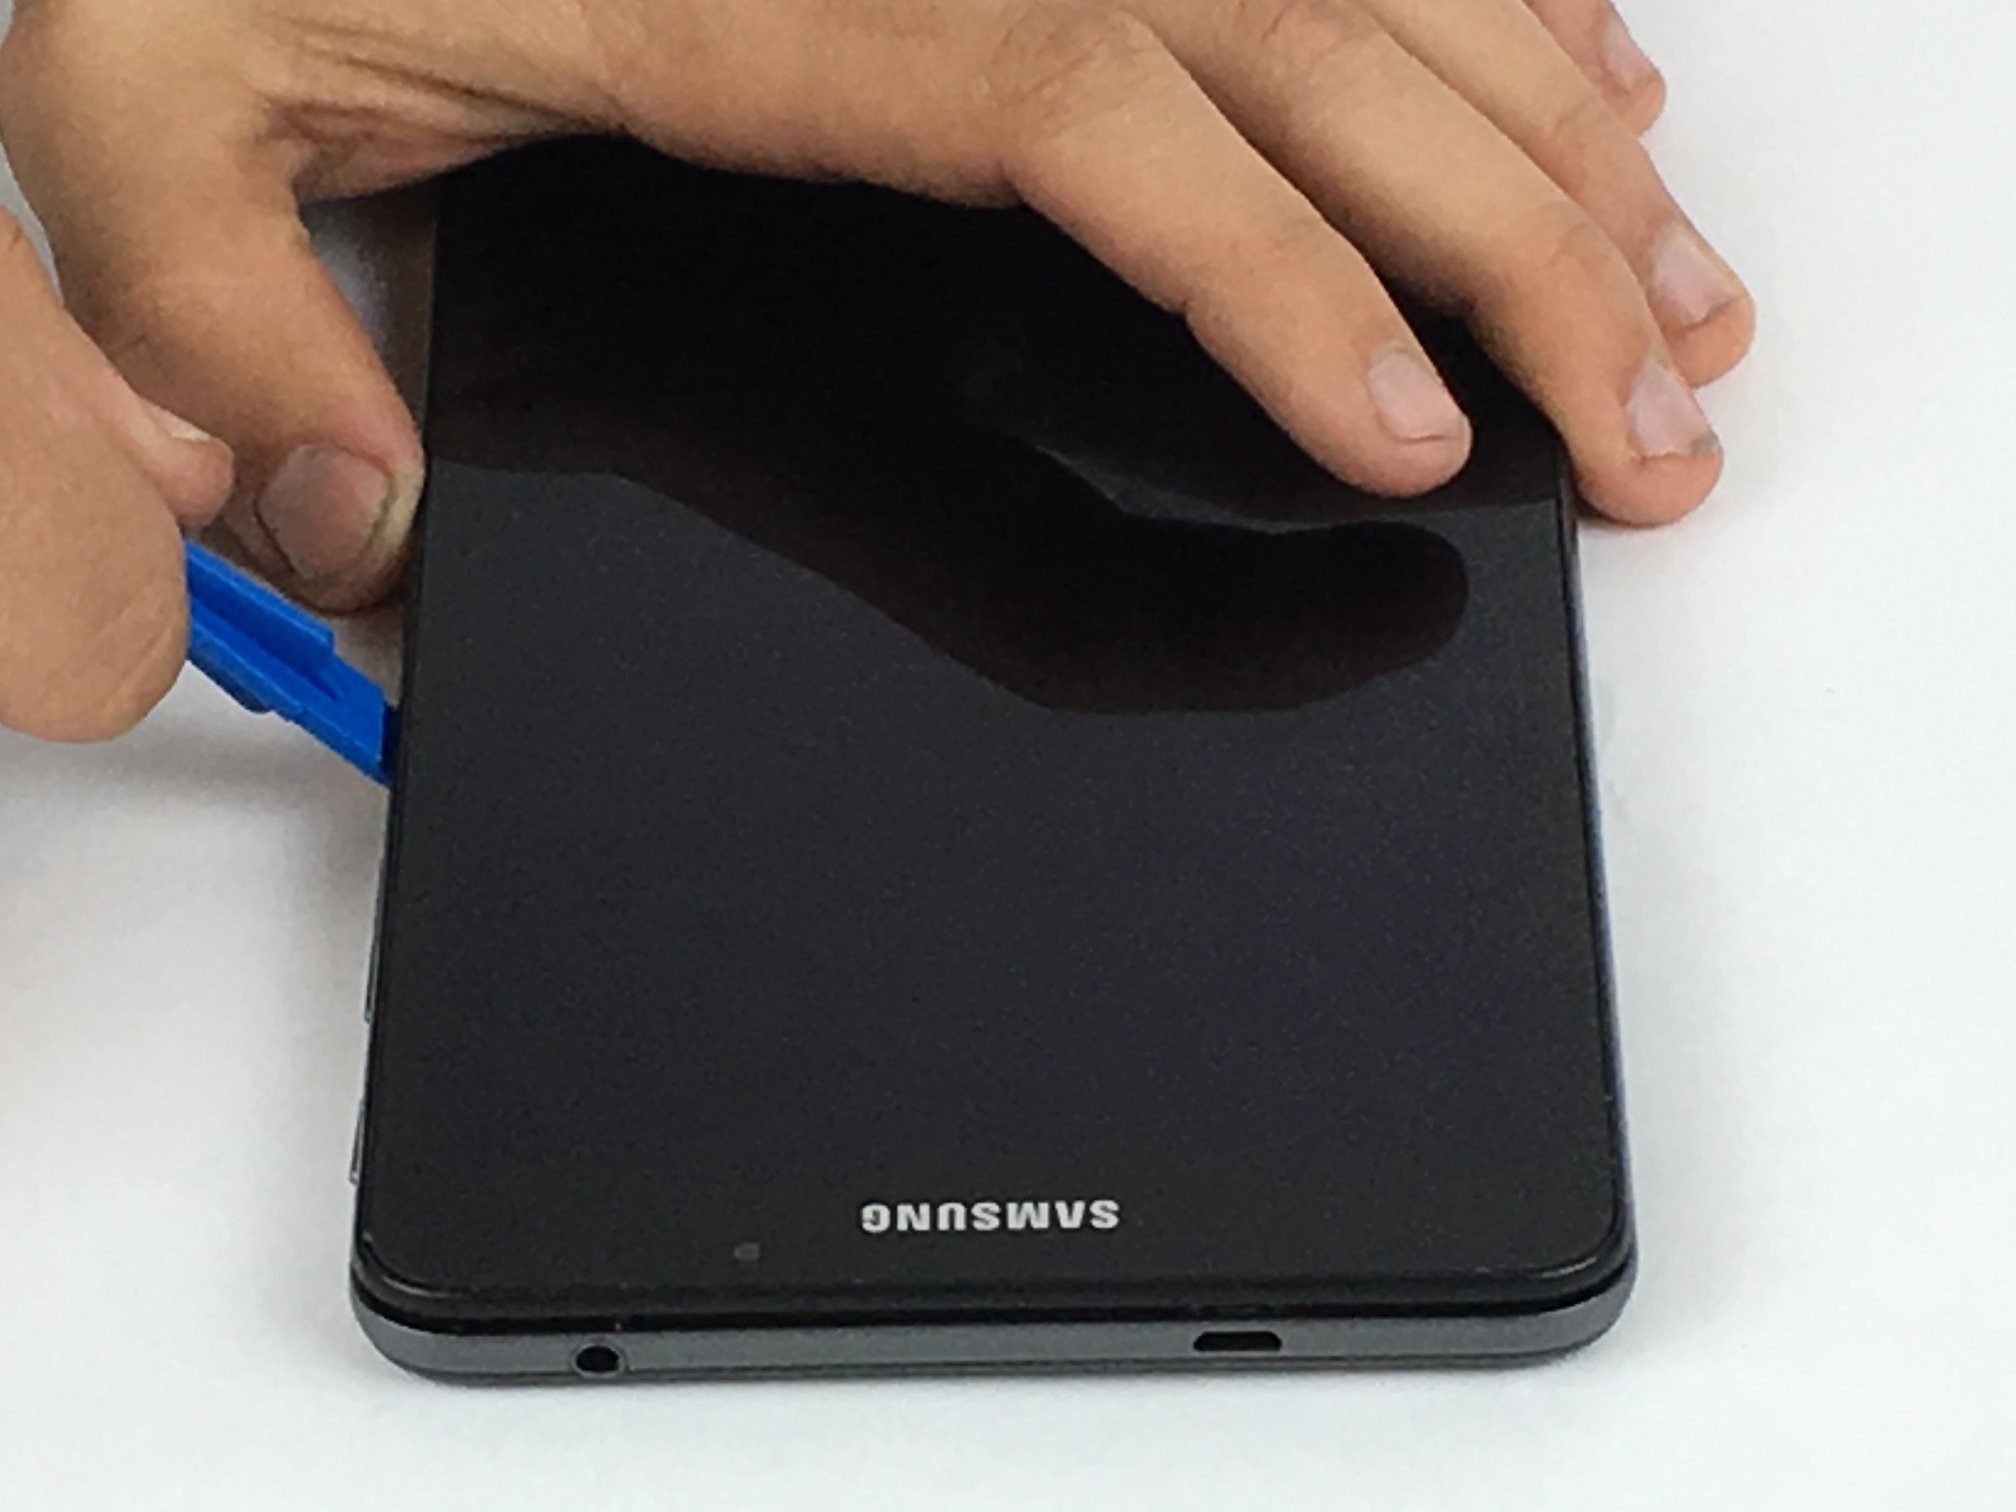
Step 1

The back cover snaps onto the device with clips spaced about an inch apart.
You’ll hear a satisfying click each time one of these clips pops free.
– Slide a metal spudger gently between the back case and the screen of your device.
– Work the spudger around the edges, popping each snap open like the pro you are.
Step 2


– Unscrew those two 2.8 mm Phillips #000 screws from the speakers and let the magic begin!
Step 3

Now, each speaker is just hanging out with the main device, held on by some handy little plastic snaps.
– Gently wedge the heavy-duty spudger under the speakers at these two spots to pop them free from the device.
Step 4
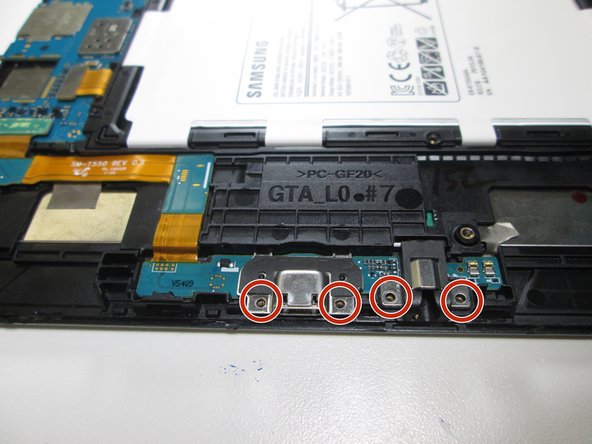

– Go ahead and take out those four 2.8mm #000 Phillips screws that are keeping the charging port and headphone jack snug as a bug. You’ve got this!
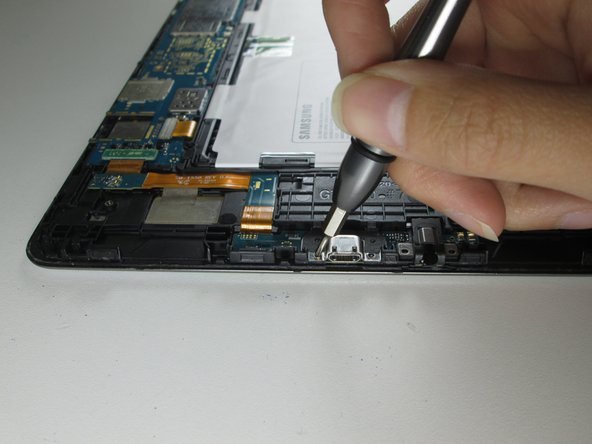
Step 5

– Let’s get started by disconnecting the green square connector from the motherboard. To make this happen, slip the flat end of your trusty plastic opening tool underneath the connector and gently push down – it’s like a little wake-up call for your device!
– When you’re putting everything back together, listen for those two satisfying clicks that tell you the charging board is securely attached to the motherboard. It’s like a little confirmation that you’re doing a great job!
Step 6

– Slide your heavy-duty spudger under the charging port and gently push down to pop it out.
– When putting the charging port back in, tilt it down towards the battery, then press down on the outer edge to secure it in place.
Step 7

– Gently peel away the charging assembly from the device to fully detach the charging port. You’ve got this!
Success!