Samsung Galaxy Tab A 9.7 Display Replacement
Duration: 45 minutes
Steps: 8 Steps
Got a cracked or unresponsive screen on your Samsung Galaxy Tab A 9.7? No worries! This guide walks you through the steps to carefully remove the display without messing up the rest of your device. The difficulty level is moderate, so keep your eyes peeled for the little details. Work on a clean, flat surface so you don’t lose track of any tiny parts or tools, and handle that screen gently to avoid any new cracks.
Step 1

The back cover is secured with a series of snaps, spaced about an inch apart. Just give them a little nudge, and they’ll pop right off.
You’ll hear a satisfying click each time one of those snaps releases, so you’ll know you’re making progress.
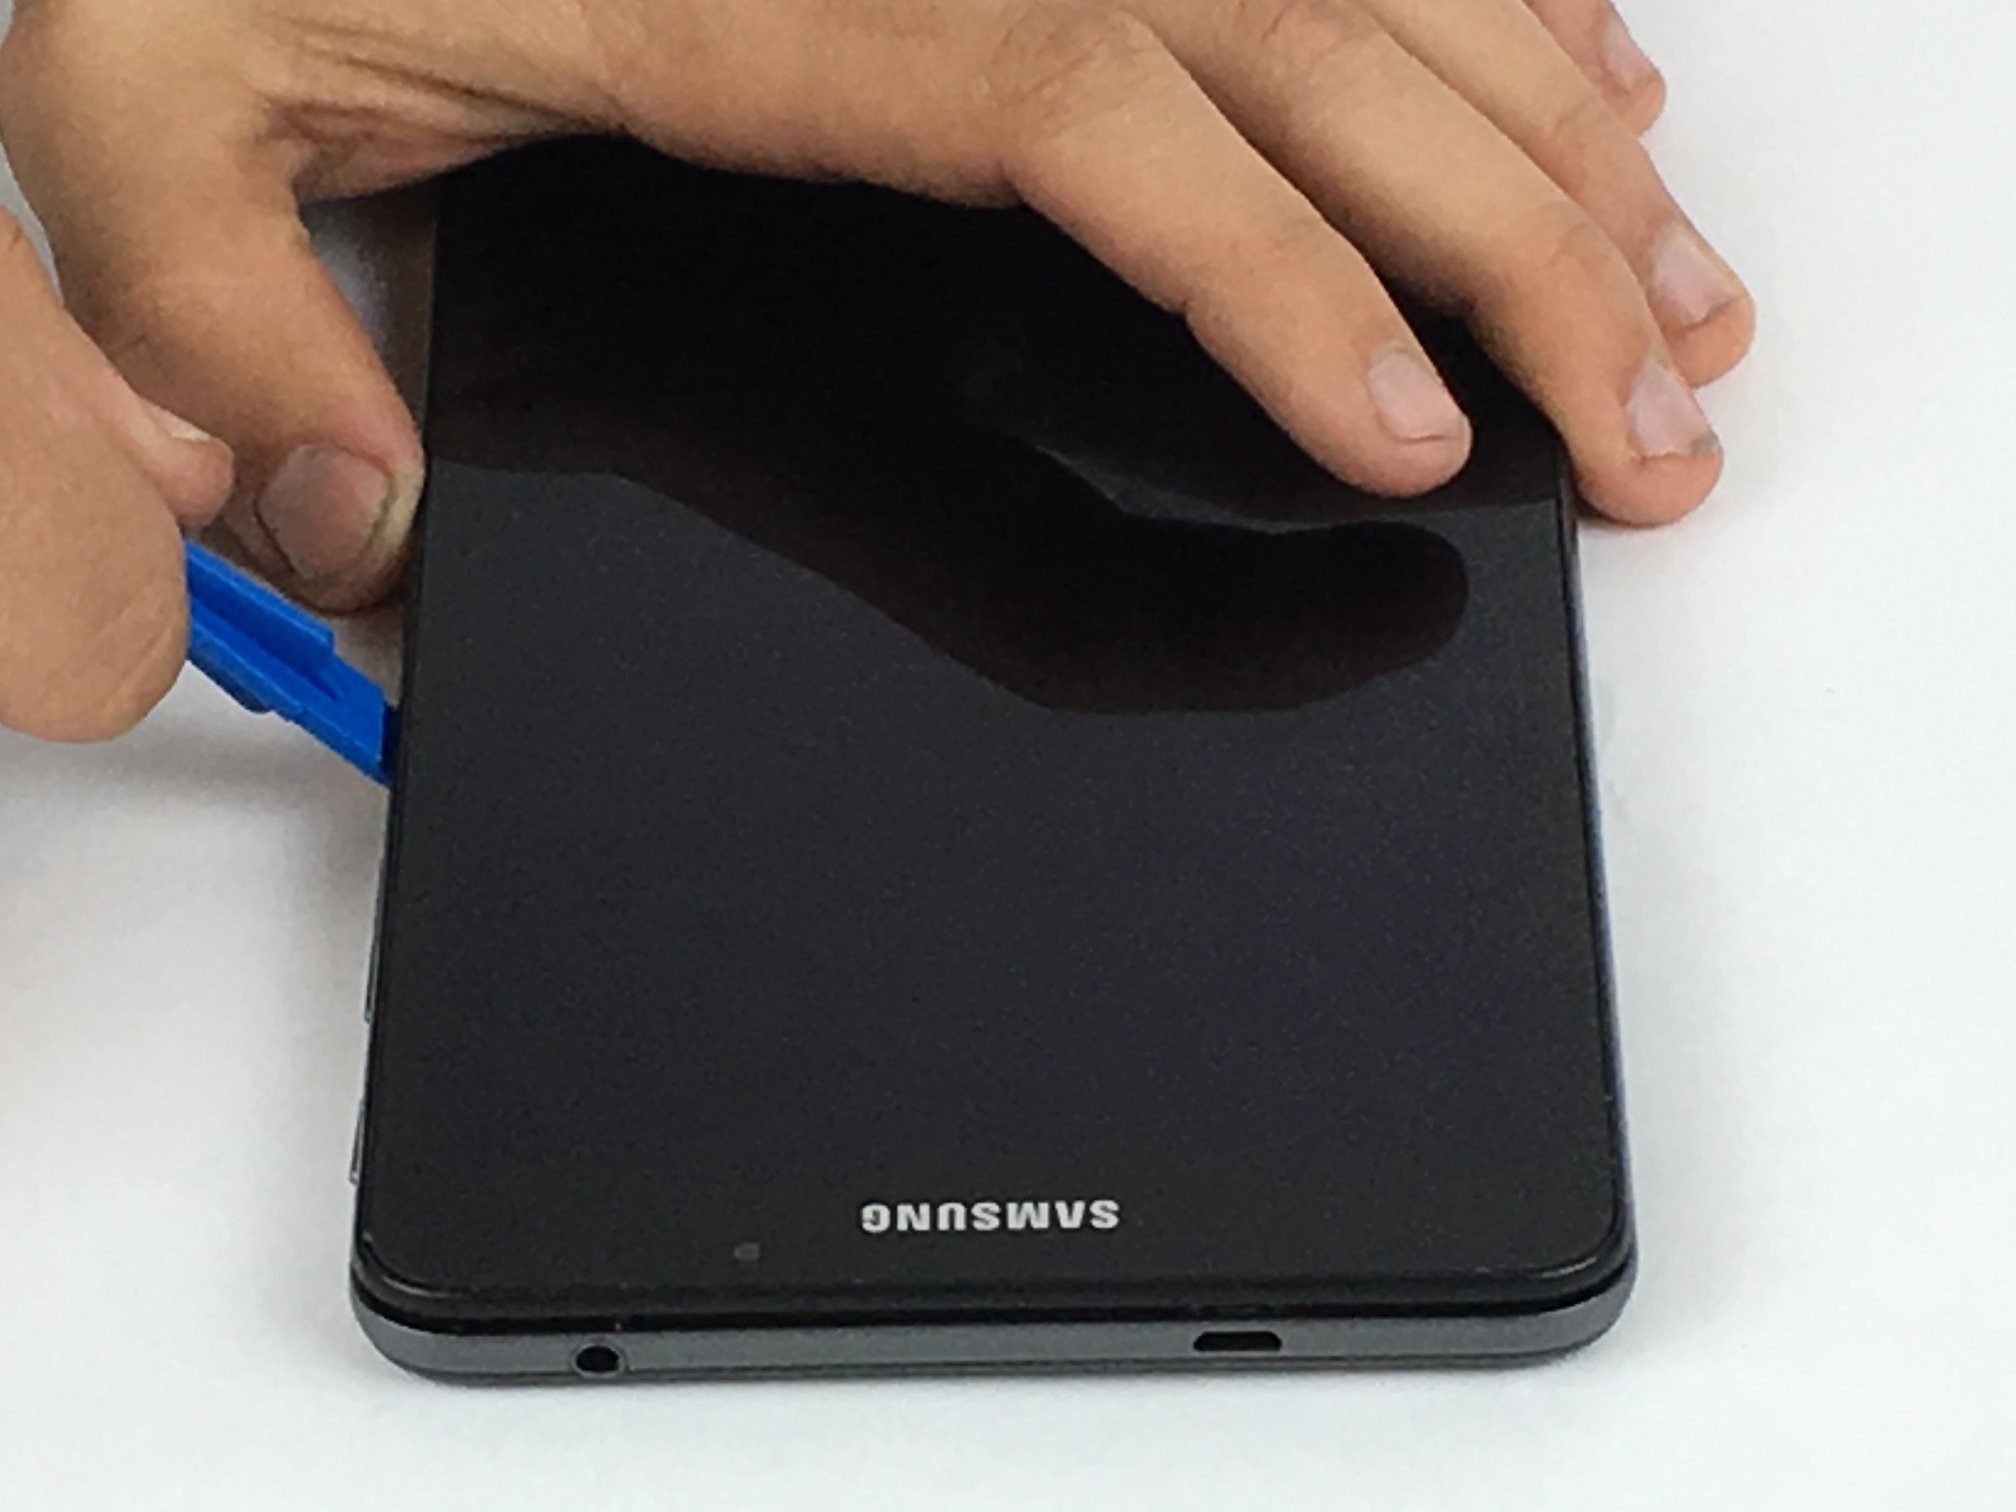
– Gently slide a metal spudger into the gap between the back case and the screen of your device.
– Carefully glide the spudger around the edges, popping open each snap as you go. You’re doing great!
Tools Used


Step 2


– Time to set those screws free! Grab your #000 Phillips screwdriver and remove all eleven 2.8mm screws securing the battery in place. You got this!
Step 3
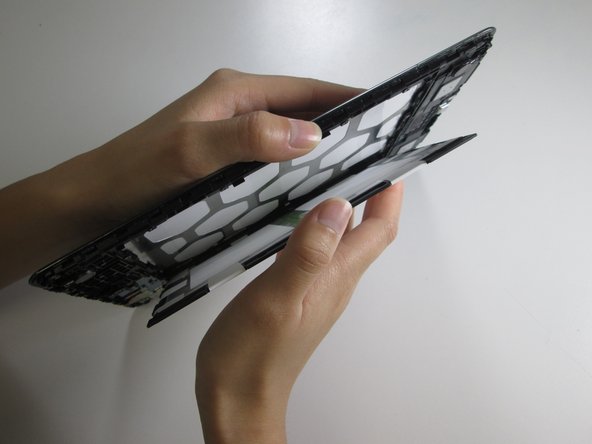

– Place one hand on the battery to hold it steady and use your other hand to grab the outer edge of the device.
– Now, carefully flip the device over, letting the battery slide right into your hand.
Step 4
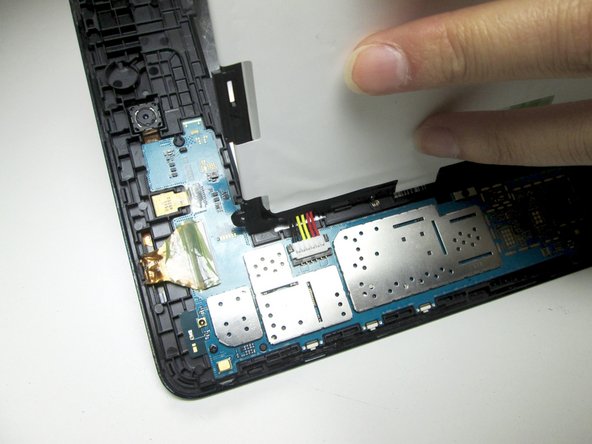

– Gently pull the battery out, leaving it connected only by the black, yellow, and red wires. Keep it chill and steady!
Step 5


– Give the battery a good hold while you gently wrap your thumb and finger around those wires.
– Carefully pull those wires away from the device to pop that white connector out of its cozy black socket.
– Now, lift that battery right up and away from your device – you’ve got this!
Step 6

– Carefully peel away the tape that’s hiding the screen ribbon cable at the top of your device. It’s like unwrapping a present!
– Using your trusty plastic spudger, gently disconnect the ribbon cable from the motherboard, which you’ll find right in the center of the device. You’re doing great!
Tools Used
Step 7

– Grab your trusty plastic spudger and gently slide it around the screen’s edge, carefully prying it away from the device. You’re doing great!
Tools Used
Step 8

– Put everything back together by carefully reversing the steps you took.
– If you hit a snag or want a hand, you can always schedule a repair.
Success!