Samsung Galaxy Tab A9 Plus Battery Replacement
Duration: 45 minutes
Steps: 7 Steps
The Samsung Galaxy Tab A9+ (Models SM-X210, SM-X16B, SM-X215) is your go-to device for on-the-go convenience, and its battery is the real MVP. A solid battery ensures your tablet stays powered up wherever you are. But if you’ve been noticing it drains faster than usual, lags, or simply refuses to turn on, it’s probably time for a battery swap. Don’t worry, this guide will show you exactly how to replace that battery and get your tablet running like new again. Symptoms like quick battery drain, slow performance, or no power at all are classic signs your battery needs replacing. If you’ve tried the usual troubleshooting tricks and things still aren’t working, it’s time for a fresh battery. Opening the tablet? A heat gun will do the trick to soften the tough adhesive keeping the back panel in place—tools like iOpeners just won’t cut it. This guide makes the whole process smooth and beginner-friendly. Just a heads-up: opening the device will break the water-resistant seals, so make sure to use new adhesives to re-seal it afterward. If your screen is cracked, put on safety glasses and gloves, and consider taping it up to avoid any sharp surprises. Handle swollen batteries with care, keep things ventilated, and never puncture them—they’re a fire risk. Old batteries are hazardous waste, so remember to recycle them properly. Stay patient, keep your parts organized, and use the right tools without forcing anything. Before you start, power off and unplug your device to avoid any electrical mishaps. It’s also a good idea to back up important data first, just in case. And if you need help, you can always schedule a repair.
Step 1

When using a heat gun, keep it moving and avoid focusing the heat on a single spot for too long — otherwise, you might end up cooking your device! Take it slow and steady, and if you need a hand, you can always schedule a repair.
Set your heat gun to 5 when warming up that adhesive. You’ve got this!
– Power off the device by holding the power button for 10-15 seconds. Let’s give it a quick break!
– Grab the heat gun and gently warm up the edge of the device to loosen that stubborn adhesive holding the screen. Be patient, it’ll give in soon!
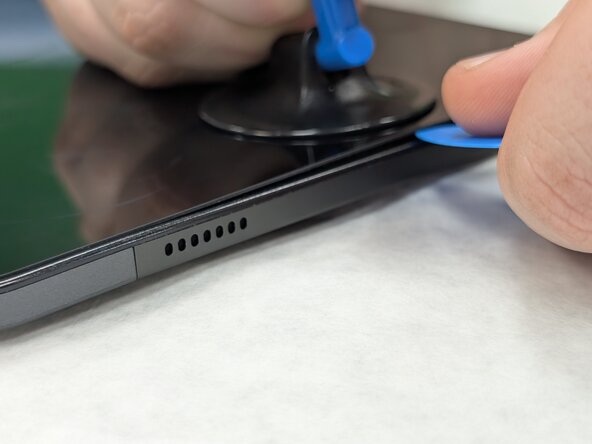
– Use the suction tool to carefully lift the screen from the case, and slip in an opening pick to keep it separated as you work your way around.
– Next, slide a second pick along the edge to cut through the last bit of glue that’s hanging on for dear life. Don’t worry, it’ll go down smoothly!
– Keep placing those plastic opening picks around the edge, about an inch apart, until the screen is fully separated. It’s like giving it a gentle push until it’s free!
Tools Used

Step 2

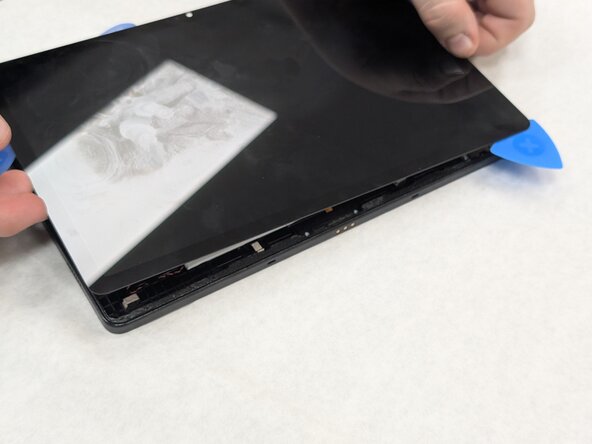
– Carefully lift the screen upward towards the top of the device (that’s the side with the front camera). Just make sure you’re gentle with the orange flex cable – it’s fragile!
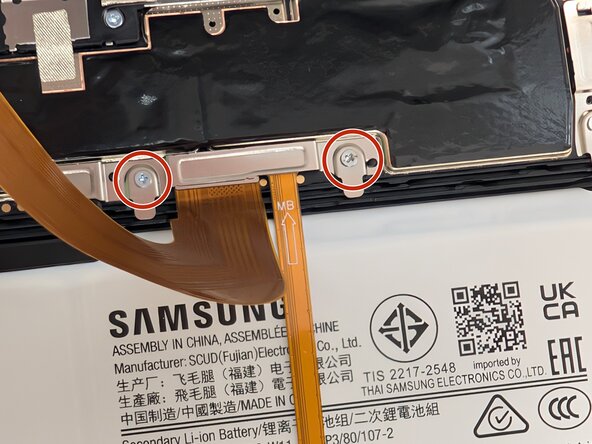
– Grab a JIS #00 screwdriver and unscrew the two 2.4 mm screws holding the metal bracket in place. Keep those screws safe – you’ll need them later.
– Now, take off the metal bracket covering the connector and set it aside. You’ll be putting it back in the next steps, so don’t lose it!
Step 3


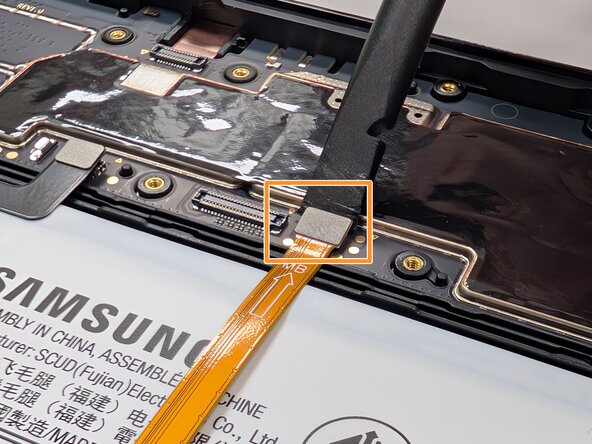
– Gently work a spudger or opening pick under the adhesive cable to loosen it up and disconnect the cable with ease.
– Carefully lift off the display screen from the tablet.
Tools Used

Step 4

If you’re struggling to peel off the adhesive, give adhesive remover a shot. It can make the job a lot easier. If you need help, you can always schedule a repair.
– Grab your trusty spudger and gently pry away any leftover adhesive that’s clinging on to the edges of your device’s back housing. You’ve got this!
Tools Used
Step 5

Handle those press connectors with care—being gentle is the way to go, or you might risk damaging them. Take your time and be patient!
– Slide a spudger or an opening tool under the edge of the connector and gently lift it up to unplug that lively orange flex cable.
– Give that black battery press connector a little nudge with your spudger to disconnect it.
Tools Used
Step 6
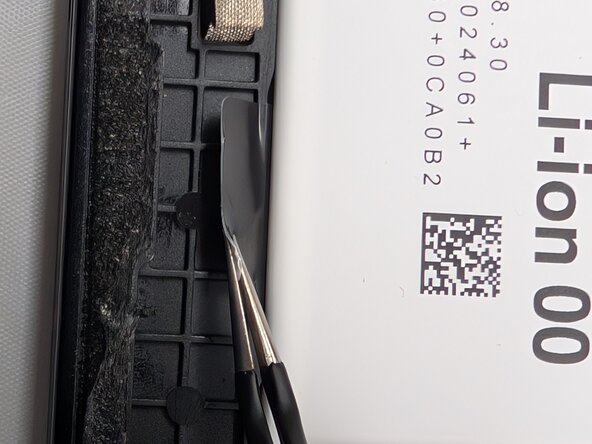

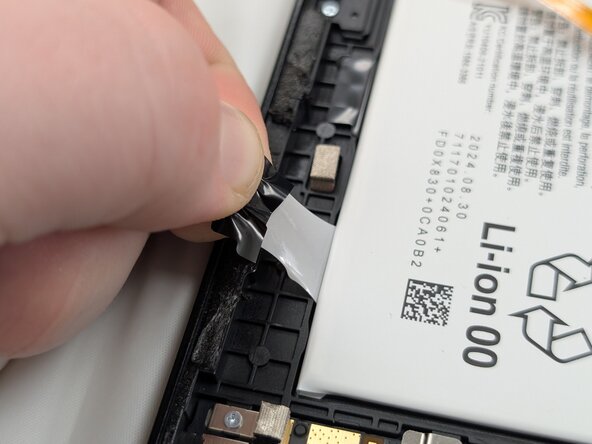
– Grab a trusty pair of tweezers and gently tug on those four adhesive tabs until you can get a solid grip with your fingers.
– Once you’ve pulled out enough of the strips, take your hands and carefully extract all four tabs from beneath the battery.
Step 7

Avoid using that spudger to pry out the battery! It might bend or warp the battery, and we definitely don’t want any fire hazards happening. Stay safe and smart while you work!
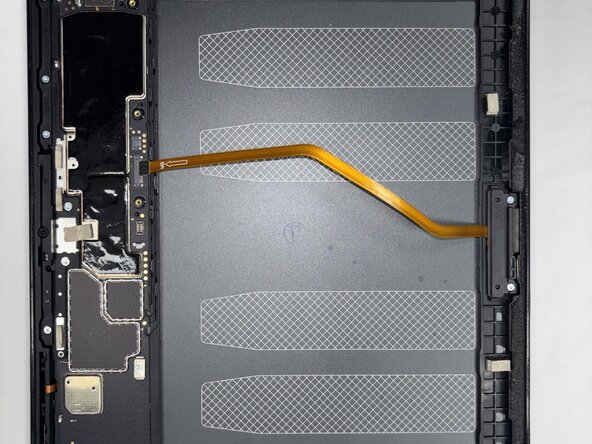
– Grab a spudger and gently lift the battery from underneath until you can hold it securely, then carefully remove it completely. If you need help, you can always schedule a repair.
Tools Used
Success!