Samsung Galaxy Tab A9 Plus Charging Port Replacement
Duration: 45 minutes
Steps: 8 Steps
If your Samsung Galaxy Tab A9+ (Models SM-X210, SM-X16B, SM-X215) isn’t charging right, takes forever to juice up, or the cable feels like it’s doing the cha-cha in the port, your charging port might be the culprit. This step-by-step guide will show you how to swap out the charging port module so your Tab can get back to charging and syncing smoothly. Wobbly connections and spotty charging are classic signs the port’s worn out. If quick fixes haven’t done the trick, it’s time for a replacement. Popping open the tablet needs a heat gun—this adhesive is tough, and standard tools just don’t cut it. Don’t worry, though: the process is straightforward, even if you’re new to repairs. Power off and unplug your device before you start, and back up your important stuff. Keep in mind, cracking open the case will break the water-resistant seal, so you’ll need new adhesive to get that back. If your screen’s already cracked, grab some safety glasses and gloves, and tape it up to avoid any glass drama. Stumble across a puffy battery? Handle it with care—those things are no joke. Stay organized, use the right tools, and don’t force anything. By following these steps, you’ll have your charging port swapped out and your Tab powered up again in no time. If things get overwhelming, you can always schedule a repair.
Step 1

Handle the heat gun with care—too much heat in one spot or holding it there too long can cause damage. Stay cool, stay safe! If you need help, you can always schedule a repair.
Set your heat gun to a cozy 5 when warming up that adhesive!
– First things first, power down your device by holding that power button for about 10-15 seconds. It’s like giving it a little nap!
– Now grab your trusty heat gun and warm up the edges of your device evenly. This will help loosen up the adhesive that’s keeping that screen stuck tight to the tablet.
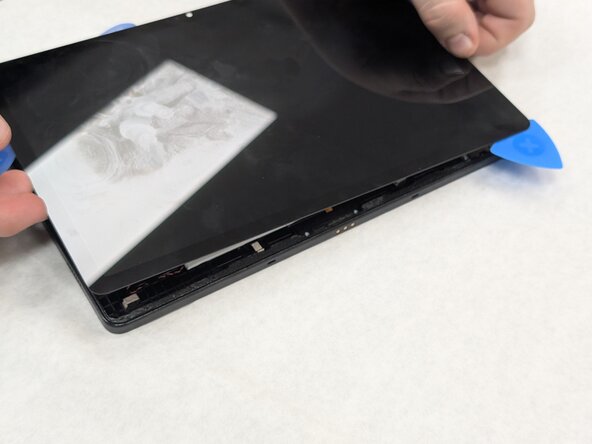
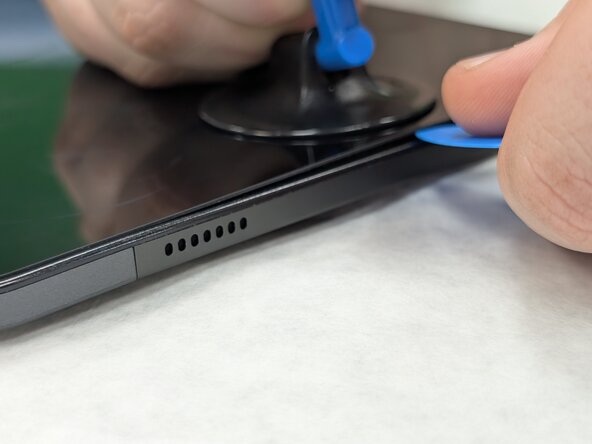
– Next, use the suction tool to gently pry the screen away from the case. Slip in an opening pick to keep the screen edge from getting too cozy with the device.
– Take a second pick and carefully slide it around the edge to slice through any leftover glue. You’re getting closer!
– Keep popping those plastic opening picks into the gaps every inch or so until the screen finally decides to part ways with the device. Almost there!
Tools Used

Step 2

– Carefully lift the screen up towards the top of the device (the side with the front camera), making sure to avoid any damage to the orange flex cable.
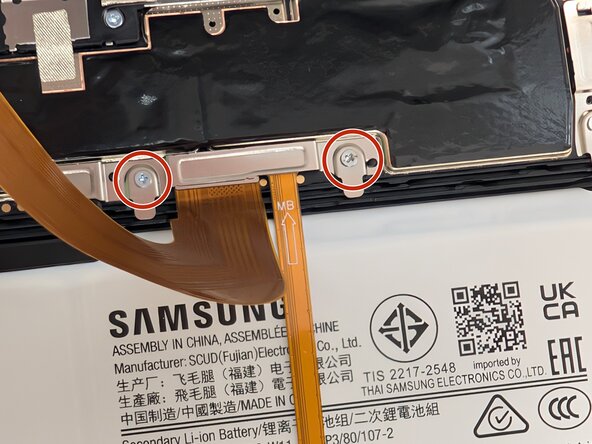
– Grab a JIS #00 screwdriver and use it to remove two 2.4 mm screws holding the metal bracket in place.
– Take off the metal bracket that’s covering the connector, and set it aside for reassembly later.
Step 3


– Gently slide a spudger or opening pick underneath the glued cable to loosen the adhesive and disconnect the cable.
– Carefully lift the display screen away from the tablet to remove it.
Tools Used

Step 4

Having trouble peeling off that stubborn adhesive? No worries! Grab some adhesive remover and give it a gentle dab. It’ll loosen things up in no time. Need a hand? Remember, you can always schedule a repair with Salvation Repair for extra help.
– Grab a spudger and gently pry away any leftover adhesive hugging the edges of the rear housing. Keep it smooth and steady—your device will thank you!
Tools Used
Step 5

– Grab a JIS #00 screwdriver and carefully unscrew the four 2.3 mm screws holding the USB port in place at the bottom edge of your device. If you need help, you can always schedule a repair.
Step 6
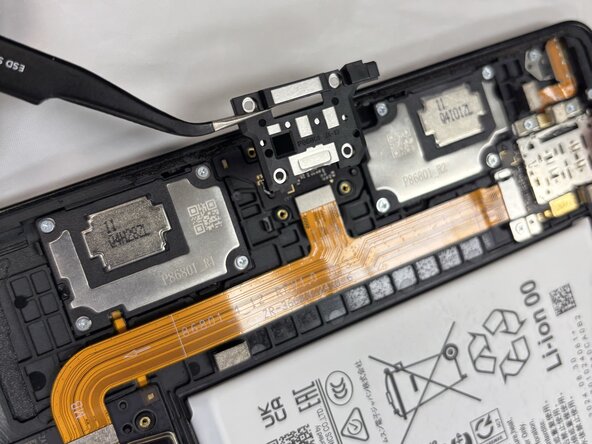
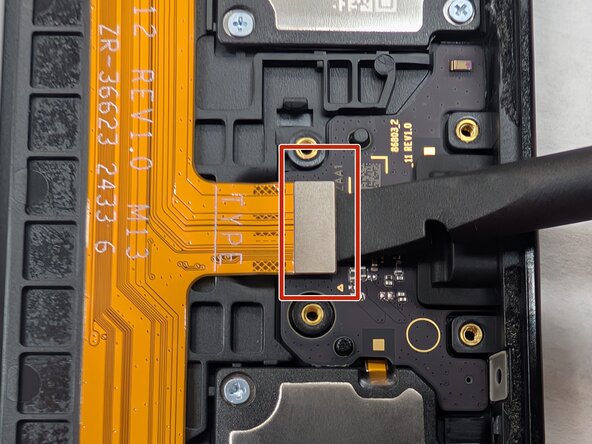

– Gently nudge a spudger into the gap between the USB cover and the device’s outer shell to pop it off.
– Slide a spudger or an opening tool underneath the edge of the connector and carefully lift straight up to detach it from the motherboard.
Tools Used
Step 7
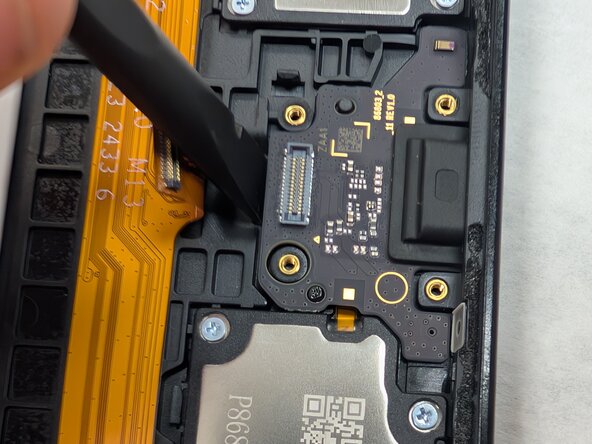

Grab a spudger and gently pry to create a small gap between the USB port and the case. This will make it much easier to lift out. If you need help, you can always schedule a repair.
– Gently insert the tip of a spudger into the small gap beneath the flex cable to carefully lift and remove the USB port. If you need help, you can always schedule a repair.
Tools Used
Step 8
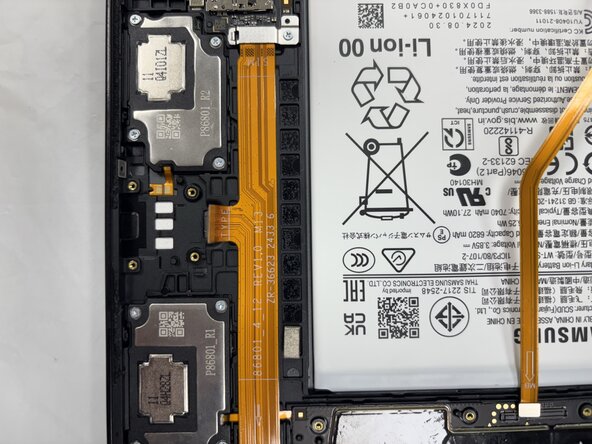

Watch out when removing the USB port—it’s super close to the press connector, and a little slip could cause some damage. Take it slow and steady!
– Gently pop out the USB port with your fingers—easy does it!
Success!