
Samsung Galaxy Tab A9 Plus Screen Replacement
Duration: 45 minutes
Steps: 4 Steps
Samsung Galaxy Tab A9 Plus
Your Samsung Galaxy Tab A9 Plus screen is the gateway to all your device interactions. If it’s cracked, unresponsive, or showing wonky images, it’s probably time for a screen swap. In this step-by-step guide, we’ll help you replace the whole shebang—screen and digitizer—since they’re usually glued together as one unit. Symptoms like spiderweb cracks, dead zones on the touchscreen, or distorted visuals are signs you need a new display. Sometimes, you’ll need to remove the screen to get to the internal parts of your tablet. Keep in mind, opening up the device breaks the water-resistant seals, so new adhesives will be needed to keep things sealed up tight again. A quick heads-up: this repair involves using a heat gun to soften the adhesive holding the screen in place. Be super careful—heat guns get hot fast and can damage your device if you linger too long in one spot or get too close. They’re hot enough to burn, so safety glasses, gloves, and tape are a good idea if your screen is cracked to avoid shards flying around. Before starting, make sure your device is powered off and unplugged from any chargers. If you need help, you can always schedule a repair.
Step 1

Be careful when using the heat gun; it can damage the device if you heat one area too much or for too long.
The heat gun should be set on 5 when using it to heat the adhesive.
– Power the device off by holding the power button for 10-15 seconds.
– Use the heat gun to evenly heat the edge of the device and loosen the adhesive securing the screen to the tablet.
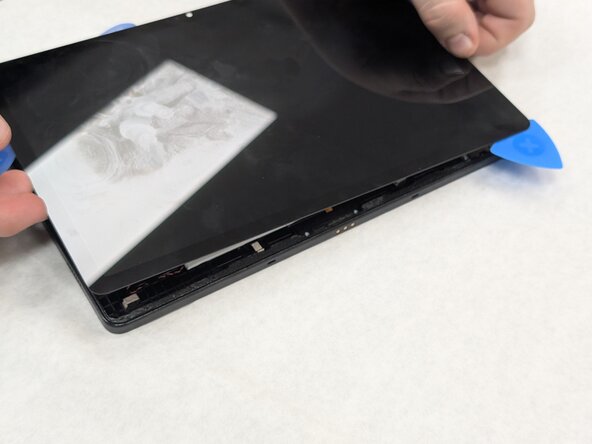
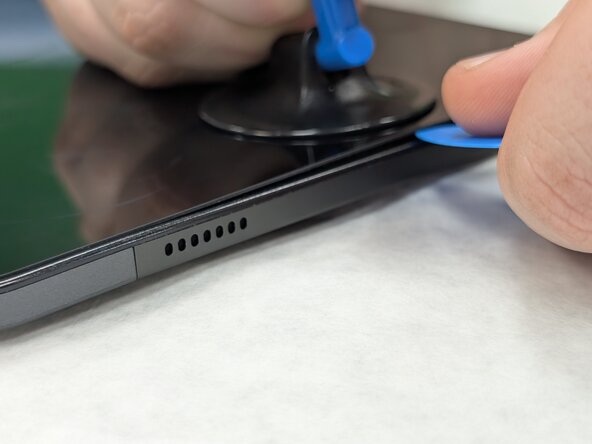
– Use the suction tool to separate the screen from the case, and insert an opening pick to help keep the screen edge separated from the rest of the device.
– Slide a second pick around the edge to cut through the remaining glue of the screen.
– Continue placing plastic opening picks in the gaps about every inch or so intill the screen fully separates.
Tools Used

Step 2

– Gently lift the screen towards the top of the device (the side with the front camera), being careful not to damage the orange flex cable.
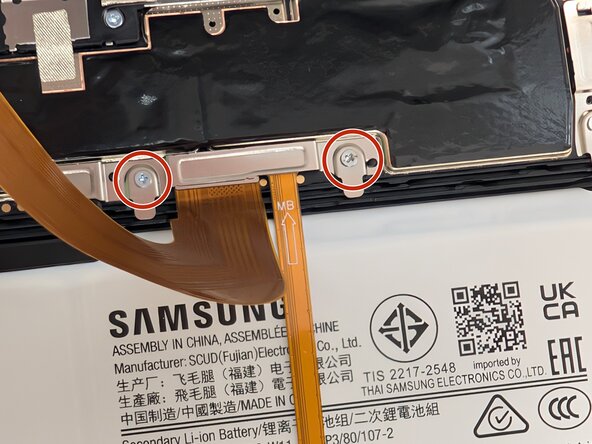
– Use a JIS #00 screwdriver to remove two 2.4 mm screws securing the metal bracket.
– Remove the metal bracket covering the connector and place it to the side to use for reassembly.
Step 3


– Carefully slide a spudger or opening pick under the glued-down cable to separate its adhesive and disconnect the cable.
– Remove the display screen from the tablet.
Tools Used

Step 4

If you are having trouble removing the adhesive, try using adhesive remover.
– Use a spudger to remove any excess adhesive remaining on the edges of the device’s rear housing.
Tools Used
Success!