Samsung Galaxy Tab E 8.0 Screen Replacement
Duration: 45 minutes
Steps: 12 Steps
The screen of the Samsung Galaxy Tab E 8.0 may become damaged if the device is dropped or struck by a hard object. This guide shows how to replace the tablet’s screen, which is attached to the front panel.
Step 1


Double-check that the device is powered down and the SD card is out before removing the back cover—it’s all about safe and smooth sailing.
– Grab your trusty opening tool and gently work your way around the edges of the back case. Just take your time and let the tool do its thing as you pop it off!
Tools Used

Step 2


– Grab your trusty tweezers and flip up the little connector that holds the back camera to the motherboard—think of it as lifting a tiny trapdoor.
– Now, gently pluck the back camera out from the motherboard with your hand. Easy does it—no wrestling required!
Tools Used

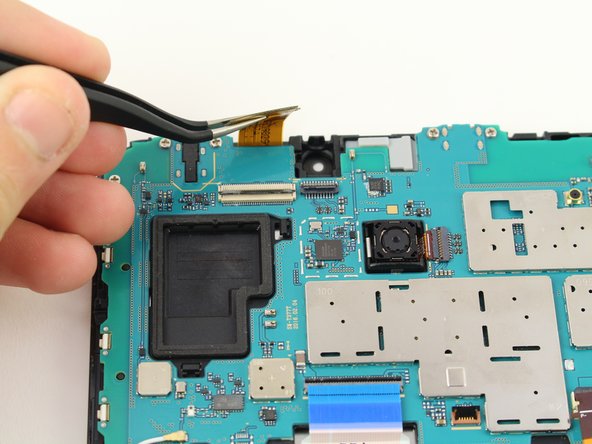
Step 3


– Grab those tweezers and gently lift the switch that connects the front camera to the motherboard. You’ve got this!
– Now, carefully remove the front camera from the motherboard by lifting it with the tweezers. Easy peasy!
Tools Used
Step 4


– Grab your tweezers and flip the switch located at the bottom of the strap that covers the battery.
– Lift the strap with your hand to release it from the switch.
Tools Used
Step 5


– Grab your trusty tweezers and carefully flip the switch that connects the top of the strap to the motherboard. Easy does it!
– Gently lift the top end of the strap with your hand, then fully remove the strap from the device. You’re almost there!
Tools Used
Step 6

This connector won’t fully detach, but it will loosen up from the motherboard. Just give it a gentle nudge and you’re good to go!
– Grab your trusty tweezers and give that connector switch a gentle flip.
– Now, carefully lift the connector off the motherboard—just like lifting a lid off a pot of soup, but with more precision!
Tools Used
Step 7


This switch can come loose from the device, but it just needs to be unplugged from the motherboard—no biggie!
Make sure the blue ribbon cable isn’t tucked under the motherboard when you put everything back together.
– Grab those tweezers and give the blue connector switch on the motherboard a gentle flip!
– Now, carefully lift that connector right off the motherboard.
Tools Used
Step 8


The switch can be easily detached from the device, but all it takes is a quick disconnect from the motherboard. No big deal!
– Grab your tweezers and gently flip the little switch that connects the battery to the motherboard.
– Carefully lift the connector up and off the motherboard—easy does it!
Tools Used
Step 9


– Grab your JIS #00 screwdriver and take out the six 4.5mm screws you’ll find lining the top of the motherboard.
– Carefully lift the motherboard up with your hand to separate it from the rest of the device.
Step 10


The battery is secured with some adhesive on the back, so be prepared to use a bit of force to get it free. Don’t worry, patience is key—just work carefully, and you’ll have it out in no time.
– Grab the tweezers and gently lift the flap on the left side of the battery. Then, use your fingers to lift the battery out. If you need help, you can always schedule a repair.
Tools Used
Step 11

Using the metal spudger with too much force can turn a little crack into a big headache—go easy on it!
A metal spudger might just be your best buddy for sliding between the screen components.
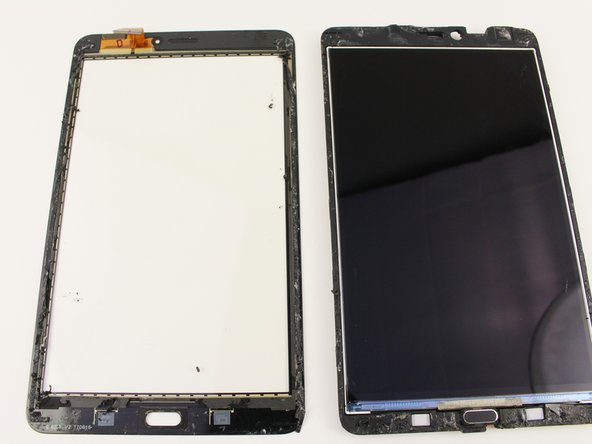
– Warm up the outer half-inch of the screen with a heat gun, hair dryer, or an iOpener, until it’s nice and toasty—but not hot enough to roast your fingertips or fry any parts inside.
– Slide the opening tool between the plastic screen and the device, and gently pry the screen loose like you’re opening a stubborn snack container.
Tools Used

Step 12

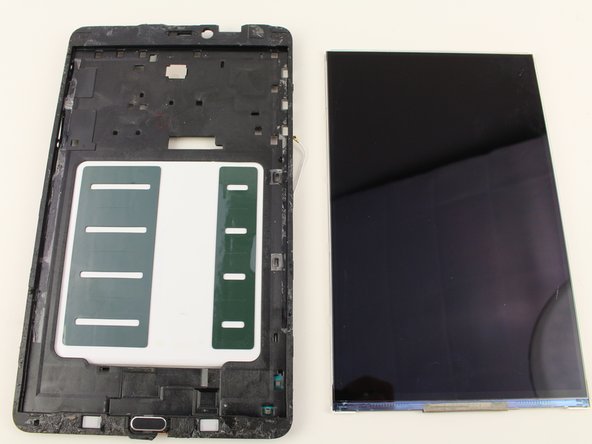
– Grab your metal spudger and gently work it between the device and the internal screen to loosen things up.
– Carefully pry the screen away from the device, making sure not to force anything. If you need help, you can always schedule a repair.
Tools Used
Success!