Samsung Galaxy Tab E 9.6 Verizon Back Camera Replacement
Duration: 45 minutes
Steps: 4 Steps
Accidentally drop your tablet or phone? The camera might not survive the fall. No worries! This guide walks you through removing the back cover of your tablet so you can easily swap out that camera and get back to snapping shots in no time. If you need help, you can always schedule a repair.
Step 1

Power down your device completely before getting started.
Avoid popping the plastic opening tool right over the power and headphone buttons—give those areas some space!
– Let’s get started! Use your trusty plastic opening tool to carefully pry open the device. Begin in the center and gently wedge the angled tip between the plastic back and the screen.
– Now, apply some gentle pressure and wiggle the tool back and forth to loosen the plastic back. Remember to be patient and take your time – we’ve got this!
Step 2


– After loosening the bottom edge, grab that suction tool and give it a gentle pull to separate the pieces.
– In the second picture, you can see what’s going on inside the tablet once you’ve popped off the back cover. Looks like progress!
Step 3
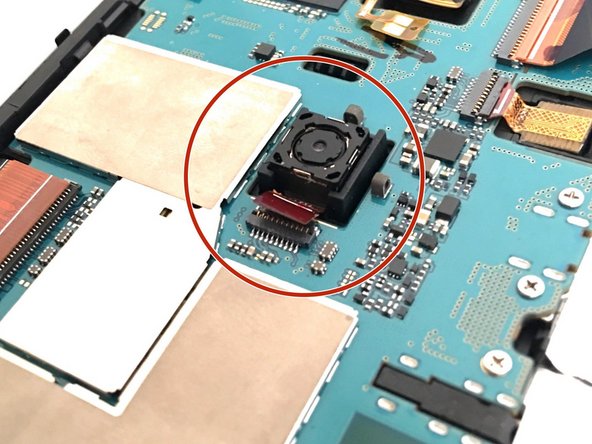

– Check out the first image to spot where the back camera hangs out.
– Carefully unplug the rectangular connector linking the back camera to the motherboard.
Step 4

– Put your device back together by going through these steps in reverse—it’s like hitting rewind on your favorite playlist.
–
Success!
