Samsung Galaxy Tab E 9.6 Verizon Battery Replacement
Duration: 45 minutes
Steps: 7 Steps
Ready to give your Samsung Galaxy Tab E 9.6 Verizon a fresh new life? This guide will walk you through replacing the battery step by step. Don’t worry, you’ve got this! If you need a hand at any point, just schedule a repair.
Step 1

Before you get started, make sure to remove any micro-SD or SIM cards, and double-check that your device is powered OFF. Also, disconnect all external gadgets from your tablet to keep things safe and smooth sailing.
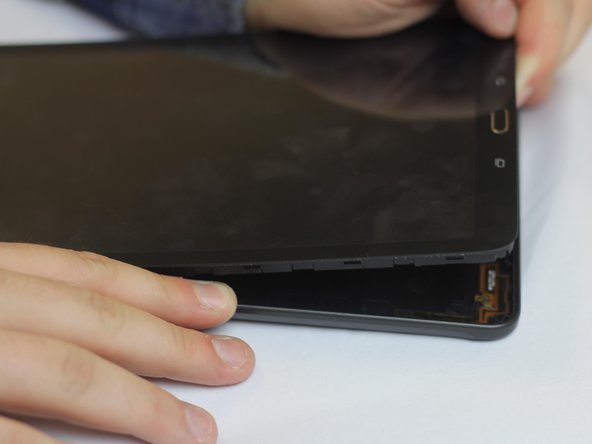
Step 2


This step might take a little extra muscle. If it feels tricky, try using a suction cup to give yourself a little more grip on the screen.
– Gently wedge a plastic opening tool between the screen and the back cover, working your way around the edges.
– Carefully slide the plastic tool along the perimeter to release the clips and unfasten the casing.
Step 3

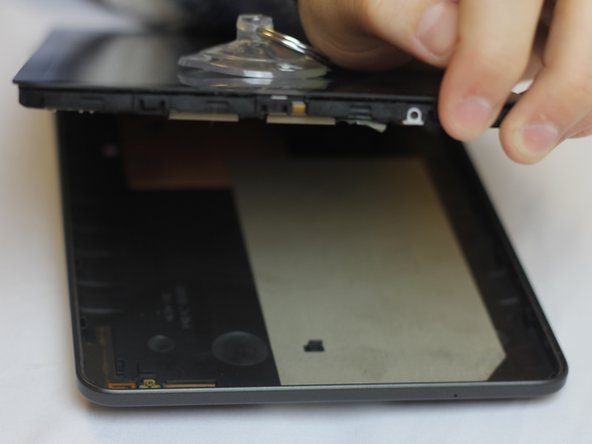
– As you start popping those clips apart, it’ll get smoother and smoother.
– Once about half the clips are free, gently pry the back cover off with your hands—no need to rush!
– If you’re feeling a bit stuck, a suction cup can lend a helping hand to ease things open.
Step 4


– Now that you’ve removed the back casing, flip the device over and take a look at the two cables that need to be disconnected from the motherboard. This is where the magic happens!
– First up, let’s tackle the ribbon cable that runs across the battery. Use a spudger tool or some trusty tweezers to gently lift the black part of the connector upwards towards the battery. Then, use those tweezers to carefully pull the ribbon cable out of its housing.
– Next, let’s move on to the cable that connects the battery to the motherboard. To remove it, start by releasing the housing lock by flipping the back part of the connector upwards. Then, use your tweezers to carefully remove the cable. If you’re feeling stuck, don’t worry – it’s all part of the process!
Step 5

– Six tiny 3mm PH000 screws are holding the battery down. Grab your trusty Phillips #000 screwdriver and carefully unscrew all six to set the battery free.
Tools Used

Step 6

– Along with the six screws, the battery is also stuck down with a little adhesive. If this is your first time taking out the battery, you’ll need to gently break the bond with the sticky stuff.
– Grab a plastic opening tool to work your way around the edges and loosen the adhesive. Pry the battery upwards carefully as you go. Do this around the whole perimeter to release it.
Be gentle when slipping the opening tool between the battery and the case. There’s a little gap right under the battery’s cable—where it sticks out from the black corner—perfect for safely slipping in your prying tool. Take your time and work carefully, and if you need a hand, you can always schedule a repair.
Gently work your way around the battery, breaking the adhesive evenly without going all Hulk Smash in one spot. To keep the battery safe from any accidental pokes or pricks, circle it a few times with your opening tool if you need to.
Step 7

– Carefully peel away the adhesive holding the battery in place, then gently lift the battery straight out of its compartment. If you’re feeling stuck at any point, remember you can always schedule a repair for a hand.
Success!
