Samsung Galaxy Tab E 9.6 Verizon Front Camera Replacement
Duration: 45 minutes
Steps: 5 Steps
Get ready to breathe new life into your Samsung Galaxy Tab E 9.6 Verizon by replacing the front camera. If it’s not working properly or has been damaged, this step-by-step guide from Salvation Repair will walk you through the process. Before you start, make sure to back up your files, power off your device, and unplug it from the power source. Take a quick look at the troubleshooting page to rule out any simple fixes. Then, follow along with us to replace that front camera and get your tablet back in top shape. If you need help along the way, you can always schedule a repair.
Step 1

Before diving in, make sure to pop out any micro-SD or SIM cards. Double-check that your device is powered off and unplugged from any power source. Also, disconnect all external gadgets like keyboards, chargers, or headphones from your tablet. If you need a hand along the way, you can always schedule a repair.
Step 2


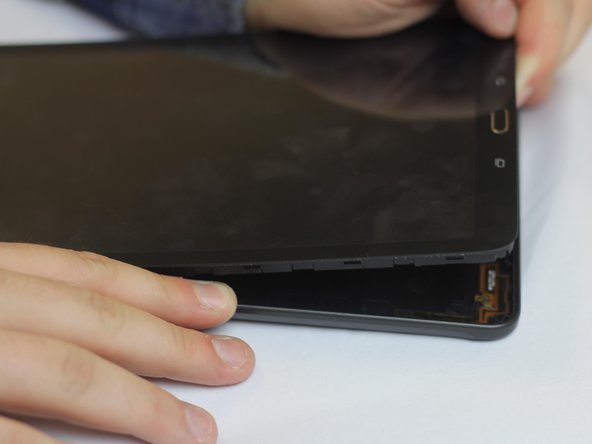
This step might take a bit more muscle than you think. If it’s being stubborn, grab a suction cup and give the screen a gentle lift to help things along.
– Gently slide the plastic opening tool between the device’s screen and back cover, like you’re opening a secret compartment.
– Work your way around the edges with the tool, carefully releasing the plastic clips that are holding the casing together. Easy does it!
Step 3

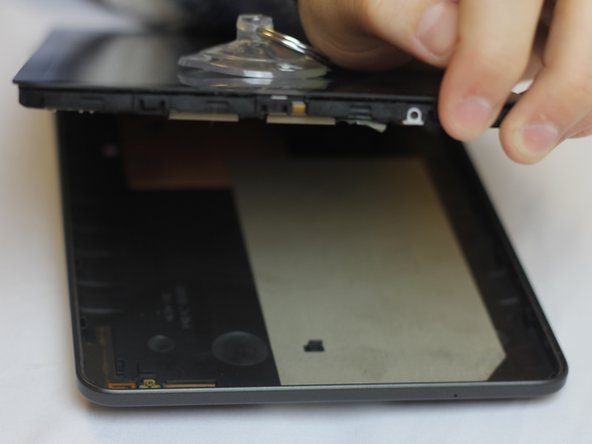
– As you pop more clips loose, it’ll get easier to work your way around the device.
– Once about half the clips are free, gently use your hands to peel the back cover away from the device.
– If you want, a suction cup can lend a hand here to help pull things apart smoothly.
Step 4

The front camera sits pretty at the top, smack in the middle of the motherboard. You can spot it easily—just follow the red rectangle in the image to your left. It’s right there, ready for action!
Step 5
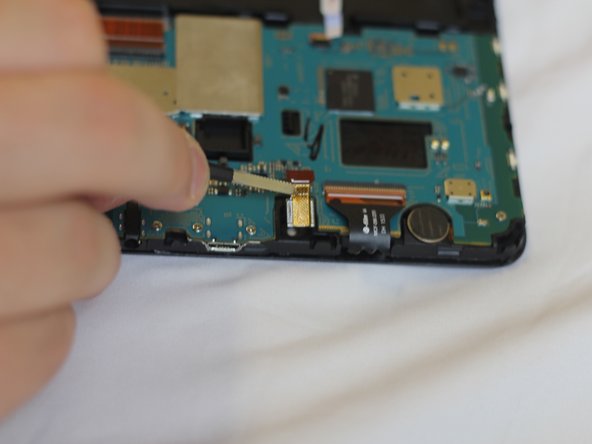


– Use tweezers to gently flip the black latch away from the camera (towards the bottom of the tablet) to unplug the ribbon cables connecting the camera to the motherboard.
– Slowly and carefully slide the camera out once it’s free.
Tools Used

Success!
