Samsung Galaxy Tab E 9.6 Wi-Fi Battery Replacement
Duration: 45 minutes
Steps: 6 Steps
This step is pretty simple, but let’s keep it smooth. Make sure you place the display on a soft surface to avoid any damage. And just to be safe, it’s a good idea to wear an anti-static bracelet or use an anti-static station. This helps protect those sensitive circuits from any sneaky static discharge. It’s all about keeping things cool and safe!
Step 1


Before you start, make sure to power down your tablet and disconnect it from any external power source. Safety first, always!
This step might take a bit of muscle to get it open. Don’t worry, give it a firm push. Once you’ve created a gap, just watch out for those fingers—you don’t want to pinch them!
– Slide one of the blue plastic opening tools between the glass display and the tablet’s outer shell edge to pop that seal loose. It doesn’t matter where you start—once you get a little gap going, just keep working your way around the edge.
– After you’ve created a gap all around, the display assembly and back casing should come apart smoothly with a gentle pull.
Step 2

Careful now—don’t poke or mess up that white battery casing!
– On the back of the display, you’ll find all the main computer parts, including the battery. To get to them, you’ll need to remove six 3-millimeter Phillips PH000 screws and disconnect two ribbon cables. Take your time, and if you need a hand, you can always schedule a repair.
Step 3
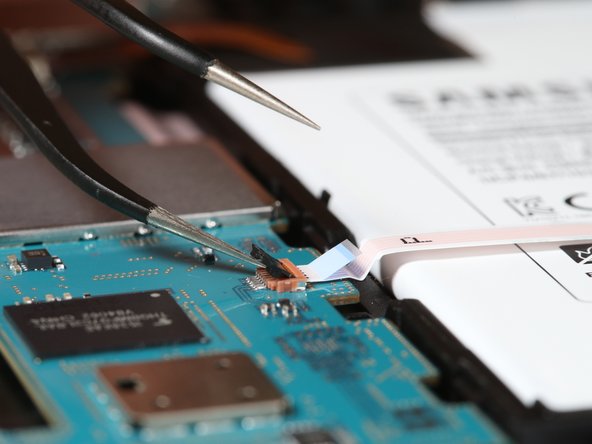

– Start by unplugging the longer ribbon cable—it’s the one that stretches over the whole battery and is highlighted in orange in the Step 2 pic.
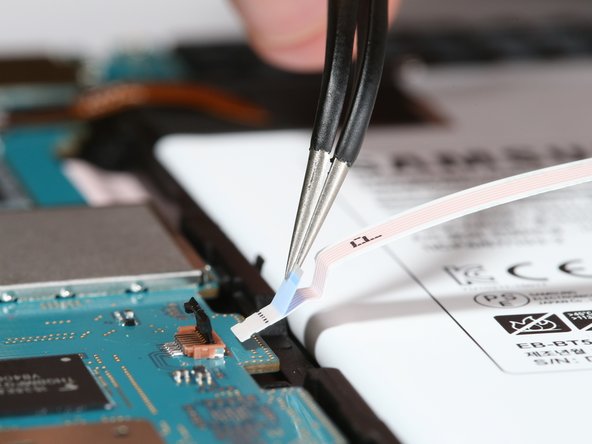
– Next, use your precision tweezers to carefully peel back the green tape covering the clip at the ribbon cable’s end.
– Finally, lift the clip lever gently, and the ribbon cable should slide right out without any fuss.
Tools Used

Step 4

– The next ribbon cable to detach is the wider, orange one. It’s pretty much a mirror image of step 2. You’ll see this ribbon highlighted in yellow in the image from step 2. Keep at it—you’re doing great! If you need help, you can always schedule a repair.
Step 5

– Grab your PH000 driver and gently unscrew the six tiny three-millimeter screws holding the battery casing in place. All six screws are highlighted with red circles in the picture over in step 2, so you know exactly where to focus your screwdriver skills.
Step 6

– After you’ve tackled those 6 screws and 2 ribbon cables, the battery should just slide right out of the display assembly without any fuss.
– Now, hold the tablet on both sides, give it a little tilt, and let the battery drop into your other hand. Simple as that.
– If the battery doesn’t want to budge, double check to make sure all 6 screws and 2 ribbon cables are fully removed. Sometimes those sneaky cables like to hold on tight!
Success!

