Samsung Galaxy Tab S 8.4 Repair Guide
Duration: 45 minutes
Steps: 4 Steps
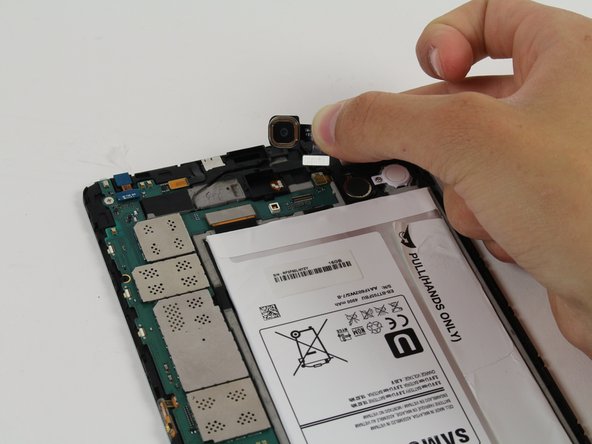
If your device took a tumble or had a rough day, there’s a good chance the rear-facing camera got cracked or scratched. No worries—this guide walks you through replacing it step by step, so your photos can be crystal clear again.
Step 1
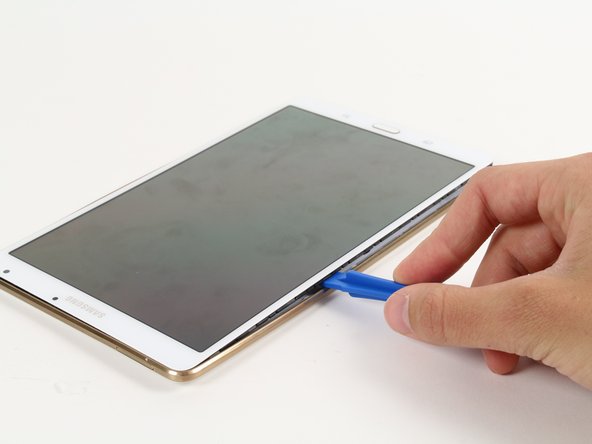
– Slide the plastic opening tool gently between the display and the back cover rim of your device.
– Carefully glide the tool downwards until you notice a little gap forming between the tablet and the back cover.
Step 2
Gently pry around all edges to completely detach the screen from the device backing.
Removing the back cover for the first time can be a bit challenging, but don’t worry—you got this!
– Grab your trusty plastic opening tool and gently work it around the edge of the device—keep going, bit by bit, to nudge the screen and back cover apart. Slow and steady wins this race!
Step 4
– Now it’s time to put your device back together! Just retrace your steps and do everything in reverse. You’ve got this!
– If you feel like taking a break or need a hand, just schedule a repair.
– Great job on getting to this point!
Success!


