Samsung Galaxy Tab S2 Auxiliary Port Replacement Guide
Duration: 45 minutes
Steps: 8 Steps
Are your headphones feeling a bit wobbly? Is the sound coming through them crackling or just not up to par? If that’s the case, swapping out your auxiliary port might just do the trick!
Step 1
Hey there! Just a friendly reminder: working on your device while it’s powered up can give you a bit of a zap! So, let’s play it safe—make sure to power down and unplug before diving in.
– Warm up all the seams of your device with an iOpener or heat gun to help loosen that stubborn adhesive holding the screen in place. Let’s get that screen ready for action!
Tools Used
Step 2
Hey there! Just a heads up: there’s a ribbon cable snugly attached to the back of the screen. Try to keep the screen’s lift-off to a chill 3-4 inches max before you disconnect that ribbon cable. Going beyond that could lead to some unwanted device drama!
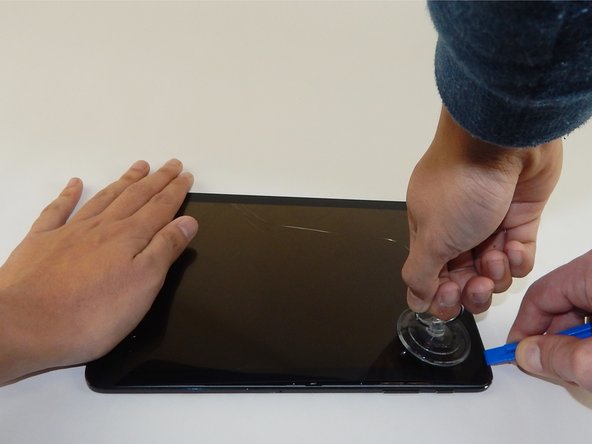
– Gently slide the plastic opening tool into the little gap on the side of your tablet, right near a corner where you want to kick off the screen removal.
– Next up, grab that small suction cup and stick it on the screen close to the corner where your trusty plastic opening tool is hanging out.
– Now, give that suction cup a little lift while you push down with the plastic opening tool to pop off the screen (you might want to have a buddy hold the device steady for some extra muscle).
Step 3
A piece of shiny silver tape is carefully laid over the golden ribbon cable that connects the screen to the tablet. It’s a simple yet effective way to keep things snug and secure!
– Take those tweezers and gently peel off the silver tape.
Step 4
– Take your trusty plastic opening tool, and with a little finesse, gently lift and unhook that shiny gold ribbon cable connecting the screen to the tablet base. Easy does it—you’re doing great!
Step 5
– Alright, grab your trusty Phillips #1 screwdriver and confidently remove those nineteen 3mm screws. You’ve got this!
Step 6
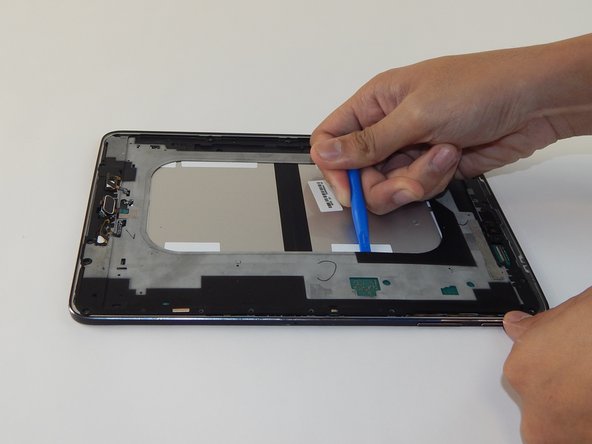
While the device comes apart along the outer edge, sliding in from the inner edge (like in the pic) might give you a bit more oomph for leverage.
– Gently pop open the next layer of your device using the plastic opening tool. Take your time—no need to rush!
Step 7
– Find that sneaky little 3 mm Phillips #1 screw that’s keeping the auxiliary port snug as a bug, and give it a gentle twist to set it free!
Step 8
– Time to put your device back together! Just retrace your steps and follow these instructions in reverse. You’ve got this!
– If you hit a snag, don’t hesitate to reach out for help. You can always schedule a repair.
– Remember, you’re not alone in this journey!
Success!


