Samsung Galaxy Tab S2 Screen Replacement Guide
Duration: 45 minutes
Steps: 4 Steps
Step 1
To avoid getting zapped by an electric shock, make sure your device is completely powered off and unplugged before you start fixing it.
– Warm up all the seams of your device with an iOpener or heat gun to help loosen that stubborn adhesive hugging the edges of the screen. Let’s get that screen ready for action!
Tools Used
Step 2
Hey there! Just a heads up: there’s a ribbon cable snugly attached to the back of the screen. Try to keep the screen’s lift-off to a chill 3-4 inches max before you disconnect that ribbon cable. Going beyond that could lead to some unwanted device drama!
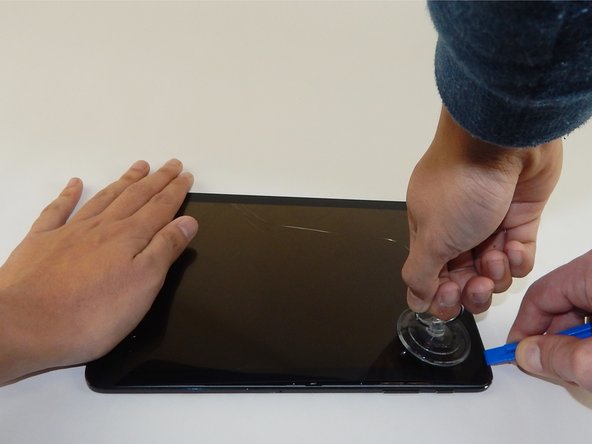
– Pop that plastic opening tool into the gap on the side of your tablet, near a corner where you’re starting your screen removal adventure.
– Stick the small suction cup on the screen close to where you placed the plastic opening tool.
– Gently lift the small suction cup up while pushing down with the plastic opening tool to remove the screen. You may need a buddy to help hold the device down for proper leverage.
Step 3
Stick a piece of silver tape over that shiny gold ribbon cable connecting the screen to the tablet—super simple!
– Gently grab those tweezers and peel away the silver tape with care!
Step 4
– Time to put your device back together! Just reverse these steps and you’ll be good to go.
– Didn’t finish? No worries, you can always come back to it later!
– Need a hand? If it feels tricky, you can always schedule a repair.
Success!


