Samsung Galaxy Victory 4G Motherboard Replacement Guide – DIY Tutorial
Duration: 45 minutes
Steps: 6 Steps
The motherboard is the brain of your phone, controlling most of its functions. Let’s get started with this step-by-step guide to remove it from your device. If you need help, you can always schedule a repair.
Step 1


– Flip your phone over so the screen is facing down – don’t worry, it won’t mind!
– Find the battery door and slide it open. Easy does it!
– Now, gently remove the battery. You’re making great progress! If you need help, you can always schedule a repair
Step 2

– Alright, let’s loosen those screws! Grab your trusty Phillips #00 Precision Screwdriver and give those 7 Phillips 3.93 mm screws a little spin. If you need help, you can always schedule a repair.
Step 3

– Let’s get this back cover off! Gently use the plastic opening tool to pry it open.
– Time to unleash the SD card slot! Slide the tool in there and wiggle it around the whole phone.
Step 4

– Let’s get started by removing one Phillips 3.93 mm screw from the bottom center of your phone. If you need help, you can always schedule a repair
Step 5


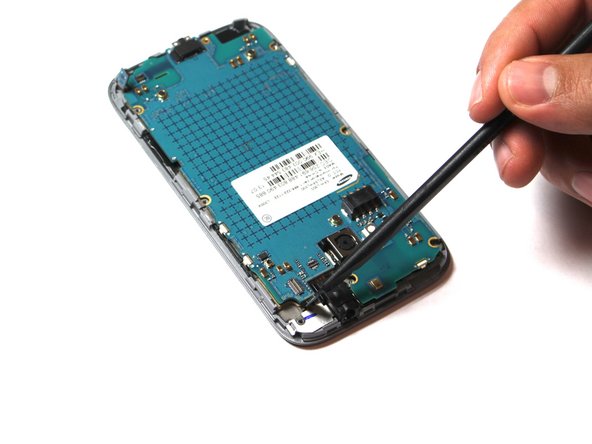
– Let’s get started. Carefully disconnect the 3 ribbons at the shown location. To remove them, simply place your tool under the ribbon and gently pull it out – nice and slow, so you don’t accidentally tear it. If you need help, you can always schedule a repair
Step 6
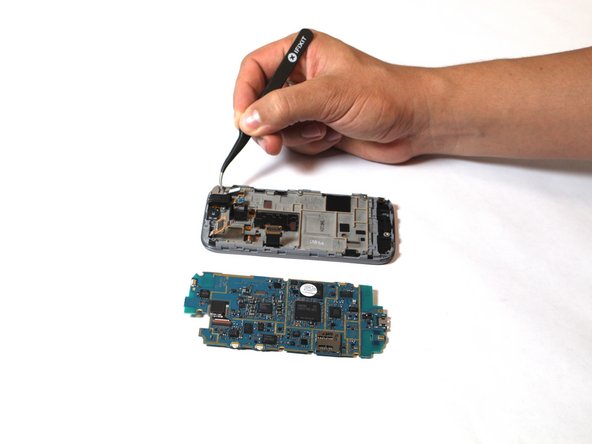

– Gently pull the motherboard back and to the left, keeping it straight up – just like in the photo. Take your time, you’re doing great!
– Now, carefully slide your tool under the labeled area and give it a gentle tug to release the ribbon cable from the motherboard. Easy does it!
– You’re almost there! At this point, the motherboard should be completely free from the rest of the phone. If you need help, you can always schedule a repair