Samsung Galaxy Victory 4G Screen Replacement Guide
Duration: 45 minutes
Steps: 10 Steps
Cracked screen got you down? Don’t sweat it! This easy-peasy guide will have you swapping that busted screen in a jiffy. Need a hand? You can always schedule a repair.
Step 1


– Let’s get started by placing your phone face down – make sure the display screen is out of sight.
– Now, find that back door and slide it open to reveal the goodies inside.
– Next, carefully remove the battery to get to the next step. If you need help, you can always schedule a repair
Step 2

– Let’s get started by removing the 7 Phillips 3.93 mm labeled screws using your trusty Phillips #00 Precision Screwdriver. If you need help, you can always schedule a repair
Step 3

– Let’s get that back cover off! Use your trusty plastic opening tool to carefully pry it open. Be gentle, you don’t want to scratch anything.
– Now, insert the tool into the SD card slot. Gently work it around the entire phone to release the clips holding the back in place. You got this!
Step 4

– Let’s get this party started! First, we’re going to remove one Phillips 3.93 mm screw from the bottom center of the phone. It’s just hanging out there, waiting to be freed. If you need help, you can always schedule a repair.
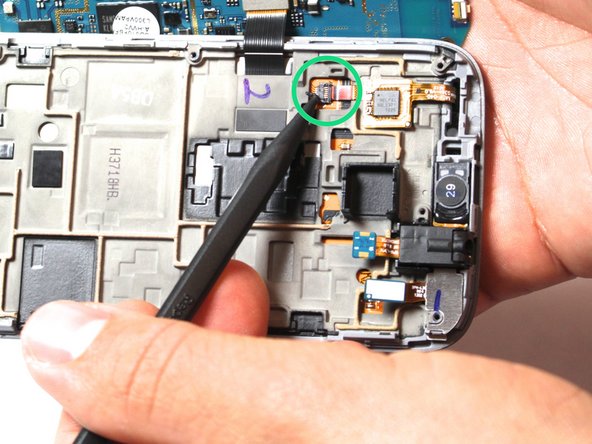
Step 5


– Now, let’s disconnect those three ribbons – the ones with the labels. Gently slide your tool under each ribbon and pull it out slowly, just like you’re sliding a piece of paper out of a folder. No need to yank it, we want those ribbons in tip-top shape. If you need help, you can always schedule a repair
Step 6
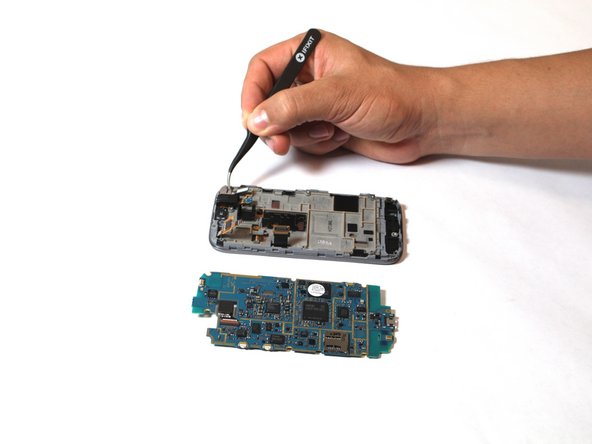

– Gently pull the motherboard back and to the left, keeping it straight up – just like in the photo. Take your time, you’re doing great!
– Now, carefully slide your tool under the labeled ribbon and give it a gentle tug to release the ribbon cable from the motherboard. Easy does it!
– You’re almost there! At this point, the motherboard should be completely detached from the rest of the phone. If you need help, you can always schedule a repair
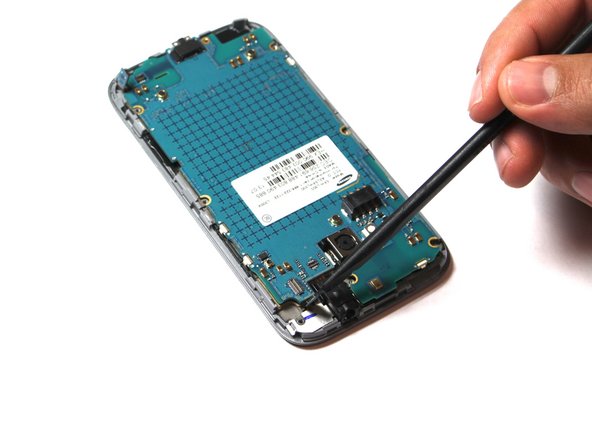
Step 7

– First up, let’s gently unplug that labeled cable. Just give that black gate a little tug and use your trusty tool to slide the cable right out.
– Now, it’s time to free the digitizer chip! Carefully slide a tool underneath and give it a little nudge to lift it up and out.
Step 8

– Let’s get this screen warm and ready! Microwave the iOpener for one minute on high power. Then, give that screen a nice, warm hug by letting the iOpener sit there for about 90 seconds. This will loosen up the glue underneath, which is pretty sticky, so be careful! You’ve got this.
Tools Used

Step 9

– Position the suction cup carefully on the screen, making sure to avoid the cracked area so you can get a good grip without causing more damage. If you need help, you can always schedule a repair

