Samsung Galaxy Z Flip 3 Screen Replacement Guide – DIY Tutorial
Duration: 45 minutes
Steps: 16 Steps
In this guide, we’re going to walk you through the steps to replace the screen on your Samsung Galaxy Z Flip 3. Just a heads up, this is our inaugural guide! A big shoutout to iHub Repair for letting us use this device for our repair breakdown. Thanks for joining us! This guide focuses on the screen and frame assembly, which means you’ll be working with both parts as one unit. Make sure you’ve got the correct part before diving in. And remember, before you start taking your device apart, it’s super important to fully discharge the battery. This helps minimize the risk of a fire if the battery gets damaged during the process. If your battery is looking a bit puffy, be sure to take the necessary precautions. Just a quick note: keeping your device water-resistant after the repair will depend on how well you reapply the back cover adhesive, so keep that in mind. Your device will lose its IP (Ingress Protection) rating, but with a little care, you can still do a great job!
Step 1


– First, let’s get started by unplugging all cables and powering off your phone completely.
– Next, find the SIM card tray hole on the top left edge of your phone and insert a SIM eject tool, a small bit, or even a straightened paper clip – yes, it’s that simple!
– Now, gently press the tool into the SIM card tray hole until it ejects, and then carefully remove the tray. If you need help, you can always schedule a repair
Step 2


– Let’s get things heated up on the back side using your favorite tools. The CPB Heating Pad, Heat Gun, or the iOpener will do the trick nicely.
– Remember, 90%+ Isopropyl alcohol is your nonconductive buddy! It makes a lot of steps in this repair a breeze.
– Once the adhesive is warm and feeling friendly, you can dive into the opening process with the iFixit Opening Pick(s). If it’s still a bit stubborn, don’t worry! We’ve got a nifty trick in the next step to help the pick break through that adhesive.
Step 3
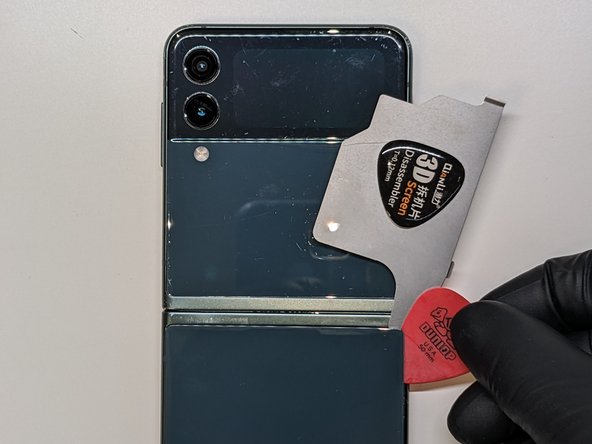


– Alright, let’s get this party started! We’re gonna use a super thin tool to get things going – a Jimmy or iSesamo Opening Tool, they’re pretty much the same. Don’t forget to use a little Isopropyl alcohol to help things slide along smoothly.
– Next up, grab some thin guitar picks – they’re our go-to. You can also use a Halberd Spudger, but the picks are our favorite because we can use a few to prop open the corners as we go, keeping the back from sealing back up.
– Last but not least, we have the Triangle Shaped Opening Picks. We’ll use this pick with some ISO to open up the back plate. But listen up, don’t go too deep! Just peek at the next steps to see how thick the frame is in the picture. No more than 1/8” – we don’t want to go overboard!
– **Important:** No scraping with the metal tool – we’re keeping things smooth! It’s okay to use it to get started, but then it’s plastic tool time. We need to make sure we don’t scratch the paint on the back plate. We want to keep things looking fresh!


Step 4

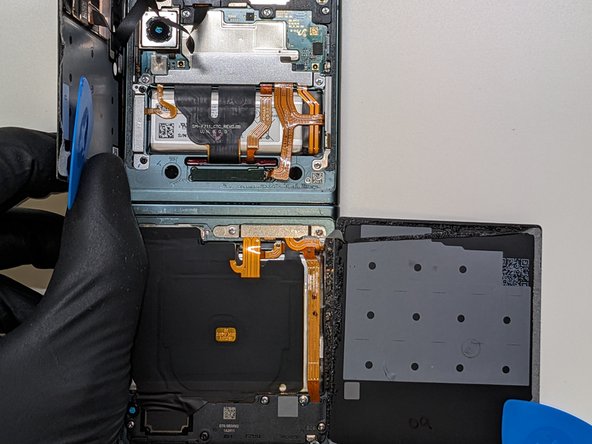

– Alright, let’s do the same thing on the top part like we did on the bottom. It’s gonna be a piece of cake!
– Watch out for that camera though, don’t want to scratch it up.
– Open it up like a book, nice and easy.
– Now, this is important, be super careful with that ribbon cable. Don’t rip it out while you’re opening the back, okay? If you need help, you can always schedule a repair
Step 5
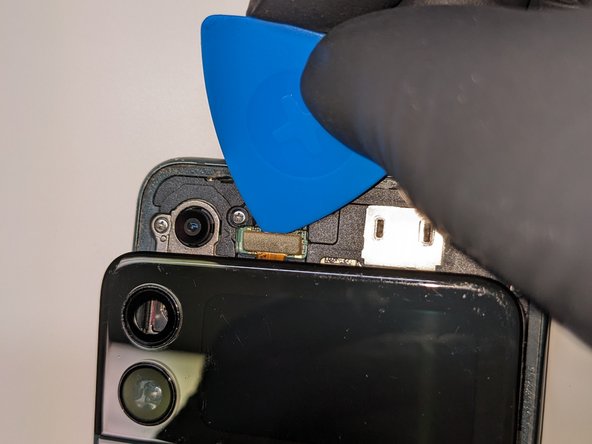

– Grab your trusty Spudger and gently pry off that plastic connector cover—it’s like a little treasure waiting to be discovered!
– Now, take your Triangle Pick and give that connector a light nudge to set it free. With that done, feel free to set aside the top back plate—you’re making great progress!
Tools Used
Step 6


– Grab that trusty manual or automated screwdriver with a PH000 head (yup, the Phillips one!) and let’s tackle those two screws. Time to make them disappear!
– Now, gently pull off the Connector(s) Cover like you’re peeling a banana—smooth and steady wins the race!


Step 8

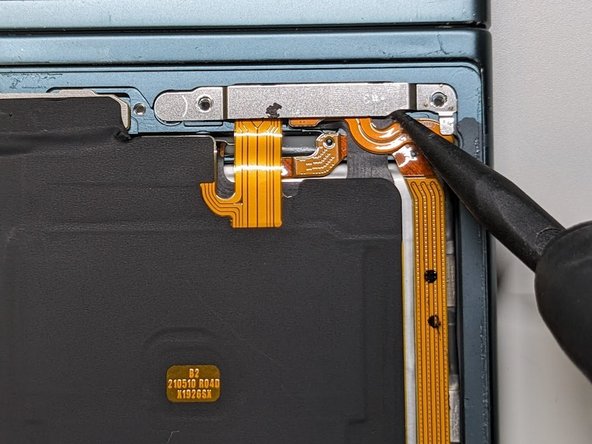
– First, let’s get started by popping up the power connector on the far right – it’s the first step to getting your device up and running again!
– Next, gently pop the five other connectors to the left of the power connection. If you need help, you can always schedule a repair

Step 10

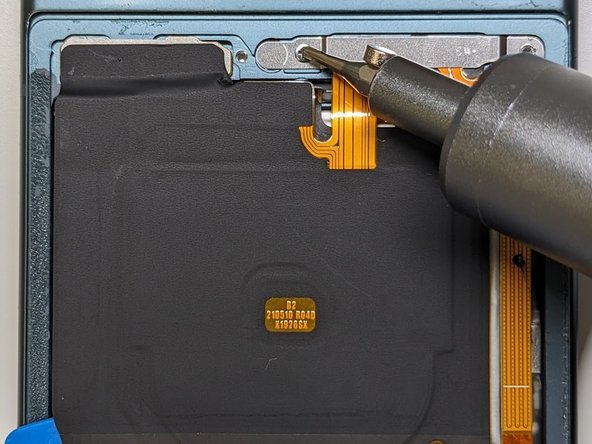
– Alright, let’s take a look at that power connector! It’s on the right side, and you’ll see a lower battery connector. Yep, two of them!
– Let’s get that Isopropyl alcohol back out. We’re going to use it to help us loosen up the adhesive that’s holding down the wireless charging pad. Give it a little love!
– Time to pop off that wireless charging pad connector! Gently set it aside for now.
Step 11
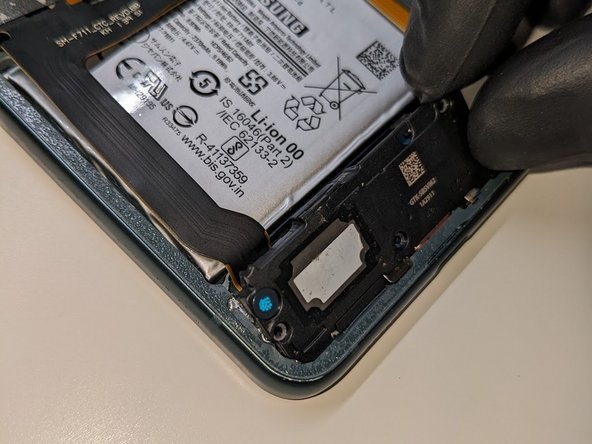

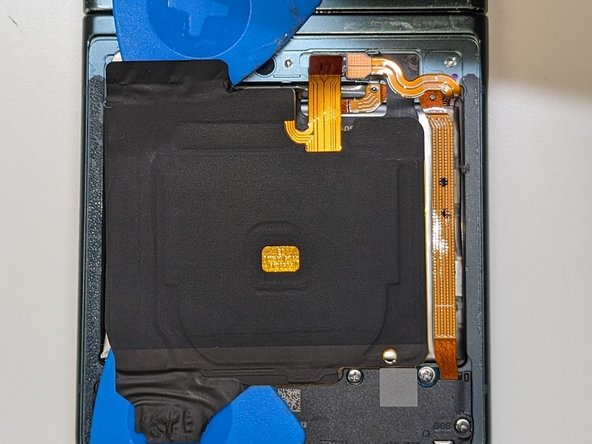
– First, remove the 5 screws. You’ll find 4 silver ones and 1 black one.
– Now, this is where things get a little fun. Use your trusty spudger to gently pop up the lower speaker assembly. You got this!
– Lift it up at least 45 degrees, and then you can pull the assembly out and set it aside. Easy peasy, right?
Tools Used
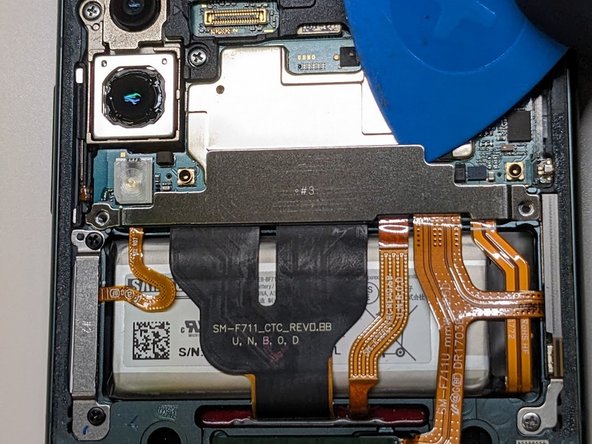
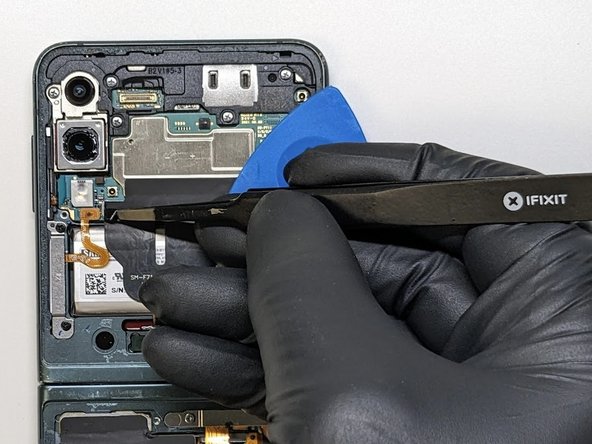
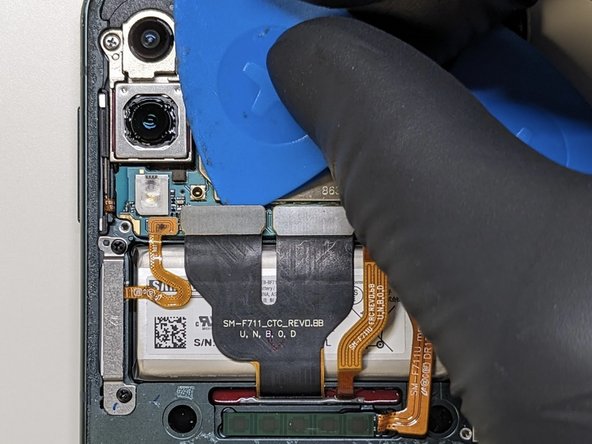
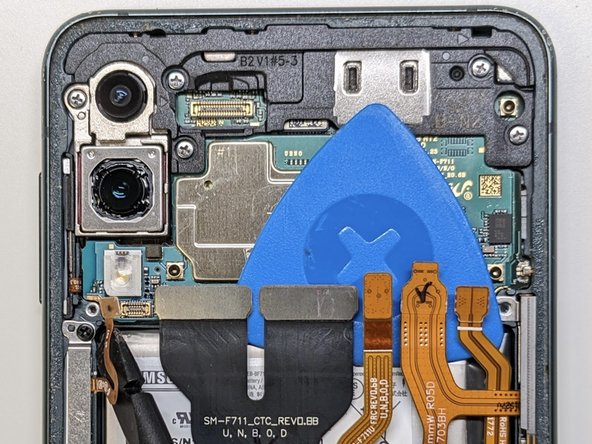
Step 12
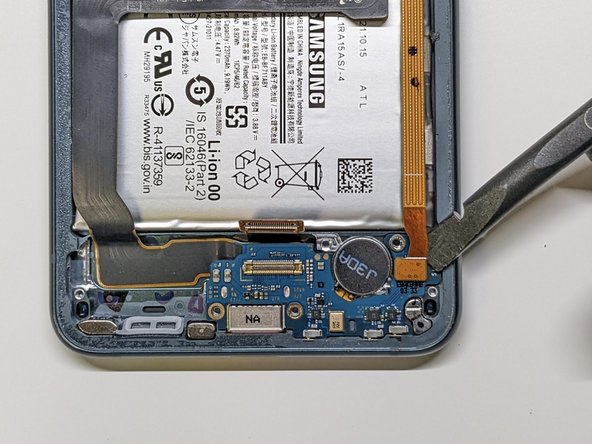
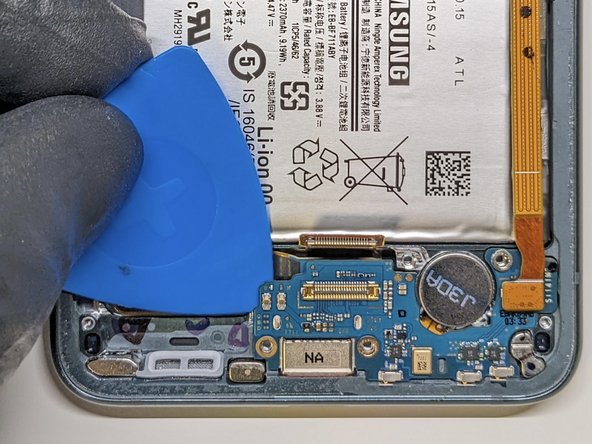

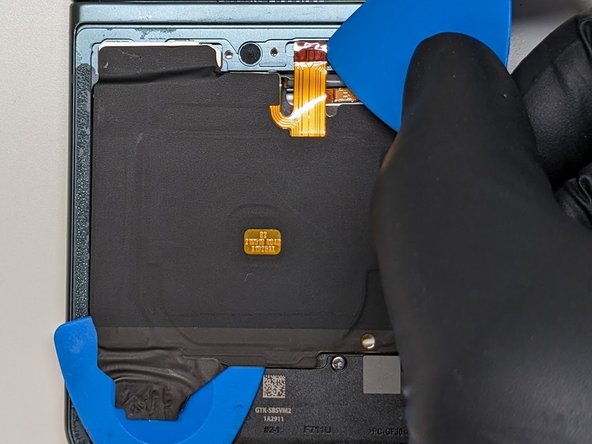
– Grab your trusty iFixit Pick or Spudger and gently pop those two main connections. You’ve got this!
– Once those connections on the sister board are free, use that opening to lift it up with confidence.
– * Remember, when you’re lifting the sister board, keep an eye out for that sneaky connection on the back. Carefully lift and then flip the sister board to reach that last connection. Check out the next step for more guidance!
Tools Used
Step 13


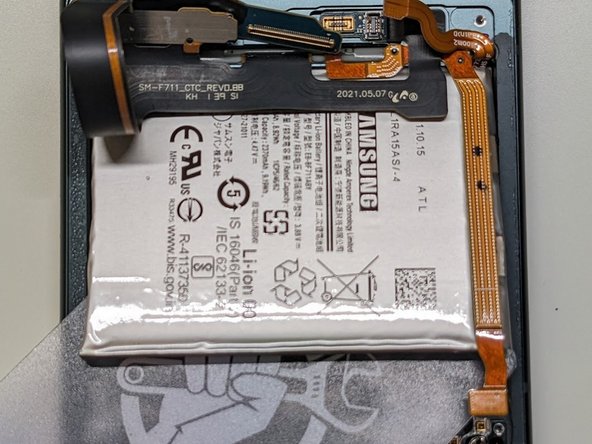
– Alright, it’s time to return that phone to the cozy heat mat! If you’ve got an iOpener handy, just lay it right on the batteries. No need to warm up the screen side.
– Make sure to get that isopropyl alcohol on both batteries while they’re getting all toasty on the heater.
– Grab your trusty iFixit plastic prying card and gently find a spot to slide it under the battery. After a few minutes in that Heat/ISO bath, you’ll be ready to pop it up!
– As you lift the battery out, keep an eye on those delicate cables. Don’t worry, the sticky adhesive is much more cooperative when it’s still slick from the isopropyl alcohol!
Step 14

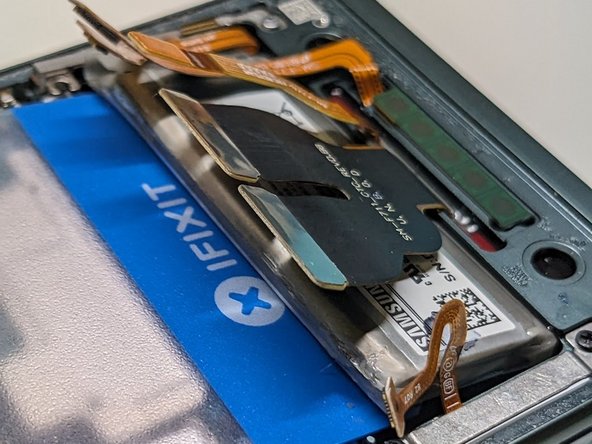

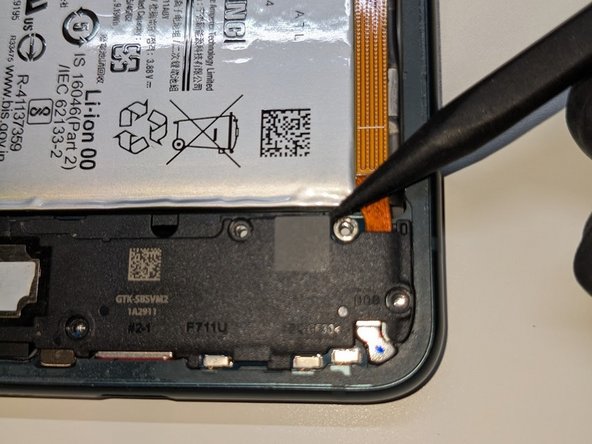
– Alright, it’s time to fold and flip that phone over! Let’s give it a little dance.
– We’re going to make use of that cozy ISO/Heat bath it just enjoyed and gently pry it out, just like we did with the lower battery. This time, it should be a breeze pulling it from the top.
– Now that the battery is free, let’s turn our attention to that one pesky screw in the bottom right corner of the third picture. Be careful here, as this part is linked to another area!
Step 15


– Gently pry the left side of the part using the pointed end of the spudger. Keep in mind, there might be some adhesive sneaking around, so a little ISO bath could help if needed.
– Next up, let’s tackle those 6 shiny silver screws that are keeping the motherboard and plastic cover in place.
– Finally, it’s time to lift the motherboard. Take your time and be gentle; if you feel any resistance, pause and check for anything holding it back.
Tools Used
Step 16

– Alright, this last step is for when you’ve completed those 15 steps in reverse. You got this!
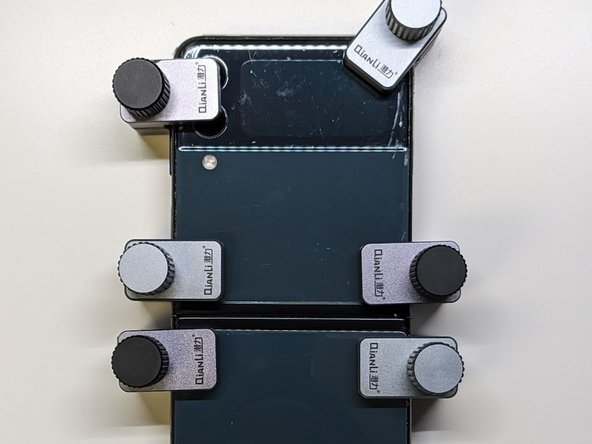
– Before you connect that External Screen Connector, make sure to tackle this step first.
– Time to get crafty! Apply some T-7000 on all the corners.
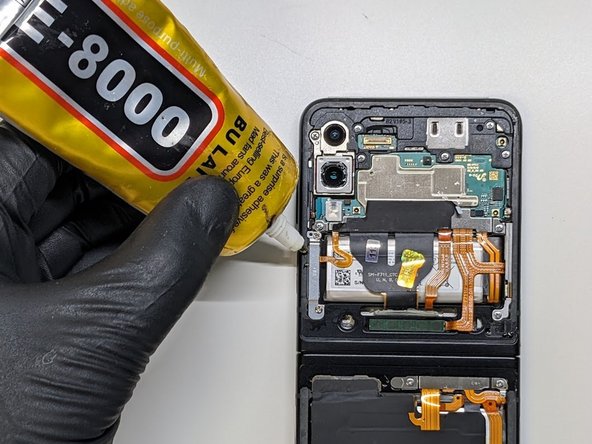
– Now, let’s spread some E-8000 along the straight edges.
– Individual clamps are your best buddies here. Just tighten them about a quarter to half a turn until you feel some resistance. Then, kick back and wait for 15-20 minutes. After that, clean up any excess around the edges with Isopropyl, and voilà, you’re all set! Congratulations on a job well done!