Samsung Galaxy Z Flip Repair Guide: Step-by-Step Teardown
Duration: 45 minutes
Steps: 15 Steps
Samsung recently showed off the new Galaxy Z Flip with its folding glass display and unique hinge fibers at their Unpacked event. We got our hands on one, and now it’s time to dive in—well, not as a phone, but as a teardown subject! Let’s see what’s really inside. For more teardown goodness and repair updates, follow us on Instagram, Twitter, and Facebook. And for the latest from Salvation Repair, don’t forget to subscribe to our newsletter!
Step 1


– Thinking about specs? For $1,380, you should get a pretty slick device, and in this case, you do. The Flip shows off a foldable, ultra-slim-glass AMOLED display with a 6.7-inch screen, a 21.9:9 aspect ratio, and a crisp 2636 x 1080 resolution at 425 pixels per inch. Powering it is a 2.95 GHz octa-core Qualcomm Snapdragon 855+ chip, backed by 8 GB of RAM and 256 GB of storage. The battery packs a punch with 3300 mAh split into two cells. Photography-wise, it sports two 12 MP rear cameras—one wide-angle ƒ/1.8 and one ultra-wide ƒ/2.2—as well as a 10 MP ƒ/2.4 selfie cam. Inside, there’s ‘sweeper technology’—a fiber layer inside the ‘Hideaway Hinge’ to help repel dirt and dust. And let’s not forget that vibrant Mirror Purple finish that makes it stand out.
Step 2


– We can’t resist the urge to pop something into one of Creative Electron’s X-ray machines—this time is no different.
– Here’s what we discovered:
– A sleek aluminum-and-glass build, easily recognizable compared to the darker, heavier steel frame we saw on the Razr.
– A super compact, stacked motherboard.
– Two separate battery cells.
– A seriously tough, spring-loaded hinge assembly.
– And at each corner, matching magnets that ensure a secure, smooth closing action.
Step 3


While neither of these is as sleek as the Razr, which folds completely flat thanks to its clever hinge and support plates, they still pack quite a punch. If you need help with your device, you can always schedule a repair.
– The Z Flip now folds a bit more seamlessly compared to the Fold, meaning there’s less of a gap around the hinge where the two halves meet. Neat, right?
– Open it up, and boom—you’ll spot the crease on the display right away. Yep, that shiny new glass sure knows how to crease like plastic.
– And guess what? It seems to scratch like plastic too. Not a huge shock, though. It’s definitely not as tough as the Gorilla Glass we’re used to on other non-folding devices.
Step 4


The bezels have a slightly lower profile, but the rubber feet stick out a bit, making it not as sleek as it could be.
– Samsung claims their phone is 6.9-7.2 mm thin, but keep in mind that’s without the plastic bezels carried over from the Fold (see on the right). Another thing the Flip shares with the Fold v2: those seemingly unchanged ‘crease caps’—the T-shaped pieces—that sit at the fold. On the bright side, the camera notch has seen a big upgrade. The Flip’s punch-hole selfie camera offers a much cleaner look, making it easier to enjoy your device without distraction.
Step 5


– Samsung claims that the Z Flip’s hinge ‘brushes’—and yes, we’re quoting—are made with nylon fibers crafted through micro-height-cutting tech to fend off dirt and dust. But once you power it up, you’ll see a flood of warnings that might make you a bit wary. To put those claims to the test, we’ll introduce some bright purple dust to the phone, shaking things up in true shake-and-bake style. This teardown turns into a mini investigation: we gently pry open the Galaxy using our trusty iOpener to remove the rear covers. Already, we notice purple dust peeking out from under the wireless charging coil—not exactly a good sign. Spoiler alert: after exposing the phone to that purple powder for a bit, opening it results in loud popping noises and a frozen hinge. Out spills a teaspoon of purple dust, confirming that dust infiltration can be a real challenge. If you need help, you can always schedule a repair.
Tools Used

Step 6


We’ve got this coating here, but don’t expect any water-resistance claims from Samsung—unlike what you might find with the Razr.
– This compact phone is a perfect match for our Essential Electronics Toolkit – it’s got everything you need, and leaves out the stuff you don’t.
– Dust alert – lifting up the charging coil uncovers a fine powdery reminder that those ominous warning texts are probably more truthful than the flashy ‘sweeper technology’ ads.
– Meanwhile, the motherboard’s got a cool psychedelic sheen – that’s your proof of a hydrophobic nano-coating in action.
Tools Used

Step 7


– Get ready for a motherboard that’s basically the clown car of chips—Samsung’s double-stacked, space-saving substrate-like PCB is here. It first popped up in the iPhone X, and showed up again in the Note10. Sure, it can be a puzzle for board repair pros, but it squeezes an impressive crowd of components into a tiny space:
– Samsung K3UH7H70AM-AGCL 8 GB LPDDR4X RAM, hanging out right on top of the Snapdragon 855 CPU.
– Samsung KLUEG8UHDB-C2D1 UFS 3.1 256 GB NAND Flash, storing all your stuff.
– Broadcom AFEM-9106 front-end module, ready for action.
– Skyworks SKY78160-51 Low Noise Amplifier, keeping those signals crisp.
– Qualcomm SDR8150 RF transceiver, making sure you stay connected.
– Qualcomm WCN3998 WiFi + Bluetooth SoC, your wireless sidekick.
– NXP Semiconductor PN80T NFC controller with Secure Element, for all your tap-and-go moments.
Step 8

– Here’s a look at some of the key players inside this techy sandwich:
– Qualcomm PM8150 power management IC – keeping everything running smoothly.
– Qualcomm WCD9341 audio codec – making sure your sound quality is top-notch.
– Samsung S2MIW04 power management – it’s all about the power, baby.
– Samsung S2DOS04 DC-DC converter – probably handling the backlight, making everything shine.
– Qualcomm QDM3870 RF front-end module – helping with that wireless magic.
– Samsung S2MPB02 power management IC – another power booster to keep things steady.
– Texas Instruments TAS2562 audio amplifier – pumping up the volume and sound quality.
Step 9

– Let’s take a look at some of the key components: first up, the Qualcomm QET5100 envelope tracker—think of it as the device’s signal coordinator. Next, there’s the probable Qualcomm QDM3870 front end module, which helps manage radio frequency signals smoothly. You’ll also find the Skyworks SKY77365-11, a quad-band GSM / GPRS / EDGE power amplifier module—it’s like the volume booster for your device’s signals. Lastly, there’s the likely ON Semiconductor FPF3788UCX, an OVP load switch that protects and manages power flow. Keep these parts in mind as you continue with the repair—you’re doing great! If you need help, you can always schedule a repair.
Step 10


This battery packs a bit less punch than the Galaxy Fold’s 16.87 Wh, but it easily outshines the Motorola Razr’s 9.7 Wh. It’s right in the mix with top-tier phones—think Galaxy S10 at 13.09 Wh or iPhone 11 at 11.91 Wh. Plenty of juice for your daily adventures!
– First, carefully remove both batteries—yes, it’s a double trouble situation, but we’ve got this! The larger battery packs a punch with a typical capacity of 2370 mAh and 9.15 Wh, while the smaller one offers 930 mAh and 3.59 Wh. Together, they deliver around 12.74 Wh of power. Expect some stubborn glue holding them in place—think of it as a tiny adhesive battle. Use alcohol and gentle prying tools to free them without damage. Keep in mind, actual power output can vary based on network conditions and usage habits. If you need assistance at any point, you can always schedule a repair.
Step 11


The adhesive here is a bit forgiving, but be careful—it’s surprisingly easy to split the layers of the display by accident.
– Secure the Z-foils in the open position! These plastic bezels, glued down to protect the main display—similar to the Fold—are your first hurdle. Next, gently heat and carefully pry the display away from the frame; it’s mainly stuck at the top and bottom edges, with less glue in the middle. Just like on the Fold, this display has some armor—metal support sheets on each side and a bit of slotted chain mail in the center—so take your time and stay patient. If you need help, you can always schedule a repair.
Step 12


– Ready to see what makes this foldable’s ultra-thin glass tick? Let’s unfold some secrets.
– Surprise—the top layer is actually plastic. So much for that ‘glass’ scratch protection, right?
– The middle layer is definitely glass—trust us, you can tell by the way it shatters if you poke it. Not recommended.
– All in all, this glasstic display lands somewhere between cool and ‘meh.’
Samsung’s got a nice gesture with a one-time screen replacement for $119 if you grab the Z Flip before year’s end—definitely a good deal to keep in mind. But, paying $499 for any extra repairs might make you do a double-take, especially since this thing can scratch up pretty easily. If you’re concerned about keeping your device looking sharp, consider some protective gear or a case. And if you need help with repairs down the line, you can always schedule a repair to keep your device in top shape.
Step 13


That tape kept the powder off the display, but now it’s hanging out in the hinge. At least the powder matches the rest of the phone’s vibe.
– Peeling off the tape protecting the hinge reveals the most intense burst of our purple powder yet. Get ready, it’s a bit much!
– Looks like we’re going to need to dig a little deeper to clear out all this powder. Time to pull everything apart.
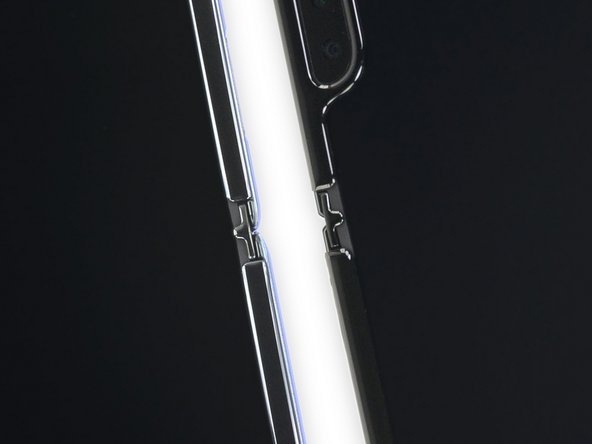
– Now, we’re staring at those brushes, standing vigil over a phone covered in dust. They look a bit shy, huh? Yeah, they might have earned that look.
– First up, we spot these smart little interconnect cables, designed to keep everything safe and sound around the hinge.
Step 14


– Here’s a look at how the hinge fared after our dust test. No tricks here, we promise, this is the real deal.
– This hinge might not be as over-the-top as the one we saw in the Fold, but it’s definitely sturdy (even though dust did slow it down a bit) and packed with some solid gears.
– Honestly, the hinge looks pretty awesome. It gives off some serious Iron Man Mk. 2 vibes.
– And hey, maybe it’ll clear up naturally over time? Or maybe those hinge lubricants will transform this phone into a dust dragon…
Step 15

– The Samsung Galaxy Z Flip might be unfolding in a whole new way, but its latest updates aren’t exactly game-changers for foldable phones. If you’re not an Instagram influencer living in a spotless apartment craving the latest gadget, this phone probably isn’t your best bet. It feels more like a luxury novelty than a must-have device. And hey, maybe that’s okay—every new tech starts somewhere. Let’s hope this one either gets better quickly or moves on fast. When it comes to dust, our ‘sweeper technology’ brushes didn’t impress during the dust test—they trapped very little dust and didn’t exactly inspire confidence. The ‘ultra-thin glass’ is real glass layered under plastic, but it doesn’t feel like premium glass or offer better scratch resistance than previous models. If you need assistance, you can always schedule a repair.
Success!