Sega CD Teardown
Duration: 45 minutes
Steps: 23 Steps
Step 1


– Grab your trusty Phillips head screwdriver and unscrew the six screws at the bottom of your console. They’re marked, so no guessing required!
– You’ll find the six screws are clearly marked for your convenience.
Step 2

– Let’s get those two screws out that are holding the Genesis’ connector snugly to the console. It’s time to set things free!
– You can spot the two screws in the handy diagram provided.
Step 3

– Give that lock tab a little slide to the left, and watch the console halves part ways like old friends saying goodbye.
Step 4

– Gently lift from the left side to pop off the top of the case. You’ve got this!
Step 5

– Grab your trusty spudger and gently wiggle it to pop off the cover of the Genesis attachment. You’ve got this!
Tools Used

Step 6

– Gently lift the top of the case to pop off the cover. Keep it steady and avoid forcing anything—patience is key! If you need a hand, you can always schedule a repair.
Step 7

– Gently lift the faceplate, pulling it upward and then out. Easy does it!
Step 8


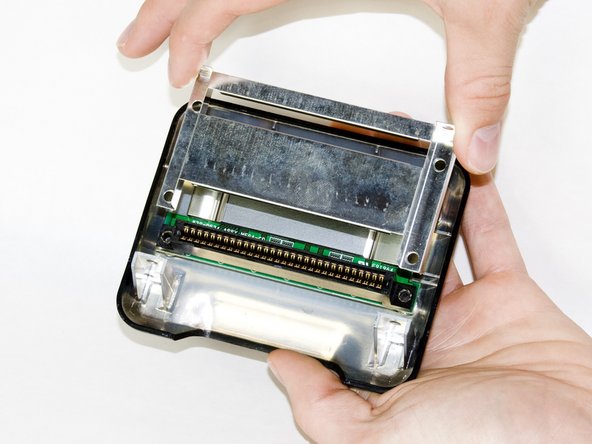
– Grab your trusty #00 Philips screwdriver and unscrew those two little screws holding the Genesis adapter to the console. You’ve got this!
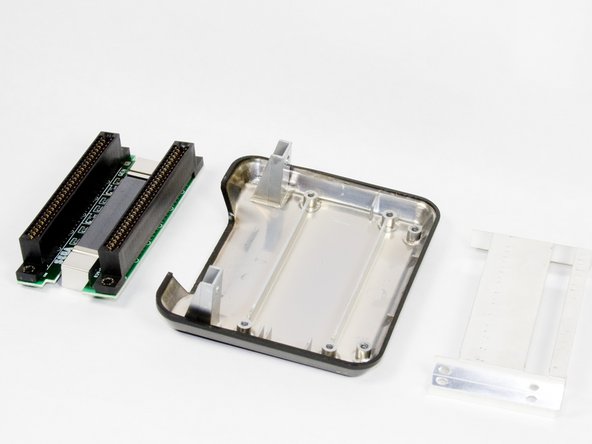
– Now, gently wiggle and pull the adapter out from the console. It should come out smoothly, just like a pro!
Step 9

– Grab your trusty #00 Philips screwdriver and unscrew the four screws from the metal plate. You’ll be all set for the next step!
– The four half-inch bronze screws are marked with yellow circles, so they’re easy to spot. Let’s get them out!
Step 10

– Gently slide the metal cover upward and lift it away from the connector—smooth moves, no force needed!
Step 11

– Gently pop the connector out of its spot—show that housing who’s boss!
Step 12

– Grab your Phillips head screwdriver and unscrew those three screws holding down the metal plate. Once they’re out, lift the plate off to continue. The screws are highlighted in the diagram to make your job easier. If you need a hand, you can always schedule a repair.
Step 13

– Unscrew the two little guys holding down the plastic bar.
– Check out the photo to spot exactly which screws need to come out.
Step 14

– Time to take out that CD tray! First, grab your trusty Phillips head screwdriver.
– Unscrew the four screws holding things in place. Easy does it—keep them safe for reassembly later.
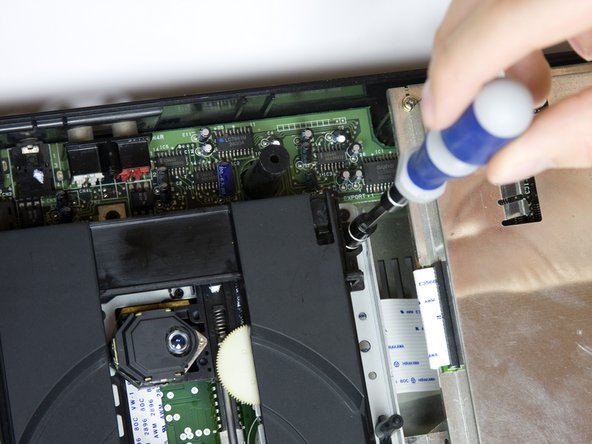
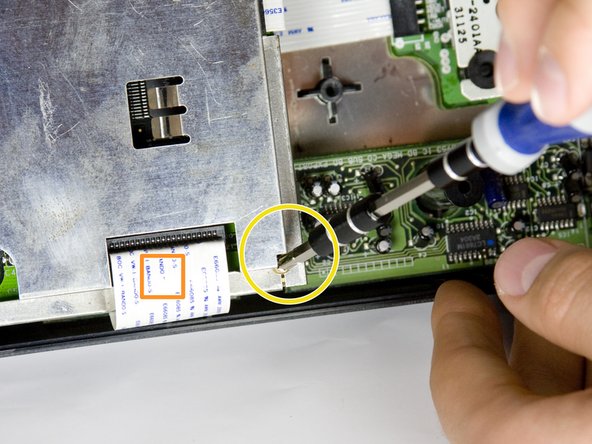
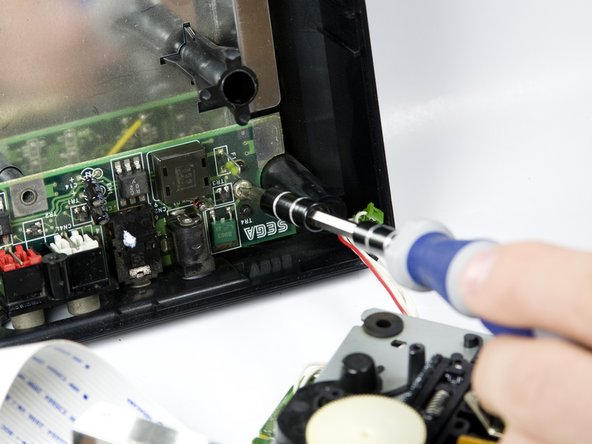
Step 15

– Gently unplug the wire from the optical reader, and be careful not to tug too hard. It’s like untangling headphones – a little patience goes a long way!
Step 16

Watch out for the four springs tucked below the circuit board—they’re attached to the screws. Keep an eye on them so they don’t spring away when you’re removing the screws. If you need a hand, you can always schedule a repair.
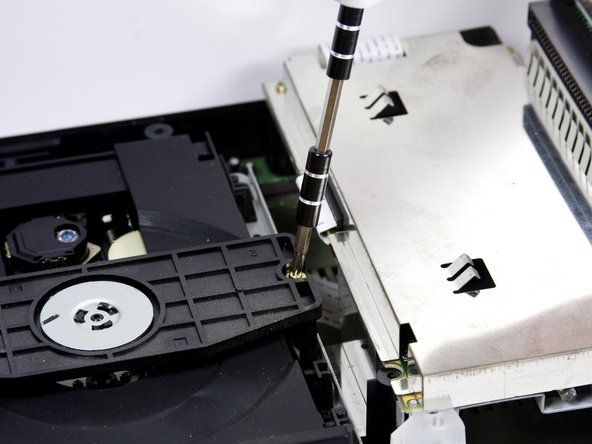
– Grab a small Phillips screwdriver and remove the four screws on the bottom of the CD tray. The locations of these screws are marked on the diagram to make your job easier.
Step 17

– Gently lift the CD tray away from the circuit board—steady hands win the race!
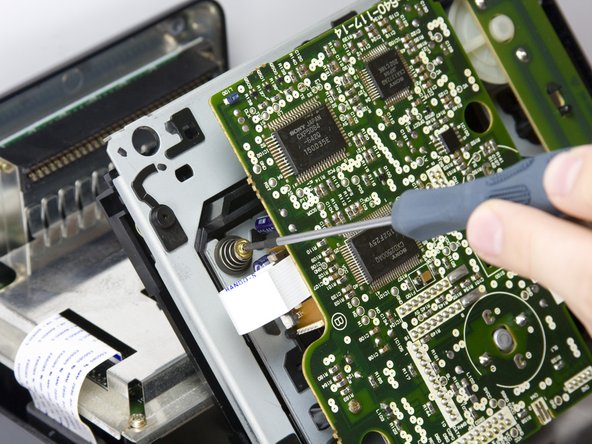
Step 18

– Use a medium Phillips screwdriver to remove the two bronze screws from the metal plate. Easy does it!
– Gently lift the metal plate to reveal the motherboard—no sudden moves here.
– Check out the diagram to see exactly where those screws are hanging out.
– Heads up: There’s a wire strip running through the metal plate that’s soldered to both the motherboard and the power supply board. The plate isn’t coming off all the way, so don’t try to muscle it. All ribbon cables can be unplugged by carefully pulling them straight out of their slots.
Step 19
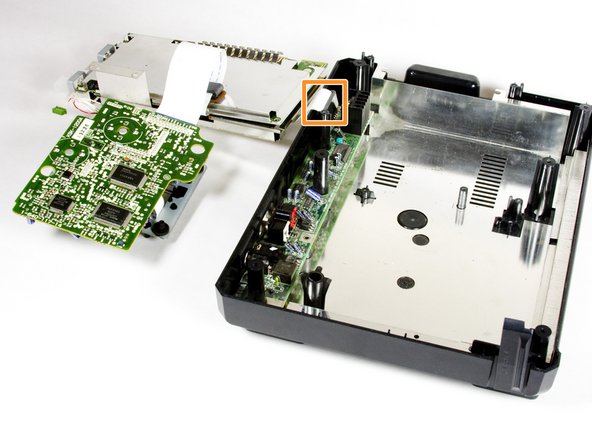

– Gently remove the metal plate, the motherboard, and the CD tray circuit board. Once they’re free, flip each one over just like you see in the photo.
Step 20


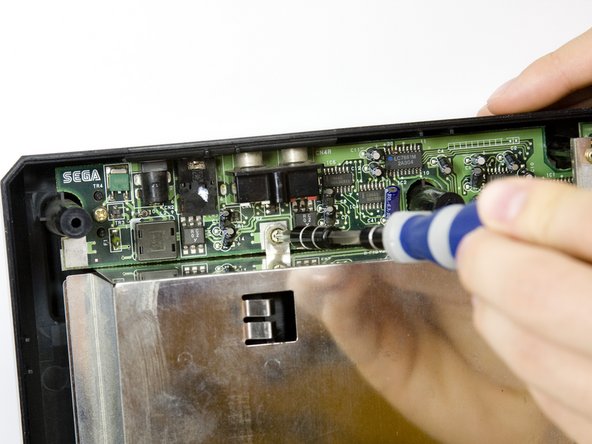
– Grab your medium Phillips head screwdriver and unscrew those two screws from the power supply. Easy, right?
– The two screws are clearly marked in the diagram, so no need to stress.
Step 21

– Remove the power supply unit from the console by lifting the unit up.
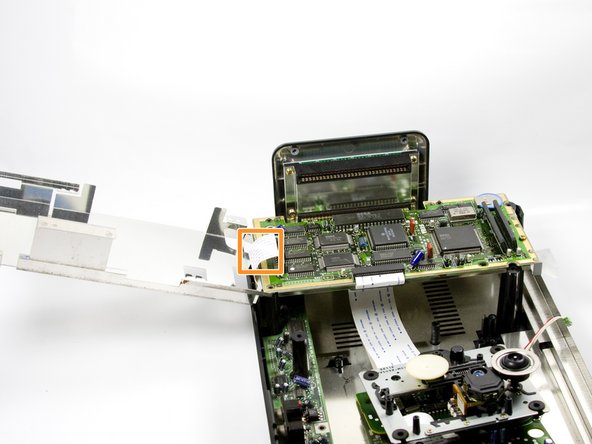
Step 22

– Here’s what the motherboard looks like once you’ve taken it out—nice and clean, ready for the next step. Keep up the good work!
Step 23

– Teardown’s done! You’ve made it this far – nice job! Keep it up and let’s move on to the next step.
Success!