Sony PlayStation SCPH-9002 Teardown
Duration: 45 minutes
Steps: 10 Steps
I’ve got a classic PlayStation 1, and we’re going to give it a brand-new teardown! I’m originally from Spain, so my English might not be perfect, but let’s have some fun and dive right in!
Step 1


– Check it out, here’s the PS1!
– Flip that PS1 over and let’s tackle those six screws together.
– Just a heads up: part number +BV 3X14
Step 2

– Pop off the top cover. It’s a breeze!
Step 3

– Unplug both CD-ROM connectors.
– CD connector one and its socket.
– CD connector two and its socket.
– Note: part number DEVICE OPTICAL KSM-440AEM
Step 4

– Gently remove the CD-ROM reader. It should slide out pretty easily, but you might need to give it a little wiggle to break free from those stubborn rubber holders.
Step 5

– Unplug those cables! One’s heading to the power supply while the other two are off to the memory cards and controller connectors. You’ve got this!
Step 6

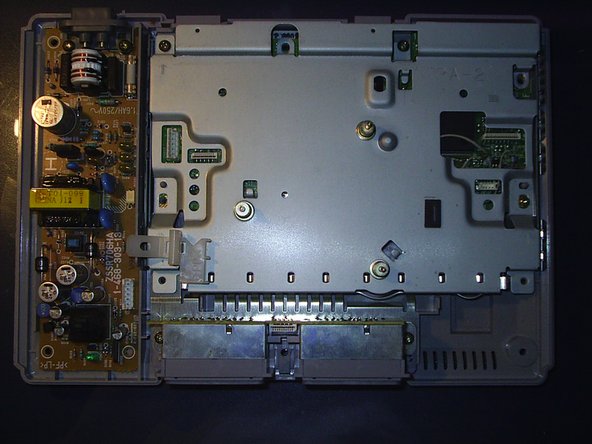
– Unscrew those four screws and take off the metal cover.
Step 7


– Here we go, you got the motherboard now!
– And there’s the power supply, you’re on a roll.
– Take out the four screws holding the motherboard and the power supply in place.
Step 8

– With the screws out of the way, go ahead and pop out the power supply.
Step 9

– Carefully take out the motherboard and unscrew both screws from the memory card/controller connection mechanism. You’ve got this!
Step 10

– Woohoo! You’ve got all your PlayStation 1 parts ready to roll!
– Main Board
– Lower Casing
– EMI Shield
– Power Supply
– Disk Reader
– Memory Card/Controller Mechanism
Success!