Step-by-Step Guide: How To Replace Your iPhone 6s Taptic Engine
Duration: 30 min.
Steps: 11 Steps
In this guide, we’ll walk you through the process of swapping out your iPhone 6s’ faulty Taptic Engine. If your phone’s been feeling a little too quiet or just barely buzzing, it’s time to get that fixed! Follow along as we show you the steps to get your phone vibing again. Don’t worry, you’ve got this!
Step 1


– Before diving into repairs, let’s give your iPhone a little break! Press and hold the standby button for about three seconds until the slider pops up on your screen.
– Now, just swipe that slider from left to right, and in about 10 seconds, your iPhone will be powered down and ready for some TLC.
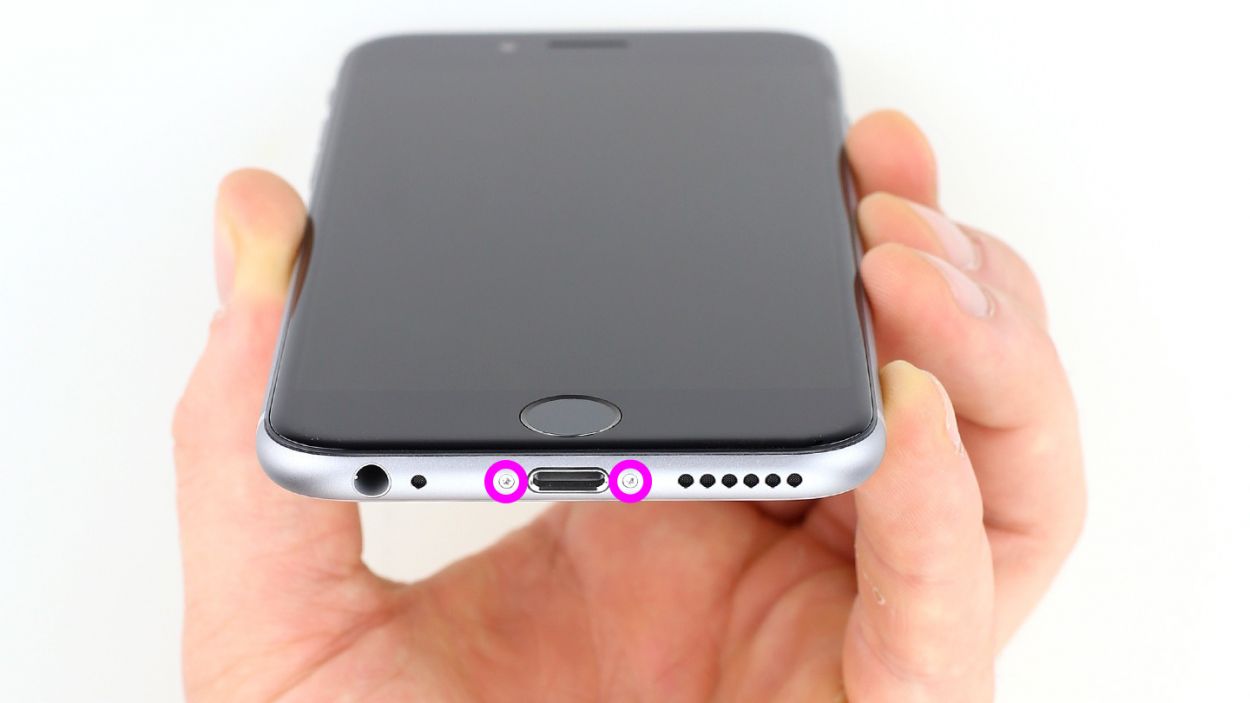
Step 2

– Ready to get into your iPhone 6s? Grab your trusty pentalobe screwdriver!
– Next up, let’s remove those two pentalobe screws located on either side of the lightning connector. To keep things organized, we suggest placing the screws on a magnetic pad, just like they were in your phone. You’re looking for those .2 x 3.8 mm pentalobe screws!
Step 3

If needed, give those outer edges of the display a little heat therapy a few times!
– Set your iPhone 6s down on a soft, clean surface so it can chill without getting scratched up.
– Grab a suction cup to lift the front panel, a hard plastic plectrum, and a hot-air gun. If your screen looks like it’s been through a battle, slap some adhesive tape over it before moving on.
– The screen is just a bit stuck to the frame. Use the hot-air gun to warm up the outer edges of the display to around 60°C (140°F).
– Place that suction cup right over the home button or next to it. While you’re lifting the screen with the suction cup, slide the hard plastic plectrum between the aluminum frame and the display frame. Press down on the aluminum frame while gently pushing the display up with the plectrum. It might take a few tries, but you’ll get it!
– Once you can lift the screen a few millimeters, slide carefully along the outer edges until the display is free on both sides. If it’s still feeling stubborn, give those edges another round of heat.
Tools Used
- heat gun to heat parts that are glued on so they’re easier to remove.
In most cases, you can also use a hairdryer.” rel=”noopener”>Heat gun - Pick Set
- VAKUPLASTIC Suction Cup
Step 4
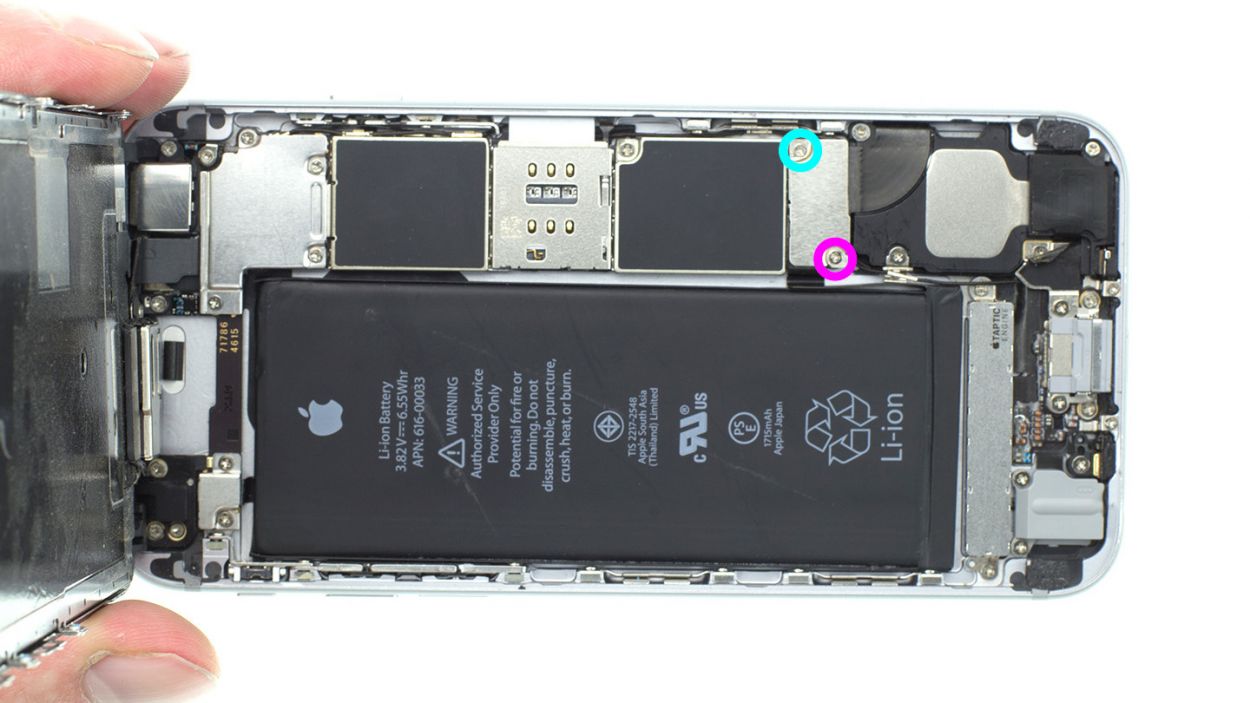

– Let’s get those Phillips screws out and remove the cover that keeps the battery plug snug as a bug. Once you’ve got them loose, toss them onto a magnetic pad so they don’t wander off. You’re looking for one 2.2 mm Phillips screw and one 2.9 mm Phillips screw.
– Now it’s time to gently coax the battery plug out. Use an ESD spudger to slide underneath the plug. If you don’t have a spudger handy, your fingernail will do the trick too. Just be careful!
Step 5
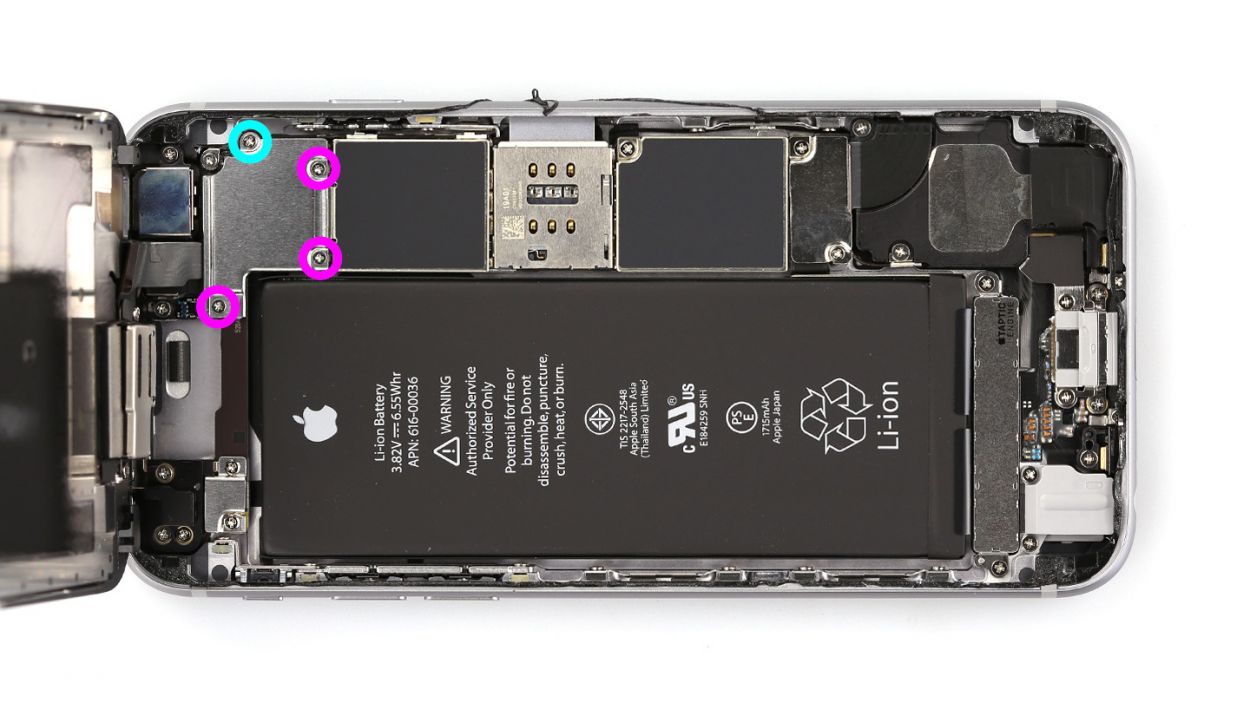

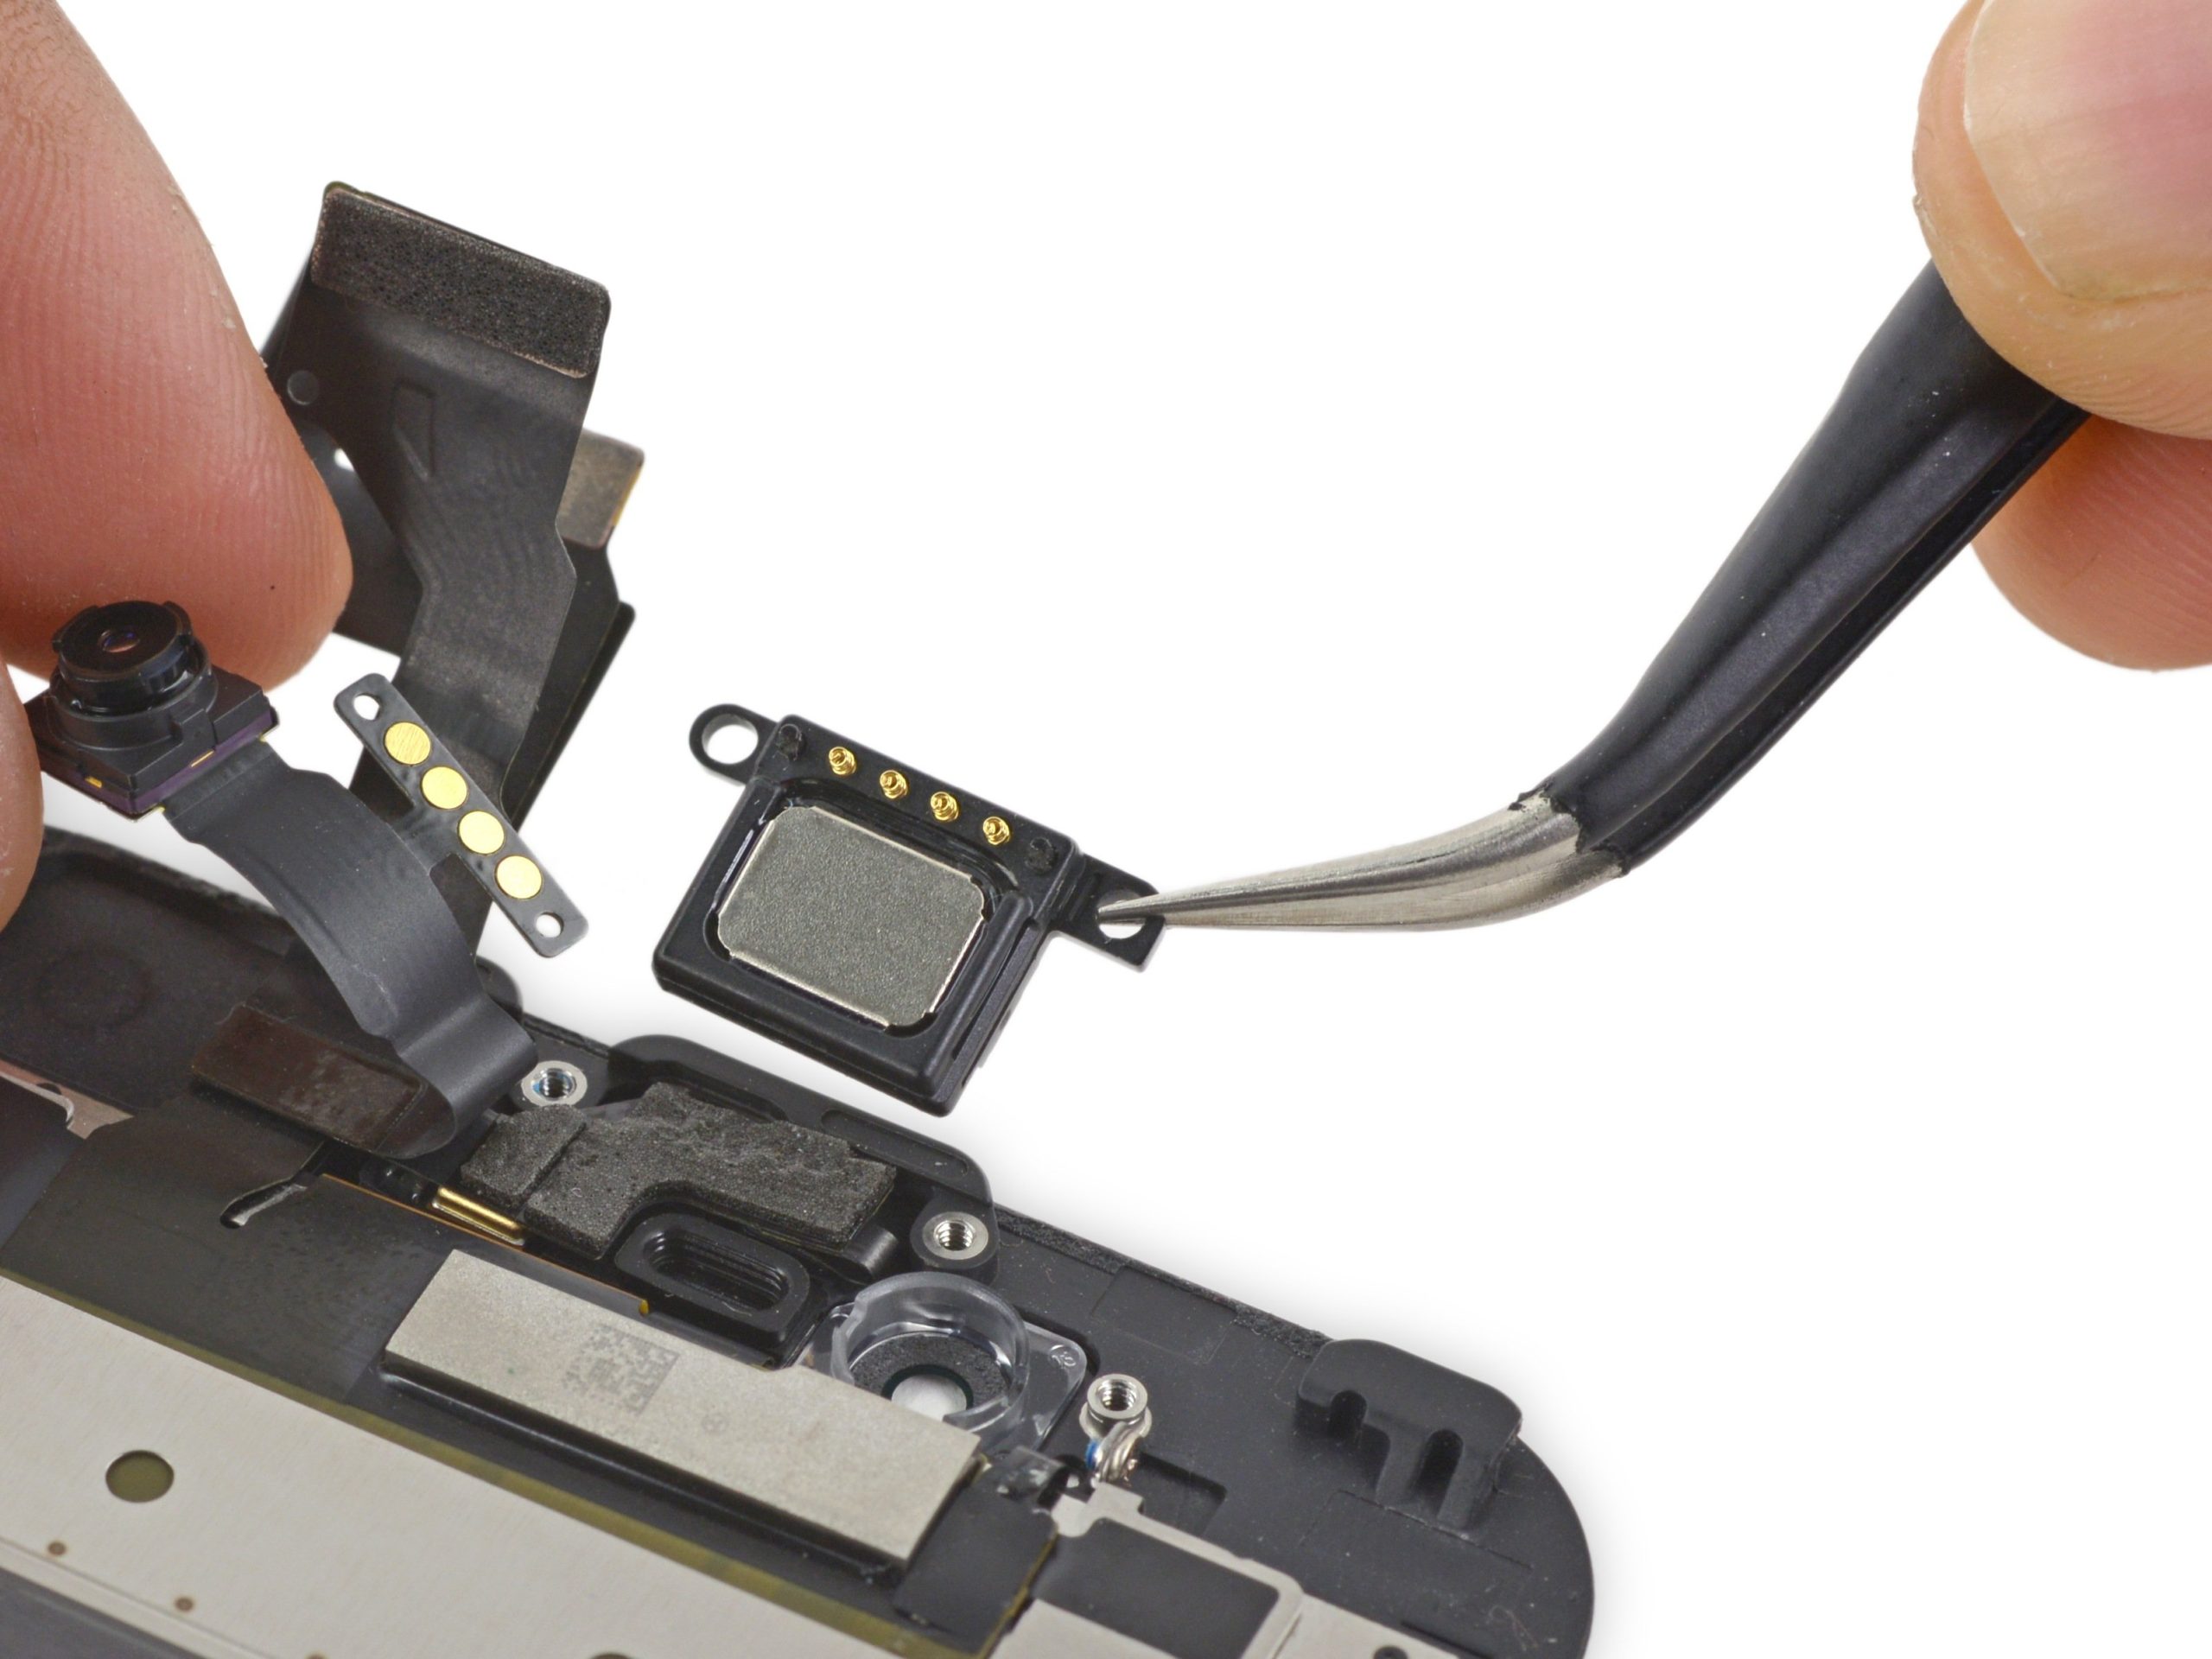
– First, let’s loosen those four Phillips screws holding down the silver contact cover. Once you’ve got them loose, pop them onto your magnetic pad along with the cover so they don’t go wandering off. You’re looking for three 1.3 mm Phillips screws and one 2.9 mm Phillips screw.
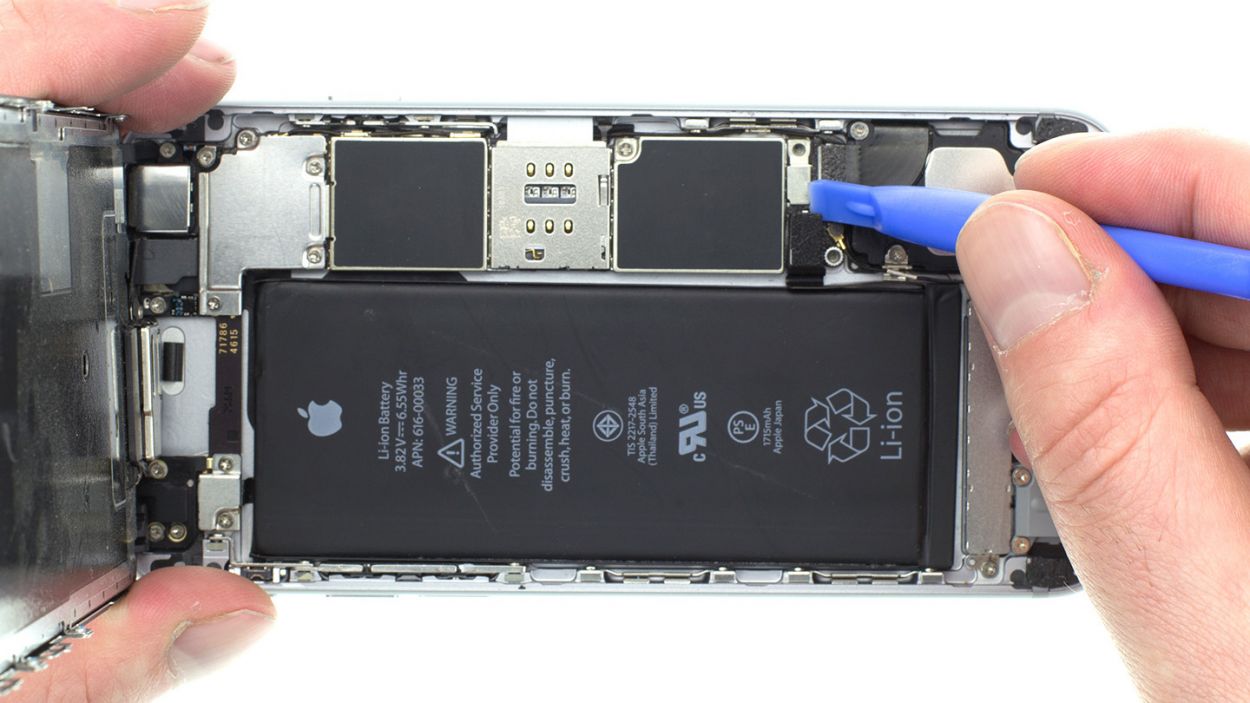
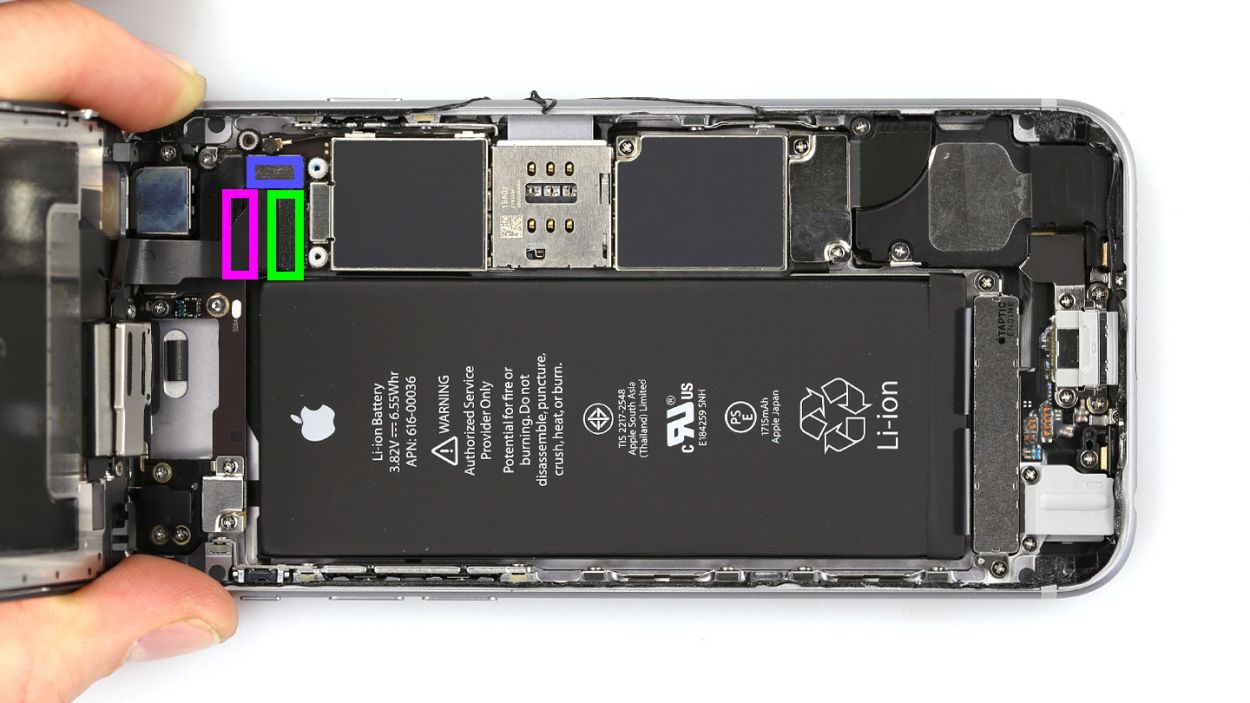
– Next up, it’s time to release the three overlapping display connectors in the order shown below. Slide your trusty spudger under each connector and gently lift it. You’ve got this! The connectors are for the front camera/sensor/earpiece/ambient microphone, Touch ID cable, and the display.
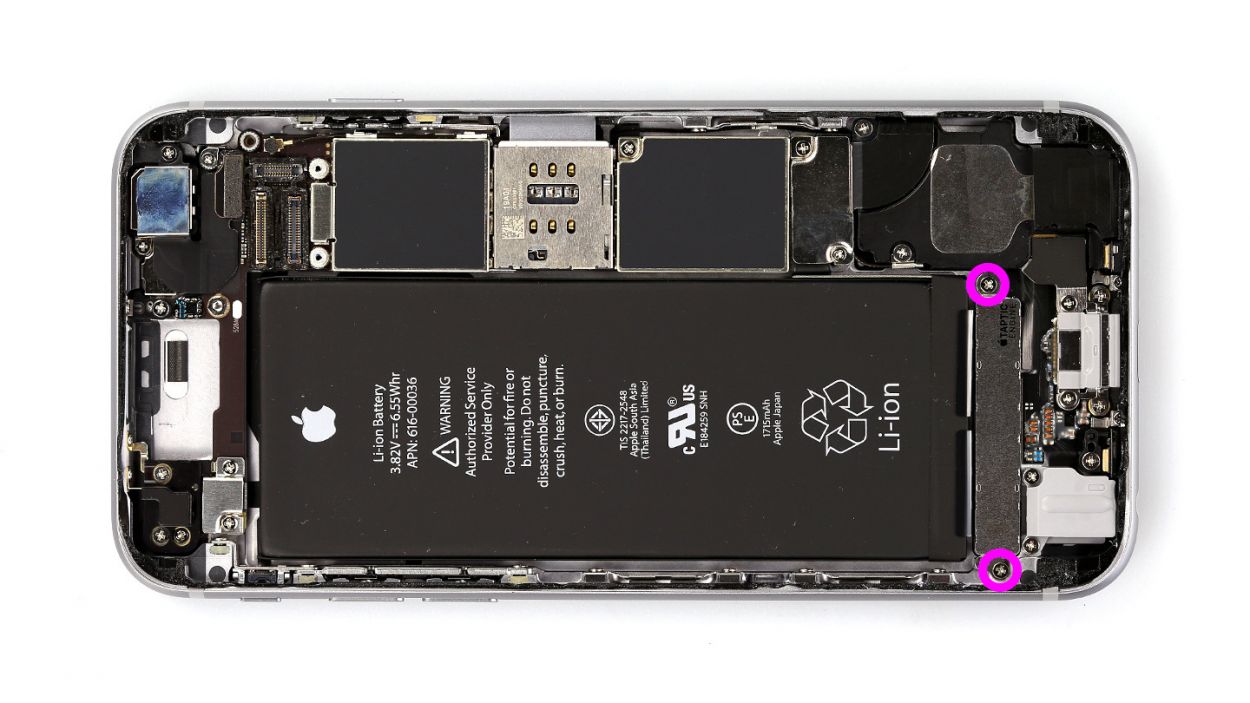
Step 6

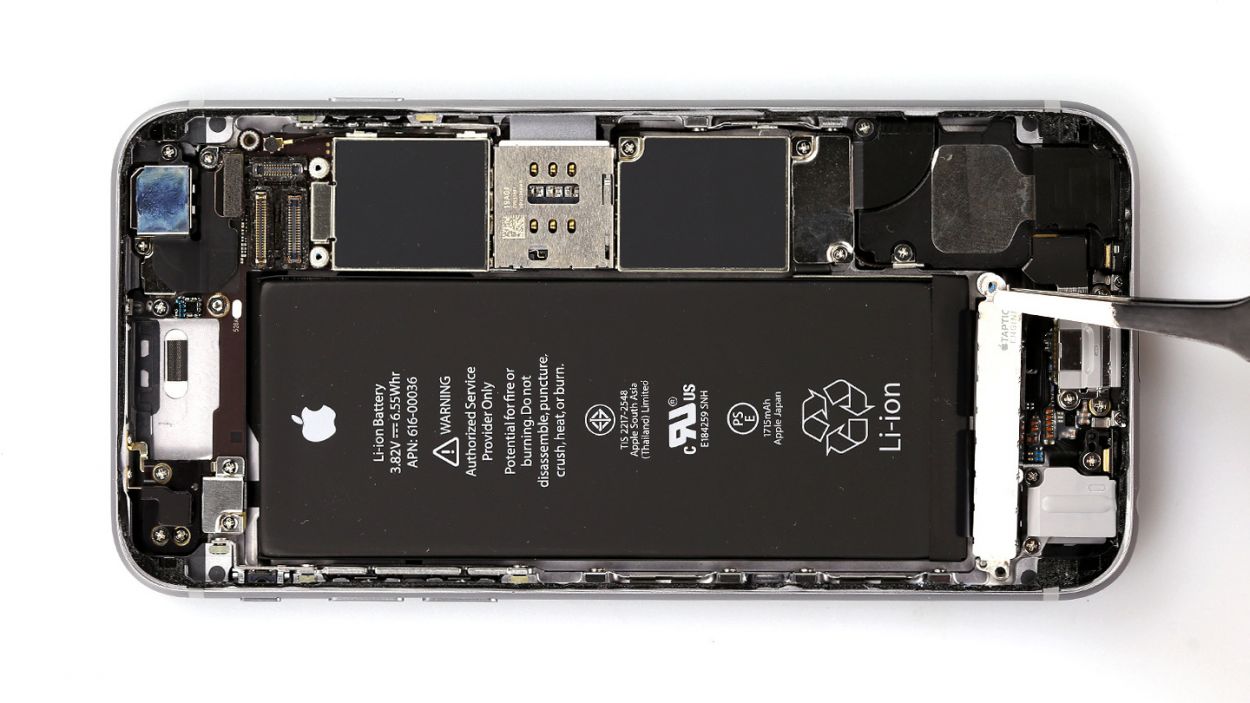
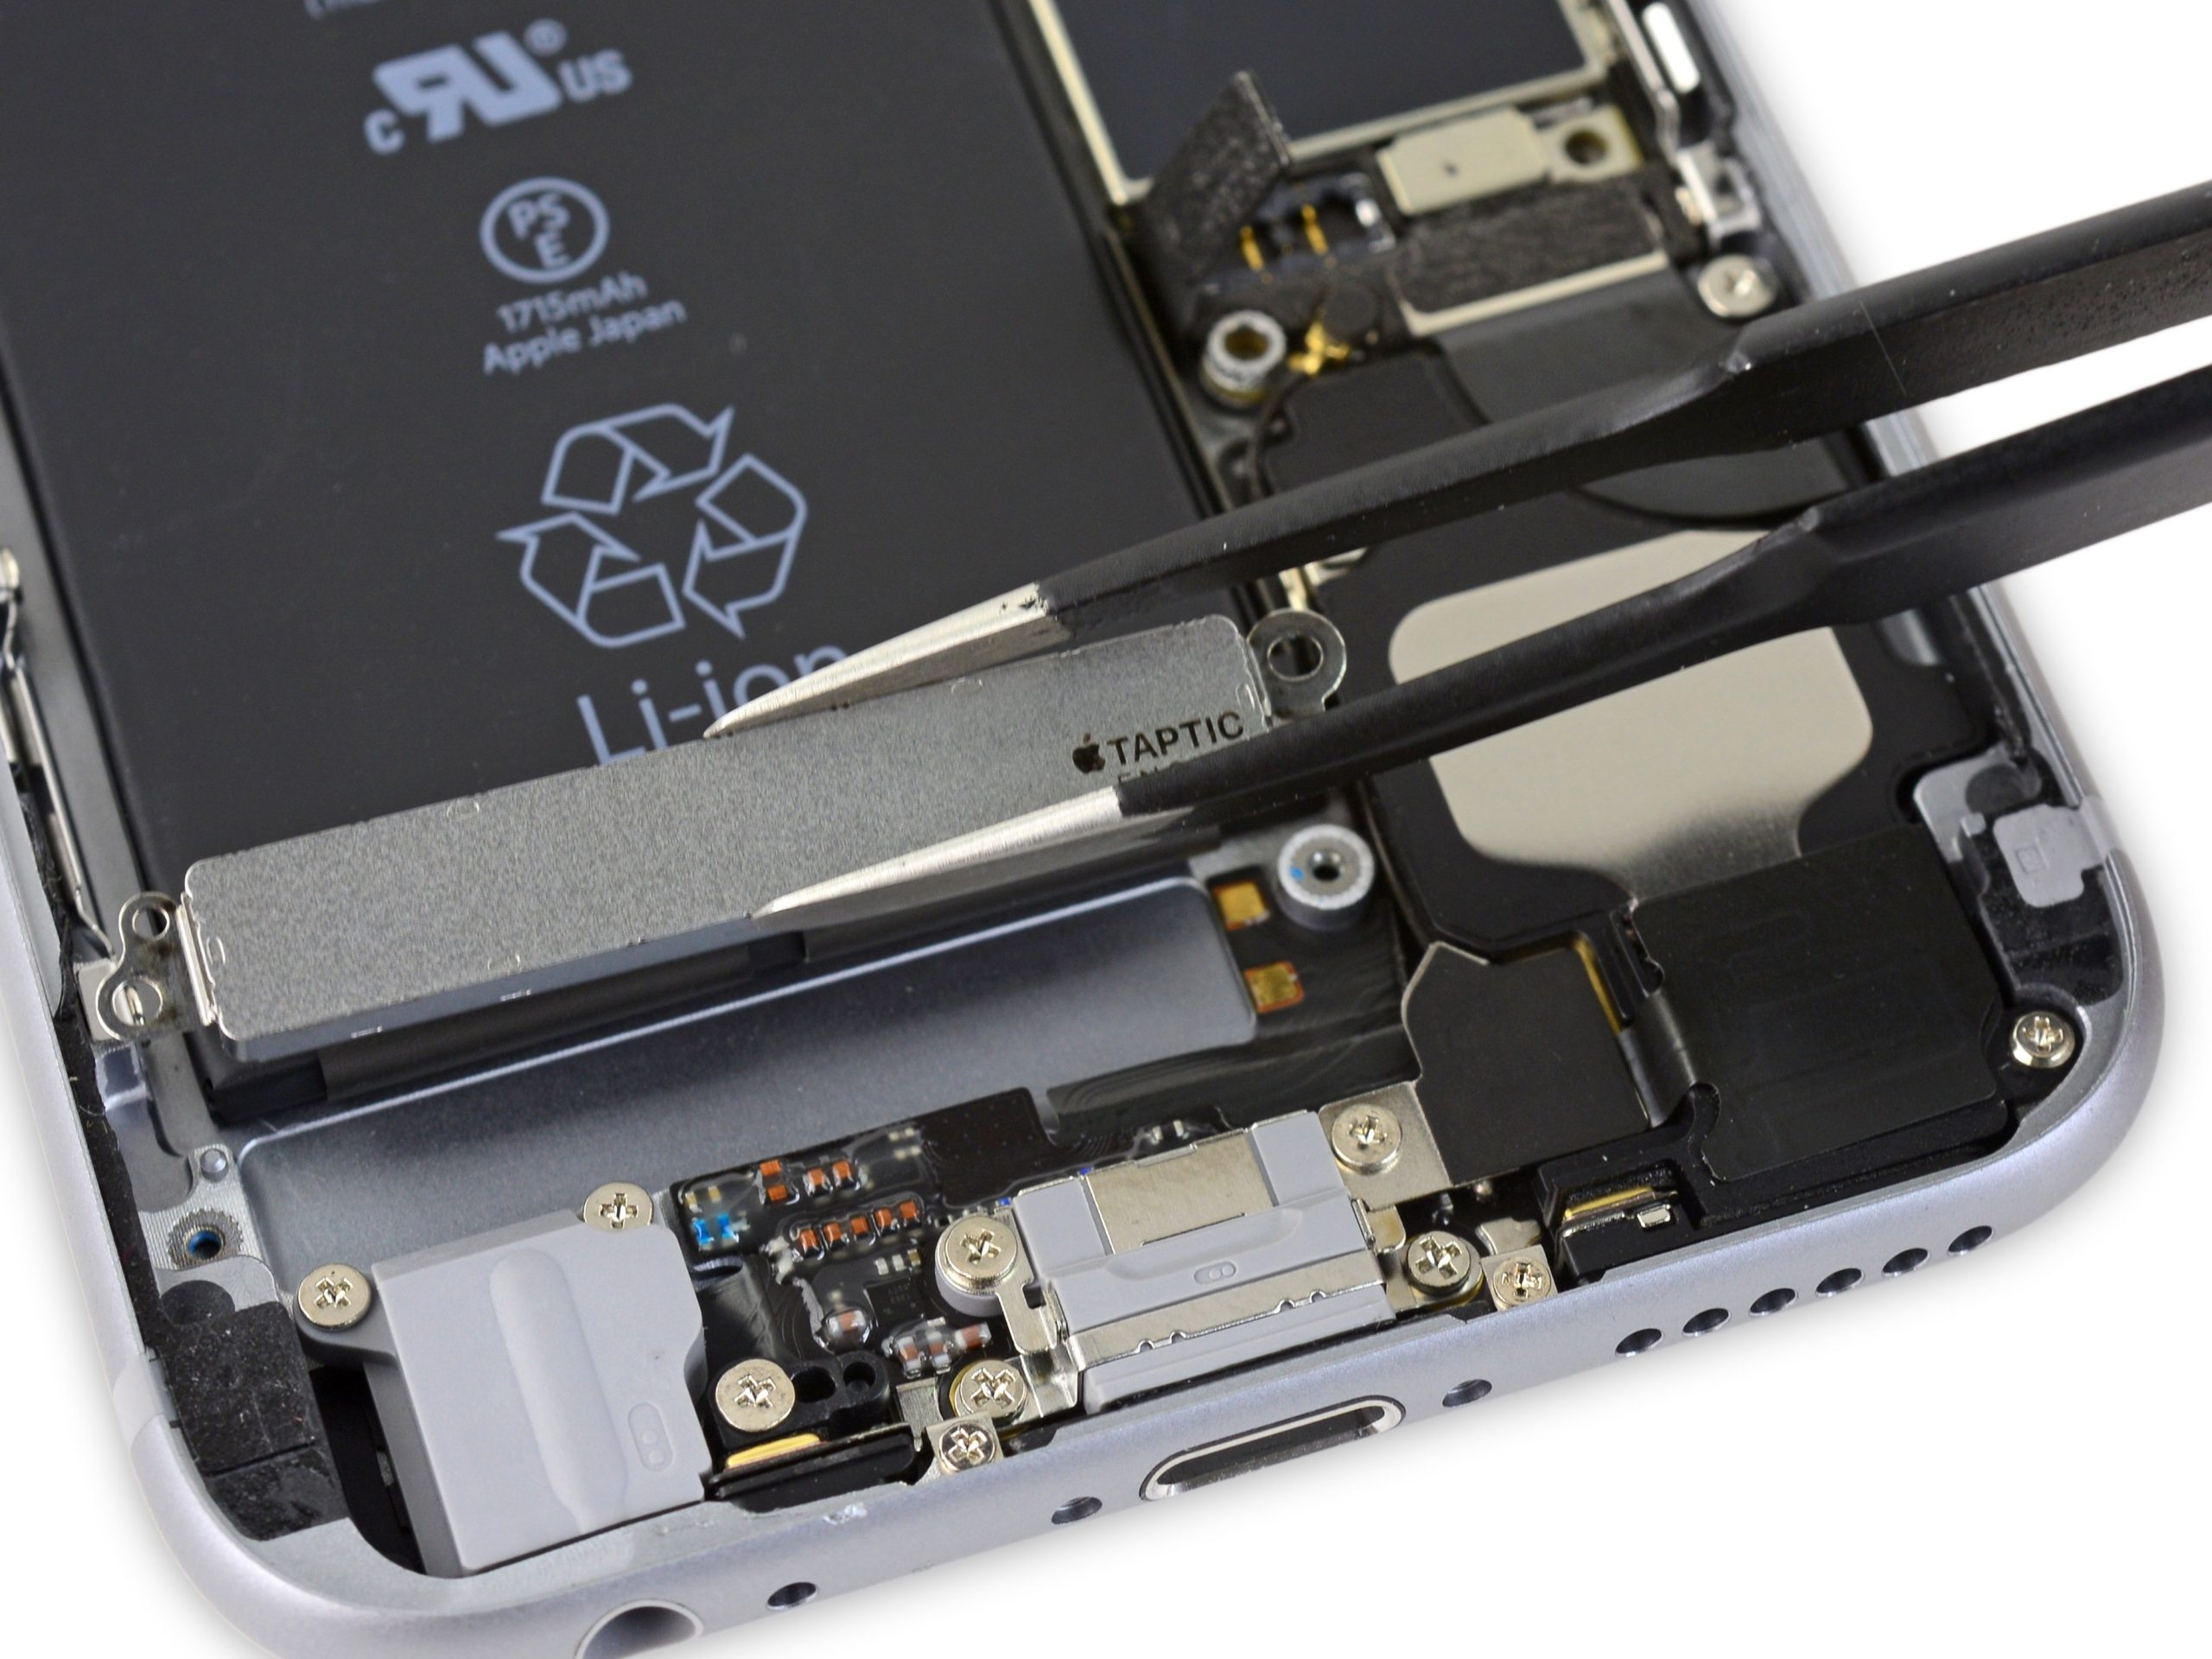
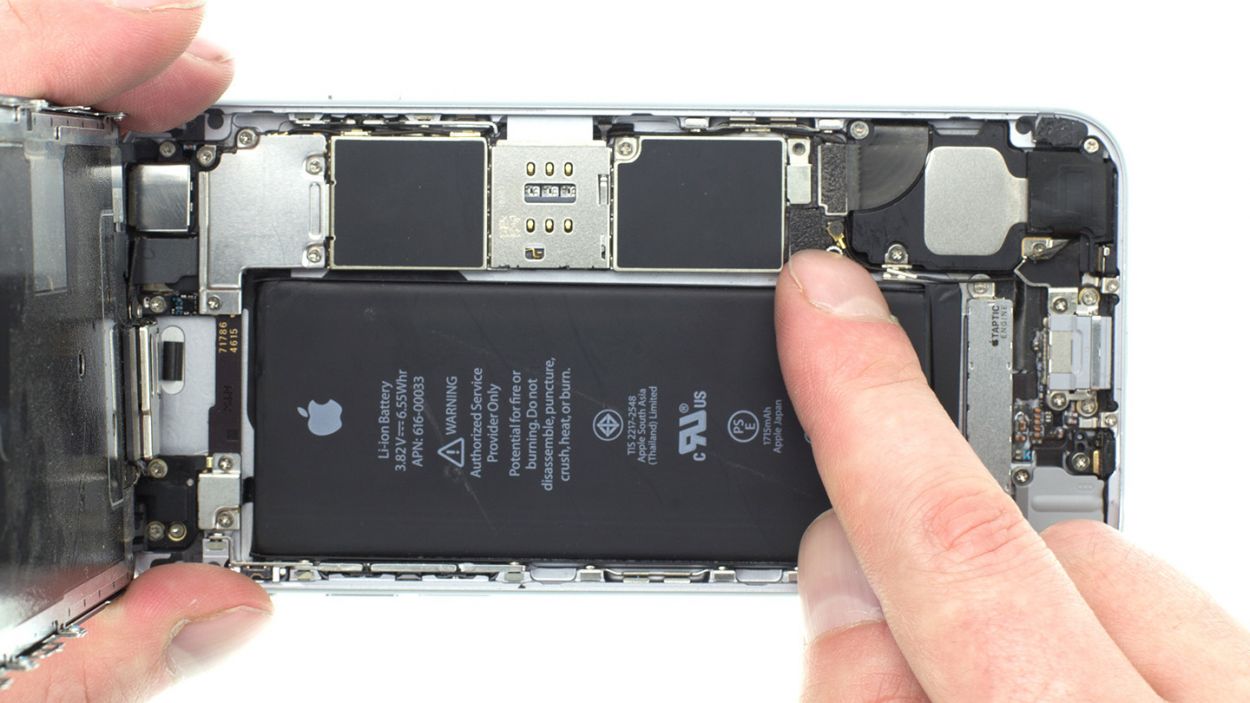
– Time to grab your Phillips screwdriver and unscrew those two little screws keeping the taptic engine in place! You’re looking for 2 x 1.5 mm Phillips screws. Easy peasy!
– Once those screws are out, go ahead and gently lift the taptic engine out. You’re almost there!
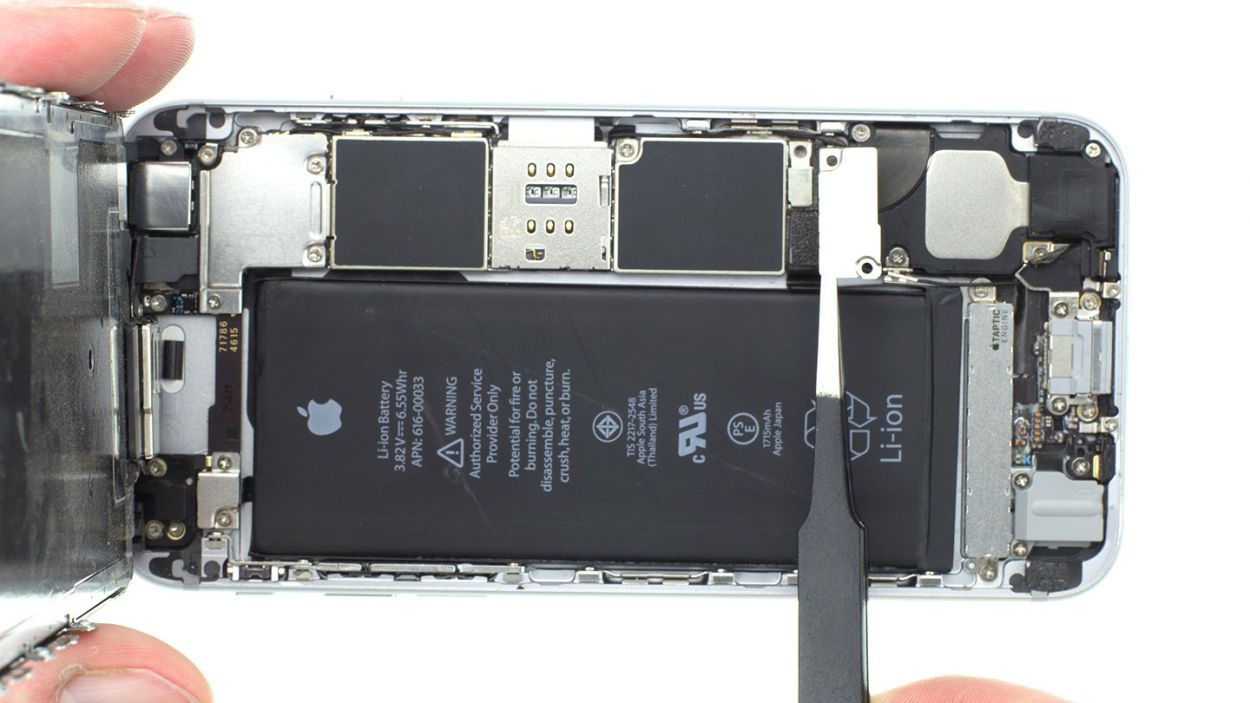
Step 7

– Let’s pop that taptic engine back into its cozy little home!
– Secure it in place with those trusty screws—2 x 1.5 mm Phillips screws should do the trick!
Step 8


If the display connectors aren’t snugly connected, you might see some funky stripes or parts of the touchscreen might throw a tantrum and stop working! Let’s make sure everything’s plugged in right!
– First up, plug in those display connectors. It might take a few tries, so don’t sweat it! Just be gentle and avoid bending them. You’ll be connecting the front camera/sensor/earpiece/ambient microphone, the Touch ID cable, and the display.
– Once everything’s plugged in snugly, fire up your iPhone! Give the LCD, touchscreen, proximity sensor, front camera, and earpiece a quick check. If the connectors are not properly seated, you might see some funky stripes or parts of the touchscreen could throw a fit and stop working!
– Now, let’s wrap things up by putting the connector cover back on and screwing it tight. You’re looking at 3 x 1.3 mm Phillips screws and 1 x 2.9 mm Phillips screw to keep everything secure!
Step 9

– Let’s plug that battery connector back in and give it a warm welcome!
– Now, grab that shiny silver cover plate and secure it in place with those screws—one 2.9 mm Phillips screw and one 2.2 mm Phillips screw will do the trick!
Step 11
– Alright, let’s wrap things up! Grab those two pentalobe screws hanging out at the bottom of the enclosure and give them a good twist to secure everything in place. You’re looking for those 2 x 3.8 mm pentalobe screws to finish the job!