Step-by-Step Guide: Nintendo Switch OLED Battery Replacement
Duration: 45 minutes
Steps: 31 Steps
Keep things safe and sound! Make sure your Switch’s battery is under 25% before diving in to disassemble it. Better safe than sorry!
Ready to swap out the battery in your Nintendo Switch OLED? First, make sure the battery is drained to under 25%—this helps lower the chance of sparks or flames if something goes wrong during the repair. Got a swollen battery? Handle it with care, and stay safe! Your Switch OLED uses JIS screws, but a Phillips screwdriver works in a pinch—just be gentle to avoid stripping them. Salvation Repair’s Phillips bits are crafted to work with JIS-style screws perfectly. Heads up: when you remove the shield plate, you’ll need to replace the thermal compound between the plate and the heatsink. Regular thermal paste won’t cut it for bigger gaps, so grab K5 Pro viscous thermal paste for the best results.
Step 1


Before diving into the repair, make sure your device is completely powered off. You don’t want any surprises when you start working on it!
– Alright, here’s the deal: grab the Joy-Con controller and give some love to that tiny round button on the back—press and hold it down like you mean it.
– While you’re still holding that button, slide the controller upward with confidence. It’s just a little wiggle and a push!
Step 2


Now, give the other Joy-Con the same love and attention by repeating this process.
– Gently slide the Joy-Con upward, keeping it steady, and voilà—it’s free from the console!
Step 3


Keep those stubborn screws in check by pressing down firmly, working nice and slow, and switching to another JIS or Phillips driver if they’re playing hard to get.
– Grab your trusty Phillips driver or a JIS driver and get ready to tackle that 2 mm-long screw holding the top of the rear case to the frame. You’ve got this!
Step 4


– Grab your trusty Phillips driver and get ready to work some magic! Start by unscrewing those two 2 mm-long screws at the bottom of the rear case that are holding it snugly to the frame. You’ve got this!
Step 5


To keep those pesky screws from getting stripped, apply a solid downward push, take your time, and if they’re being stubborn, give a JIS 000 or PH 000 driver a shot. You’ve got this!
– Grab your trusty Phillips driver and tackle that 3.8 mm screw holding the right Joy-Con sensor rail to the rear case. You’ve got this!
Step 6


– Grab that trusty Phillips driver and remove the 3.8 mm screw holding the left Joy-Con sensor rail to the rear case.
Step 7


Got a microSD card in the slot? Time to pop it out! Don’t worry, this step’s a breeze—just slide it out before moving on.
– Gently use your finger to pop up the kickstand on the back of the device—it’s like giving your gadget a little high-five!
Step 8


– Grab your trusty Y00 screwdriver and unscrew the two 4.3mm screws that are keeping the rear case snugly attached to the frame.
Step 9


If the case is being stubborn, grab an opening pick and gently pry those plastic clips loose. They’ll give way with a little encouragement.
– Gently lift the back cover starting from the top edge of your device and set it aside.
Step 10


– Grab the flat end of your trusty spudger and gently lift a corner of the tape off the shield plate—easy does it!
Tools Used

Step 11


– Grab your trusty tweezers or just use your fingers to gently peel back and take off that tape.
– Find a clean spot to keep the tape safe for when it’s time to put it back on.
Tools Used

Step 12


– Grab your trusty tweezers or just use your fingers to gently lift and disconnect the primary Wi-Fi antenna’s coaxial cable. You’ve got this!
– When it’s time to put everything back together, reconnecting these can be a bit of a puzzle. Take it slow—hold each connector right above its socket and give it a gentle press down with the flat end of a spudger. You’ll hear a satisfying snap when it clicks into place!
Step 13


– Grab your tweezers or your trusty fingers and gently guide the primary antenna’s coaxial cable out of its cozy slots in the shield plate. Easy does it!
Tools Used
Step 14


– Let’s get started! Use a Phillips driver to carefully remove the two 4.4mm screws that keep the primary Wi-Fi antenna attached to the shield plate. This is an easy step, just take your time and you’ll be done in no time!
Step 15


– Slip an opening pick right between the main Wi-Fi antenna and the shield plate—like sliding into the coolest spot at a party.
– Gently pry upward with the pick to separate the main Wi-Fi antenna from the shield plate. Go slow and steady—you’re doing awesome!
Step 16


– Gently detach the main Wi-Fi antenna—it’s like giving your device a little breather.
Step 17


– Grab those tweezers or use your fingers to gently lift and disconnect the coaxial cable from the secondary Wi-Fi antenna. You’ve got this!
Tools Used
Step 18


– Use the tip of a spudger to carefully coax the secondary Wi-Fi antenna’s coaxial cable out of its slot in the frame. It’s like gently persuading a friend to come out and play – be gentle, and it’ll come out easily!
Tools Used
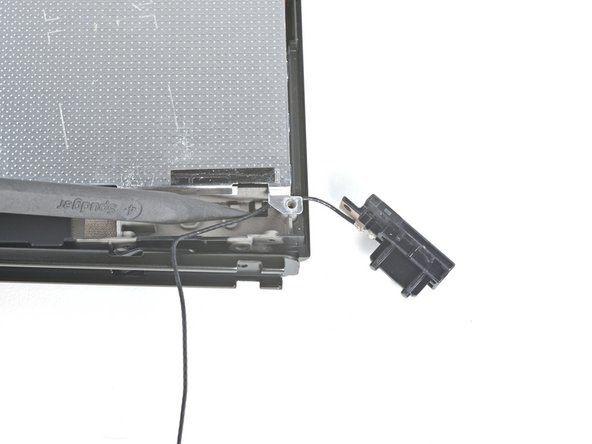
Step 19


– Grab your Phillips driver and unscrew the 4.4 mm screw holding the secondary Wi-Fi antenna to the shield plate. Easy peasy, you’ve got this!
Step 20


Hold your horses on yanking that antenna out just yet! Its coaxial cable is still snugly tucked through the frame.
– Slide an opening pick between the secondary Wi-Fi antenna and the shield plate—just like slipping a card into a tight wallet.
– Use the pick to gently pry up and separate the secondary Wi-Fi antenna from the shield plate. Take it slow and steady—you’re doing great!
Step 21


– Gently use the tip of a spudger to guide the secondary Wi-Fi antenna’s coaxial cable out of its cozy spot in the frame.
– Carefully remove the secondary Wi-Fi antenna.
Tools Used
Step 22


– Grab your trusty Phillips driver and let’s get those six 4.4 mm screws out of the way! They’re holding the shield plate snugly to the frame, so let’s show them who’s boss.
Step 23


Don’t worry if you feel a bit of resistance – it’s totally normal. The shield plate is stuck to the heat sink with thermal paste, so it’s gonna take a little extra oomph to get it loose.
– Gently coax the top of the shield plate upwards and away from the frame using your fingers.
– Say goodbye to the shield plate as you remove it.
– Underneath, you’ll find a thick layer of pink thermal compound connecting the shield plate to the copper heat sink below. When you take off the shield plate, be sure to check out our thermal paste guide for tips on getting rid of the old thermal compound and replacing it with a suitable one, like K5 Pro, when you put everything back together.


Step 25


Be super careful not to jab the battery with the applicator for the isopropyl alcohol—it’s not a fan of being poked!
Before jumping in with adhesive remover, let’s get things prepped and ready! Follow these simple setup steps first.
– Drip a little adhesive remover or high-proof isopropyl alcohol (90% or more) into the battery well along the top edge. It’ll loosen up that pesky adhesive and make your life easier!
Step 26


– Give the top edge of your device a little tilt up, letting the isopropyl alcohol do its magic under the battery.
– Hang tight for a minute or two to let the isopropyl alcohol weaken that sticky adhesive.
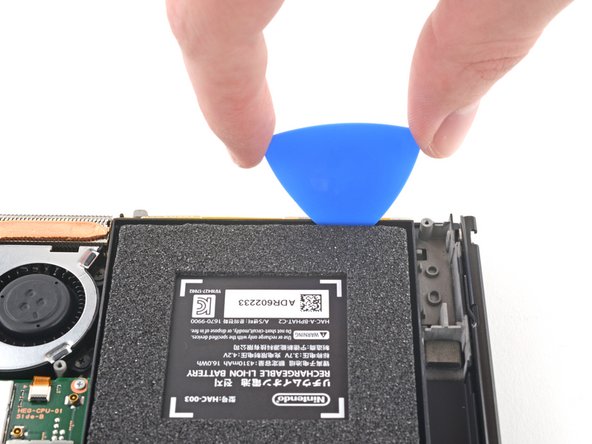
Step 27


Make sure not to poke or bend the battery with your tool—a damaged or bent battery might leak harmful chemicals or even catch fire. Stay safe!
– Gently slide an opening pick into the space between the battery and the battery well’s wall.
– Carefully work the tip of the opening pick under the battery and slide it along the edge to start cutting through the adhesive.
Step 28

– Keep that opening pick snug in place and sprinkle a few more drops of adhesive remover or isopropyl alcohol into the battery well. It’s like giving your device a little spa treatment!
– Now, gently tilt the top edge of your device upwards and hang tight for 1-2 minutes. This will let the isopropyl alcohol work its magic and loosen up that stubborn adhesive.
Step 29

– Keep gliding the opening pick further along the top edge of the battery, slicing through more of that sticky adhesive underneath. You’re doing great—just keep it steady and take your time!
Step 30

Handle the battery with care and avoid bending it while prying.
A little extra isopropyl alcohol can be your best friend if the parts are being stubborn.
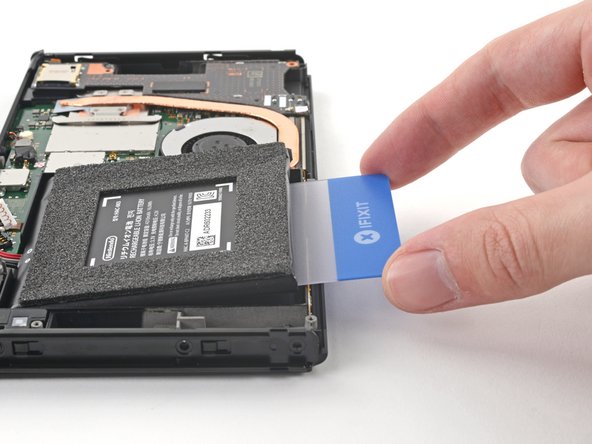
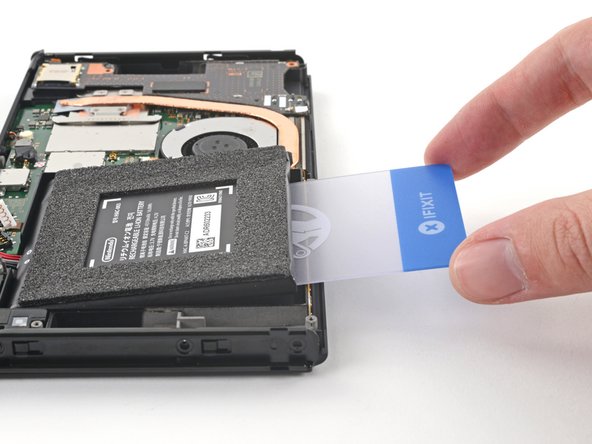
– When you’ve got enough space, slide a plastic card under the battery and gently lift it up. You’ve got this!
Step 31


Once the battery’s out, it’s time to bid it farewell—reusing it is a no-go for safety! Grab a fresh new battery to keep things running smoothly.
If your new battery doesn’t come with adhesive already in place, no worries! Just use this guide to slap on some pre-cut adhesive at the base of the battery—it’s quick, easy, and keeps everything snug.
– You did it! To put everything back together, just reverse the steps.
– For a happy device, calibrate that new battery after you’re done with this guide.
– Take a closer look at your new part and the old one – you might need to move some bits over or peel off adhesive backing before installing.
– Be kind to the planet and take your e-waste to a reputable recycler.
– Things didn’t quite go as planned? Try some troubleshooting or get help from our community for some expert advice.
– If you need help, you can always schedule a repair
Success!