Step-by-Step Guide: Replace Apple iPhone 5s Screen
Duration: 30 min.
Steps: 18 Steps
Welcome to the delightful world of DIY repairs! In this guide, we’re going to help you swap out that faulty display unit on your iPhone 5s. If you’re dealing with a cracked screen, a touchscreen that’s gone rogue, or an LCD that’s as black as night or flickering like a disco ball, you’re in the right place! Let’s roll up our sleeves and get your phone looking fabulous again. Remember, if you need a hand, schedule a repair with us!
Step 1
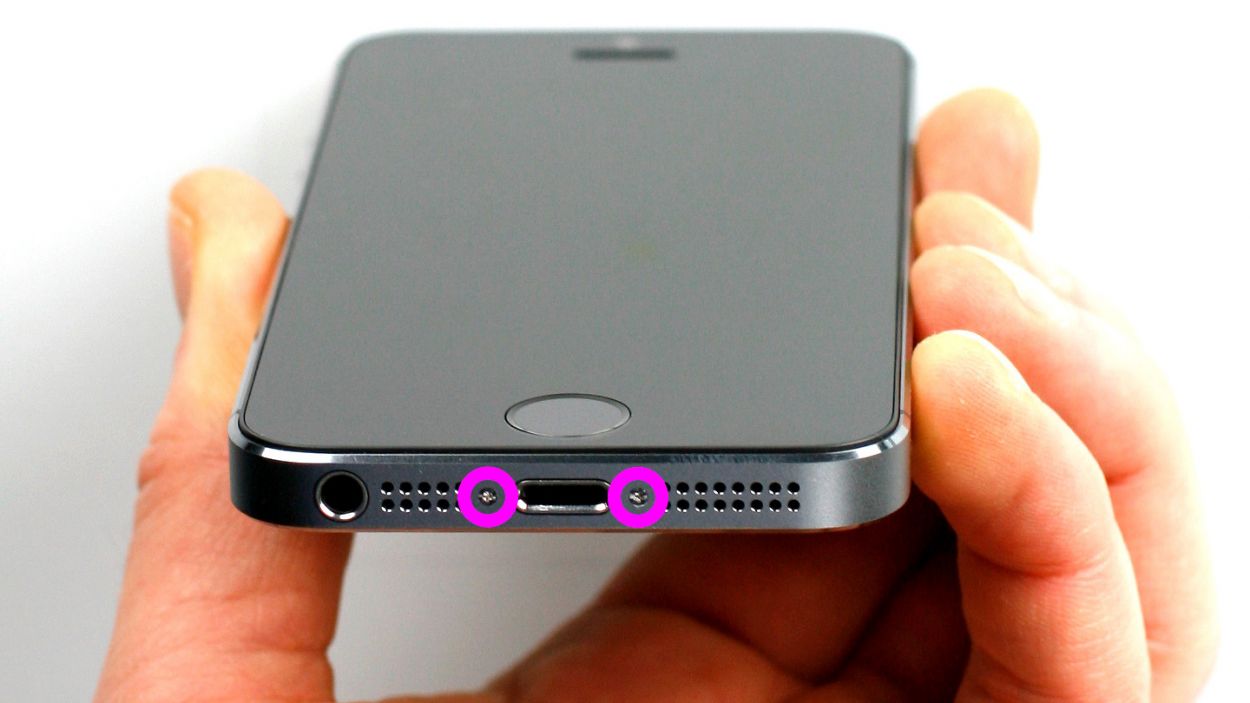
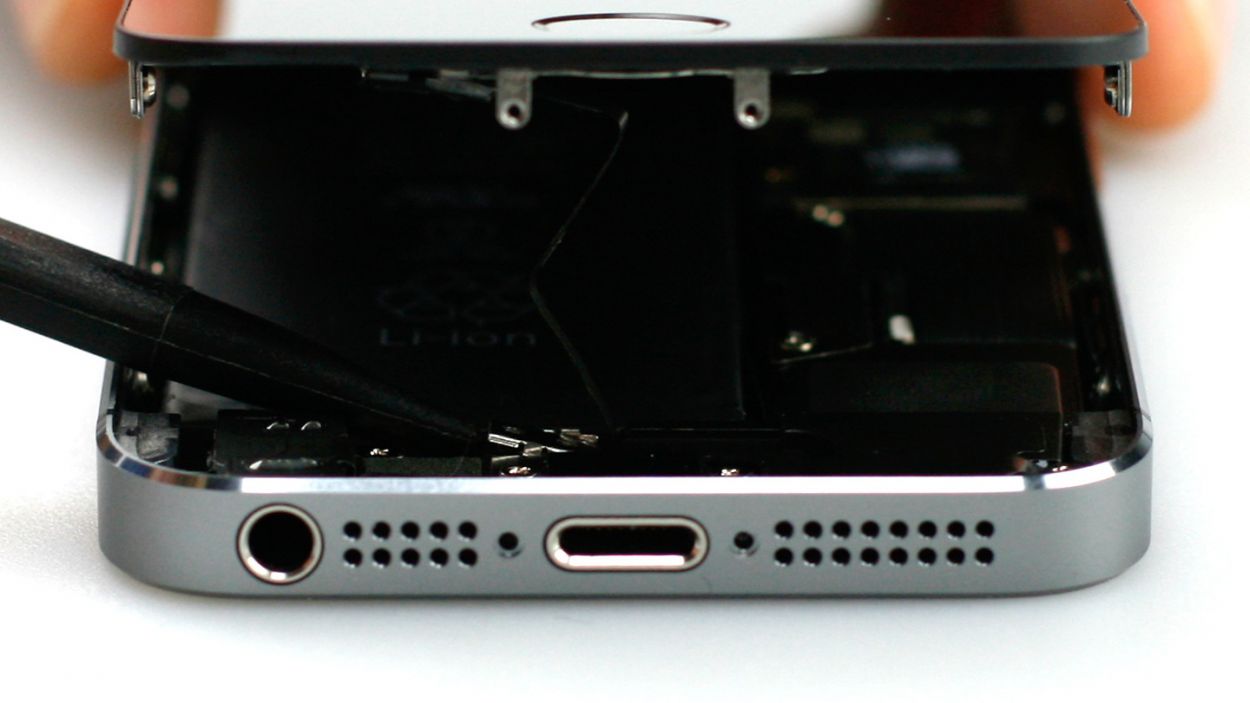
– Grab your trusty pentalobe screwdriver to pop open that iPhone 5s!
– Next up, let’s tackle those two pentalobe screws at the bottom of the enclosure. They’re hanging out right next to the Lightning connector, one on each side. Make sure to stash those screws in the same compartment of your organizer tray. You’ll need 2 x 4.0 mm pentalobe screws for this adventure!
Step 2


Keep the display lift to a max of two centimeters—beyond that, you risk yanking the Home button cable underneath. Let’s keep everything intact!
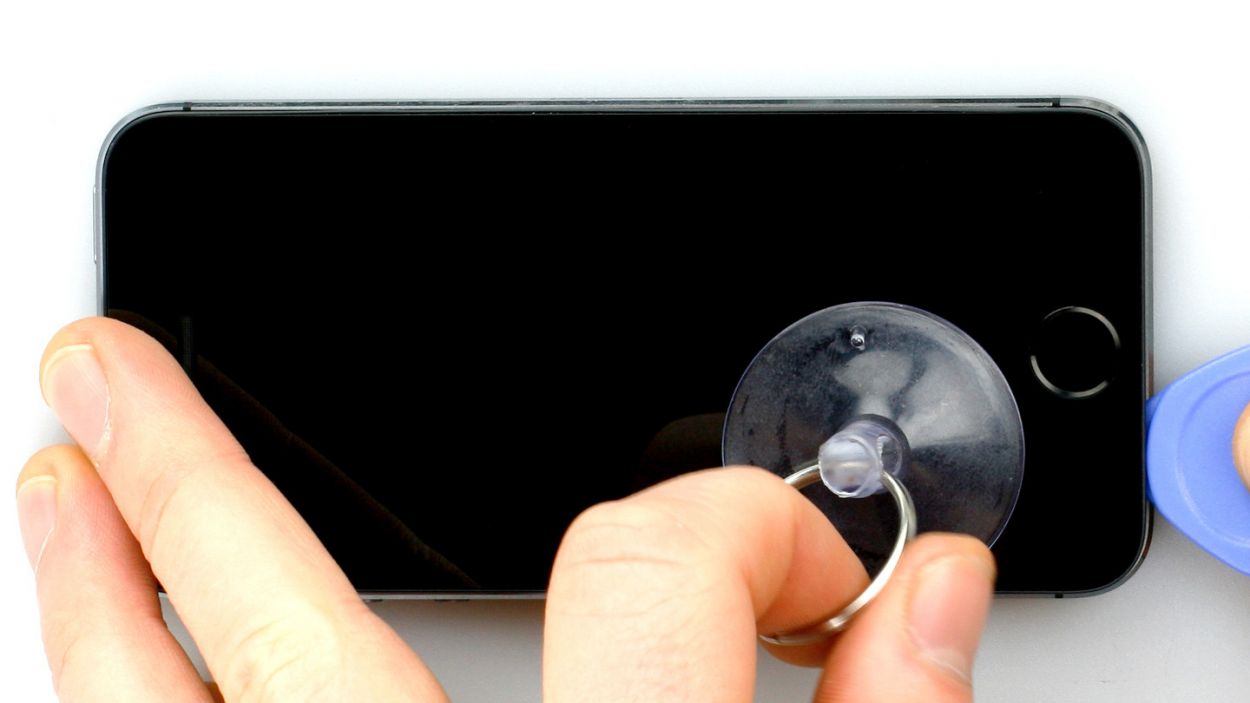
– Lay your iPhone 5s down on a soft, clean surface to keep that back safe from scratches!
– To lift the front panel, grab a suction cup and a hard plastic pick. If your screen is cracked to bits, a little packing tape will help hold it together.
– Place the suction cup over the Home button (if you can) or right next to it (check out figure 1). While you gently pull the screen up with the suction cup, slide the hard plastic pick between the aluminum frame and the display frame, and give the aluminum frame a little press down. Use the hard plastic pick to nudge the screen up (see figure 2). It might take a few tries, but you got this!
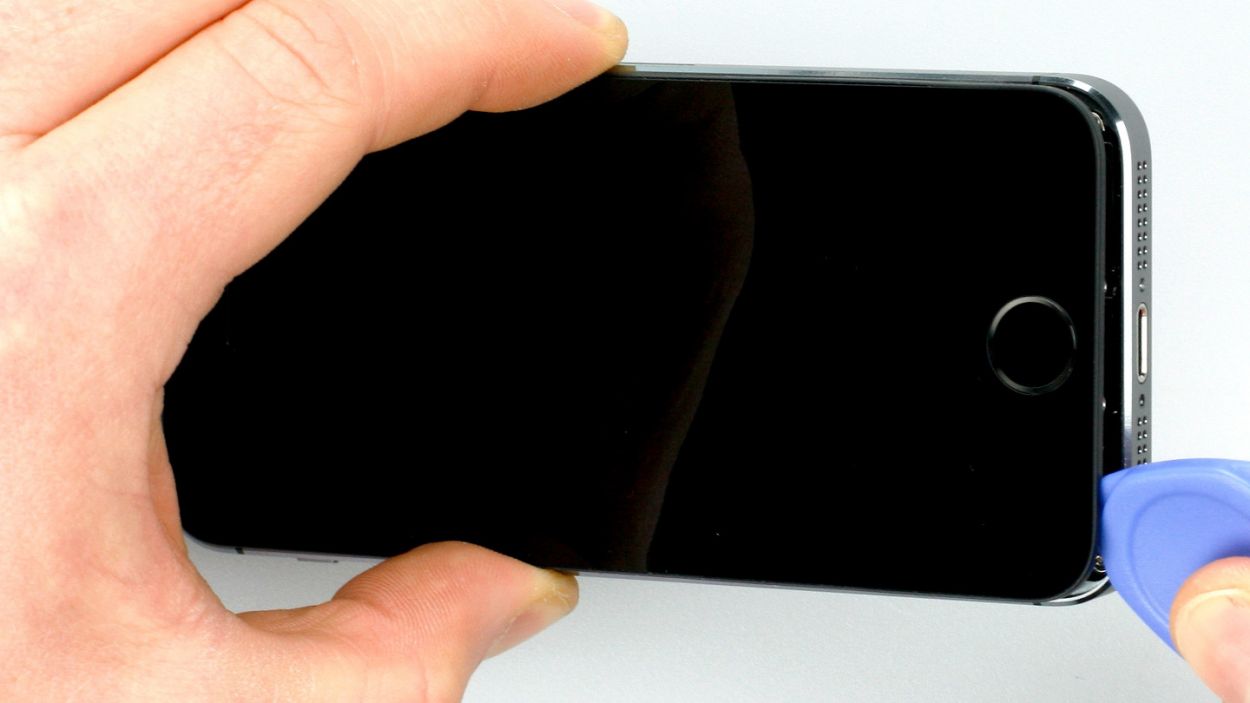
– Once you can lift the screen a few millimeters (see figure 3), carefully work your way around the edges until it’s loosened on both sides (see figure 4).
Step 3

– Start by gently removing the shiny silver cover that’s snugly sitting over the Home button connector. Use the pointed tip of your spudger to gently lift it out from just below the cover (check out figure 1 for a visual!).
– Next up, it’s time to disconnect that contact from the connector. With a steady hand, carefully pull it off using your trusty laboratory spatula or spudger.
– Once the cable is free, you can lift the display right at the Home button area. Just a heads up—the LCD and touchscreen cables are still hanging out with the logic board, so stay tuned for the next step!
Step 4


– Start by unscrewing those four Phillips screws from the shiny silver cover (check out figure 1 for a visual guide). Make sure to stash those screws in the same compartment of your organizer tray so they don’t go wandering off! Now, gently lift off the cover to set it free. You’ll need: 1 x 1.7 mm Phillips screw (not magnetic), 2 x 1.2 mm Phillips screws, and 1 x 1.7 mm Phillips screw (magnetic).
– Let’s give that new cable set a test run! Temporarily connect it (see figure 2, green connector). Fire up your iPhone and see if the FaceTime camera, ambient microphone, and proximity sensor are all working like champs. While recording a voice memo, cover the sensor with your hand and see if the display goes black—if it does, you’re golden! Just ensure those connectors are snugly plugged in. If everything checks out, you’re ready to roll on to step 3. If the display has a hint of yellow, don’t worry—just check out the last step in this guide.
– Plug in that new cable set (see figure 2, green connector) for a quick test.
– Now, start your iPhone and check if the FaceTime camera, ambient microphone, and proximity sensor are all in tip-top shape. Remember to cover the sensor while recording a voice memo to see if the display goes black. Make sure all connectors are securely in place. If all systems are go, you can move on to step 3.
– If the display has a slight yellow tint, refer to the last step in this guide.
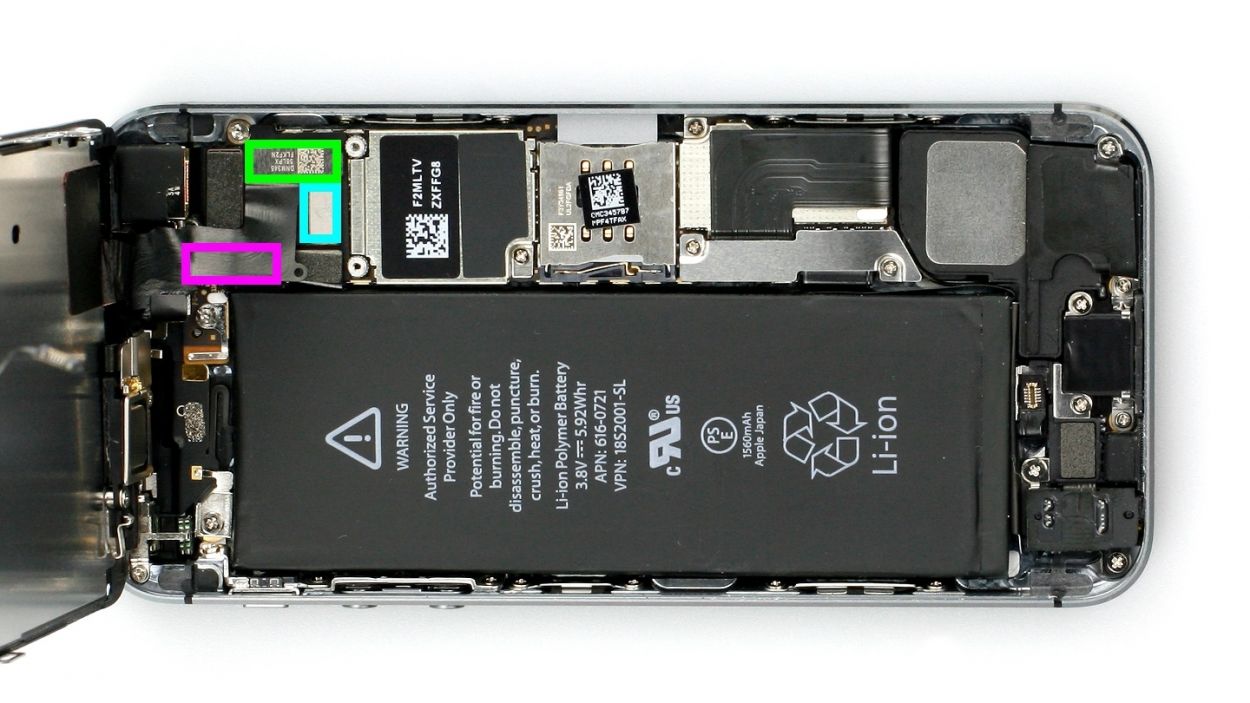
– Carefully disconnect the three connectors shown in figure 2. Use the pointed tip of your spudger to gently lift just below the contact. Take care during this step! The connectors you’ll be working with are: Touchscreen, LCD, and Front camera/sensor/earpiece/ambient microphone.
Step 5

– Let’s kick things off by removing that Phillips screw (check out figure 1). Just a heads up, there’s a tiny metal contact hiding below it that often gets a bit too cozy with the cable set along with the screw. You’ll need 1 x 2.0 mm Phillips screw for this.
– Next, it’s time to tackle those two equally sized Phillips screws (see figure 2). Once they’re out of the way, gently lift off the silver cover. Don’t forget to keep everything organized in your trusty organizer tray compartment. You’ll need 2 x 1.4 mm Phillips screws for this step!
– Now, grab your laboratory spatula and carefully slide the pointed tip underneath the cable set, which is usually stuck down with some glue. This will help you detach it without any hassle (see figure 3).
– The Home button is a bit shy and is glued to the screen from the inside. Use your spudger to gently peel off the rubber coating to avoid any scratches on the screen (see figure 4). If you’re feeling adventurous, you can also press in the Home button from the front side (see figure 5).
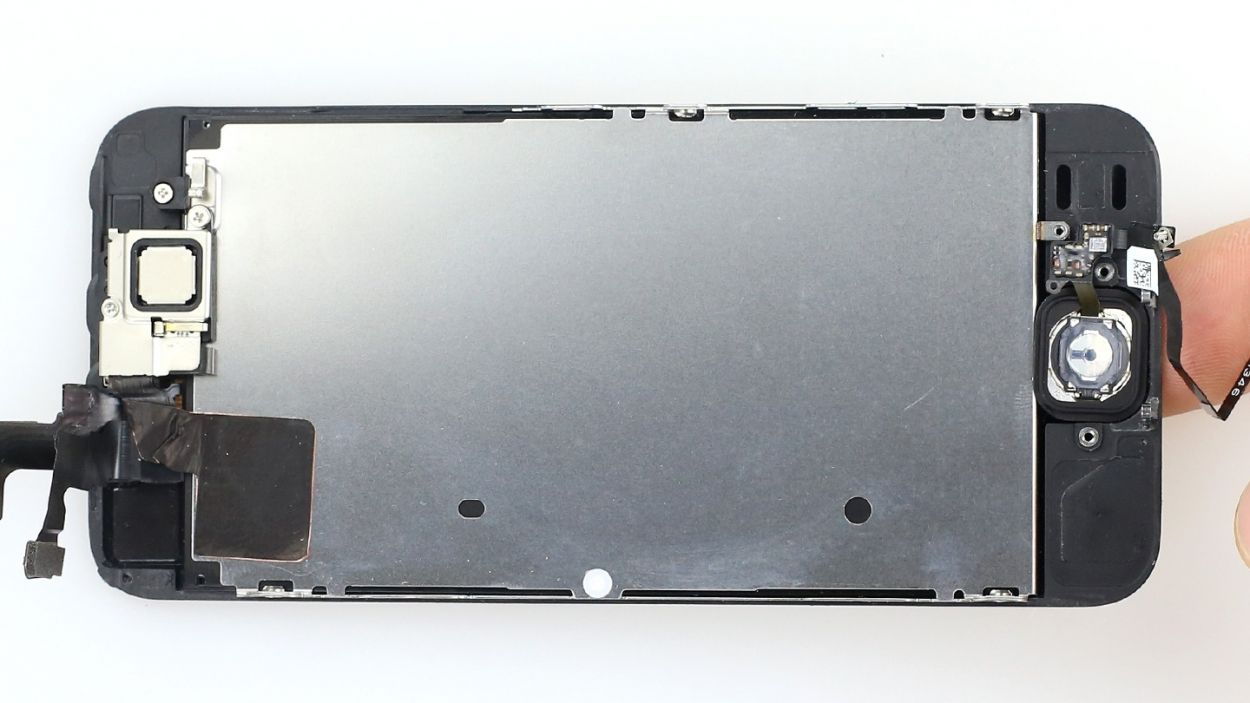
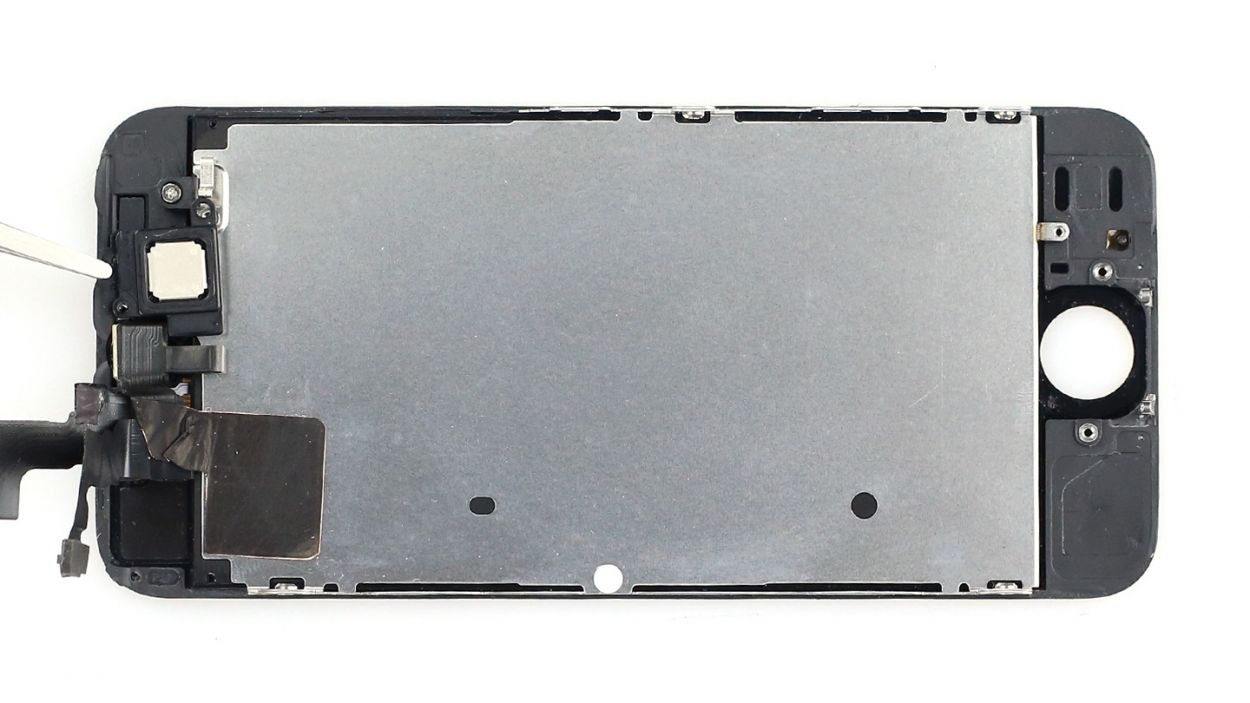
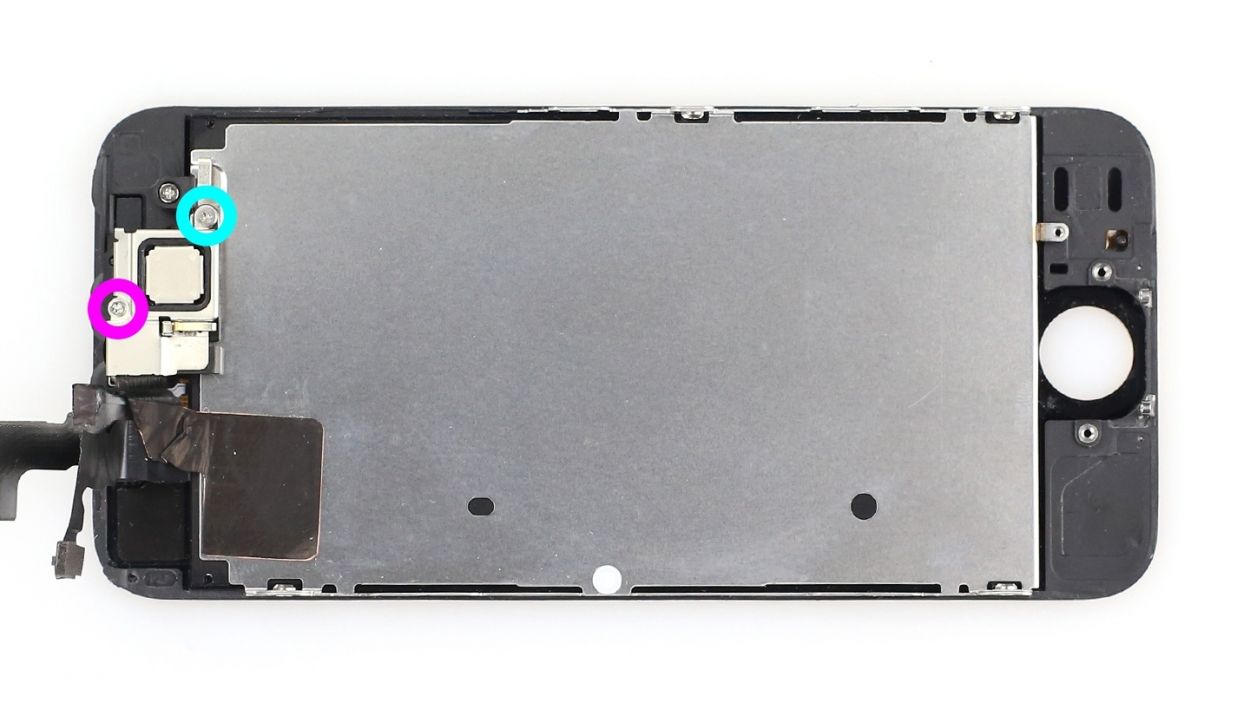
Step 6


– The earpiece is cozy at the back of the display unit. First, let’s unscrew those two Phillips screws from the cover on the earpiece (check out figure 1) and stash them in the same compartment of your organizer tray. You’ll need: 1 x 4.0 mm Phillips screw and 1 x 2.2 mm Phillips screw.
– Next, gently lift off the cover. It’s got a little hook action going on in two spots, so carefully unhook one side and lift it out. Don’t forget to toss it in with the screws you just removed (see figure 2).
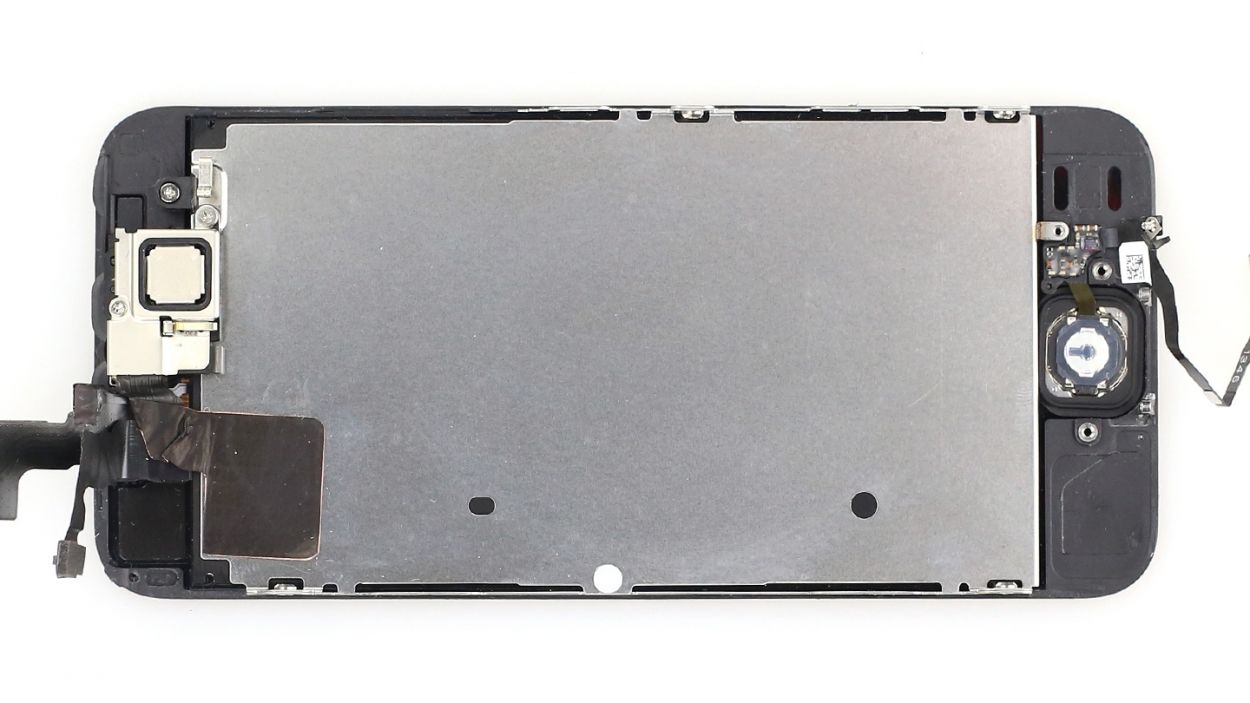
– Now, let’s reveal the earpiece (see figure 3) so you can give it the boot!
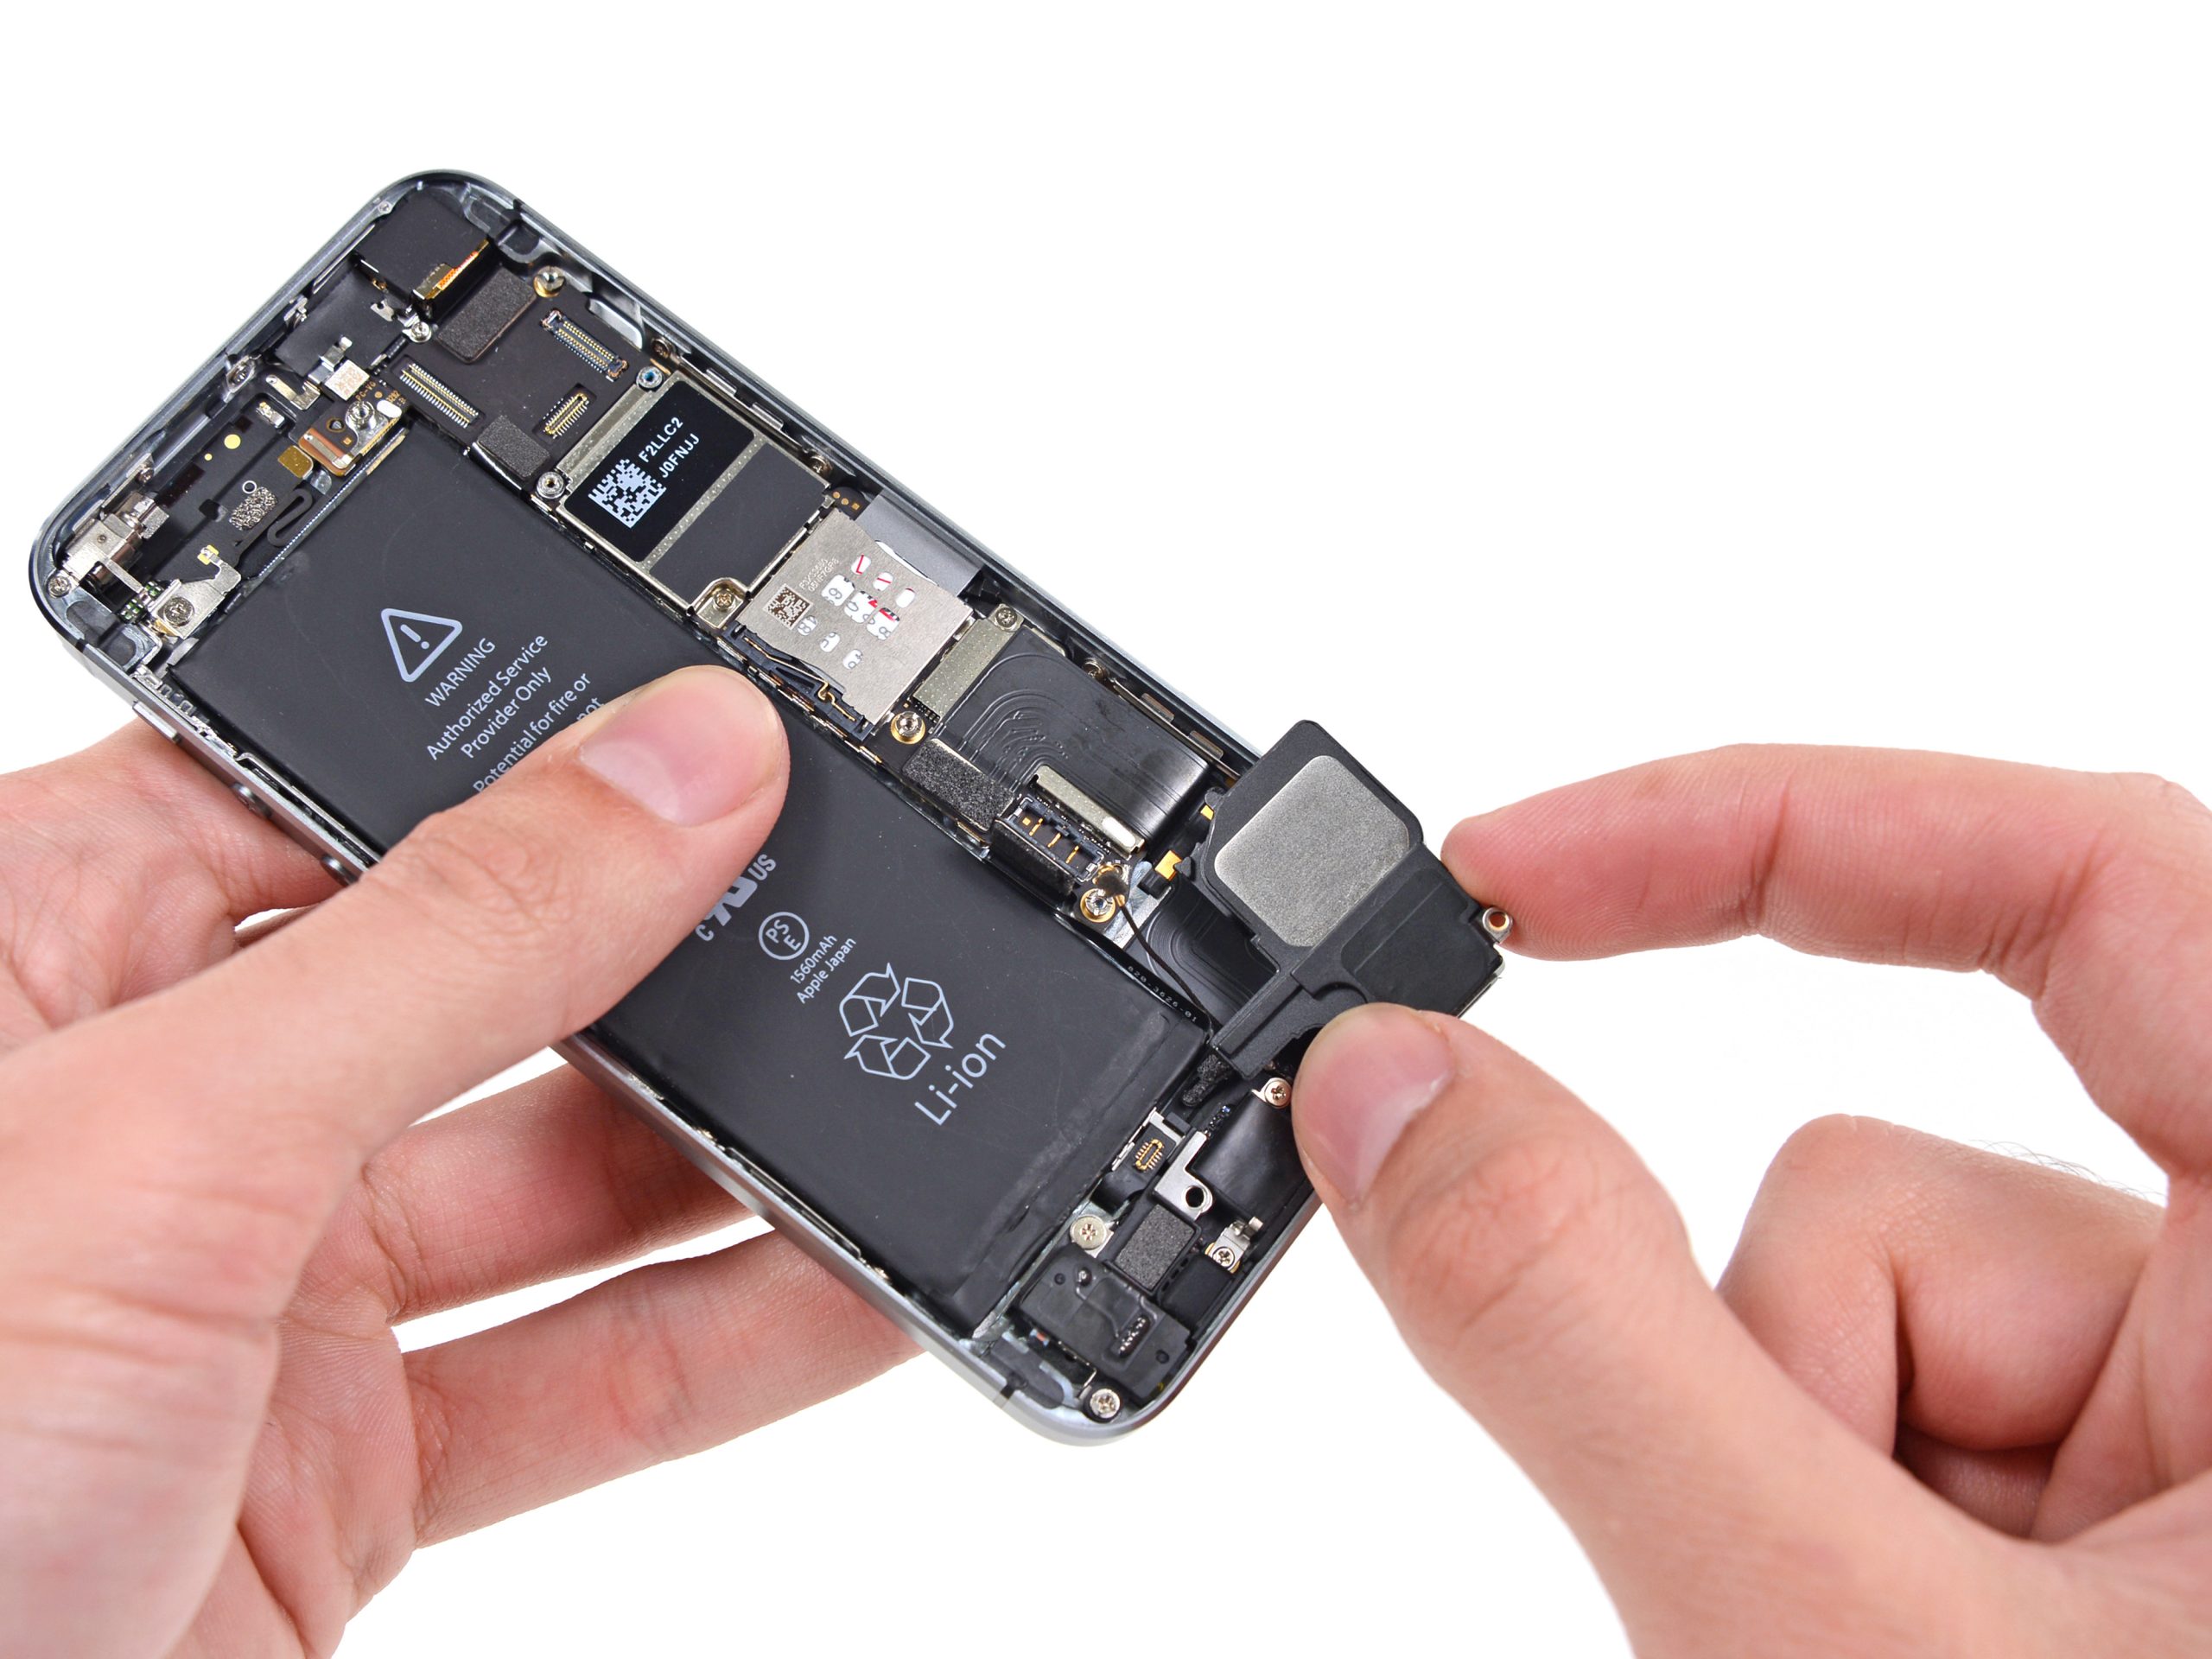
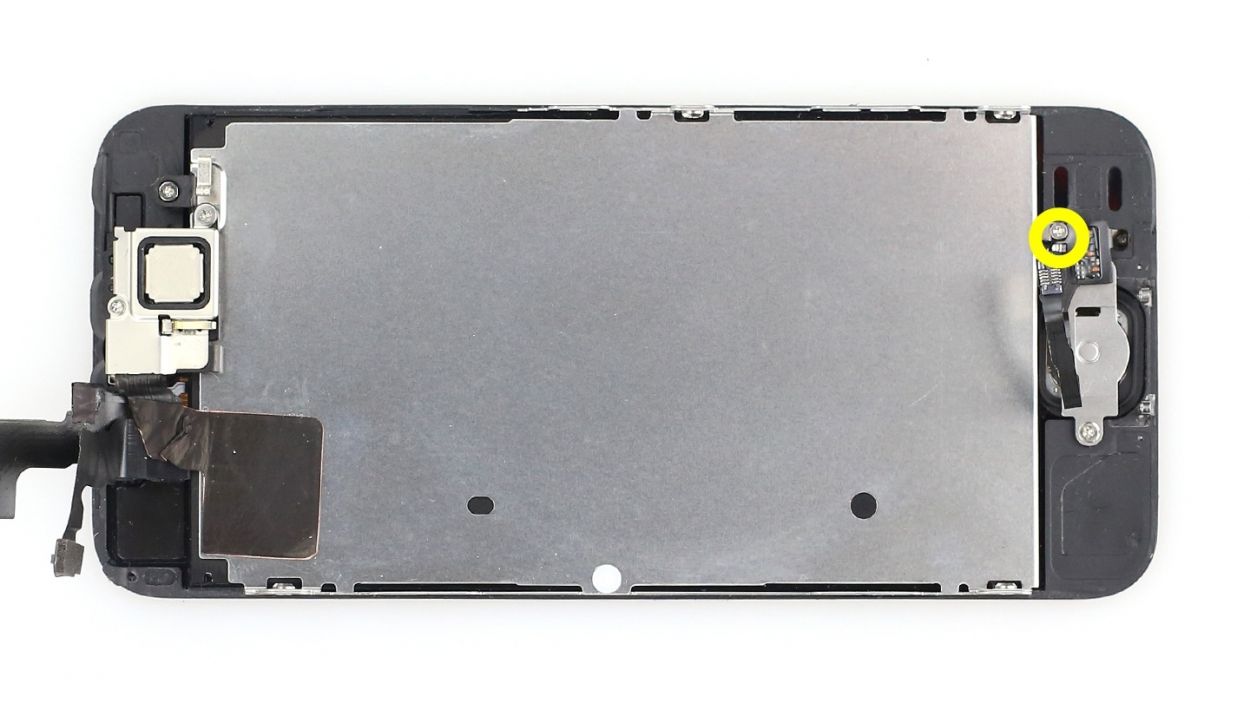
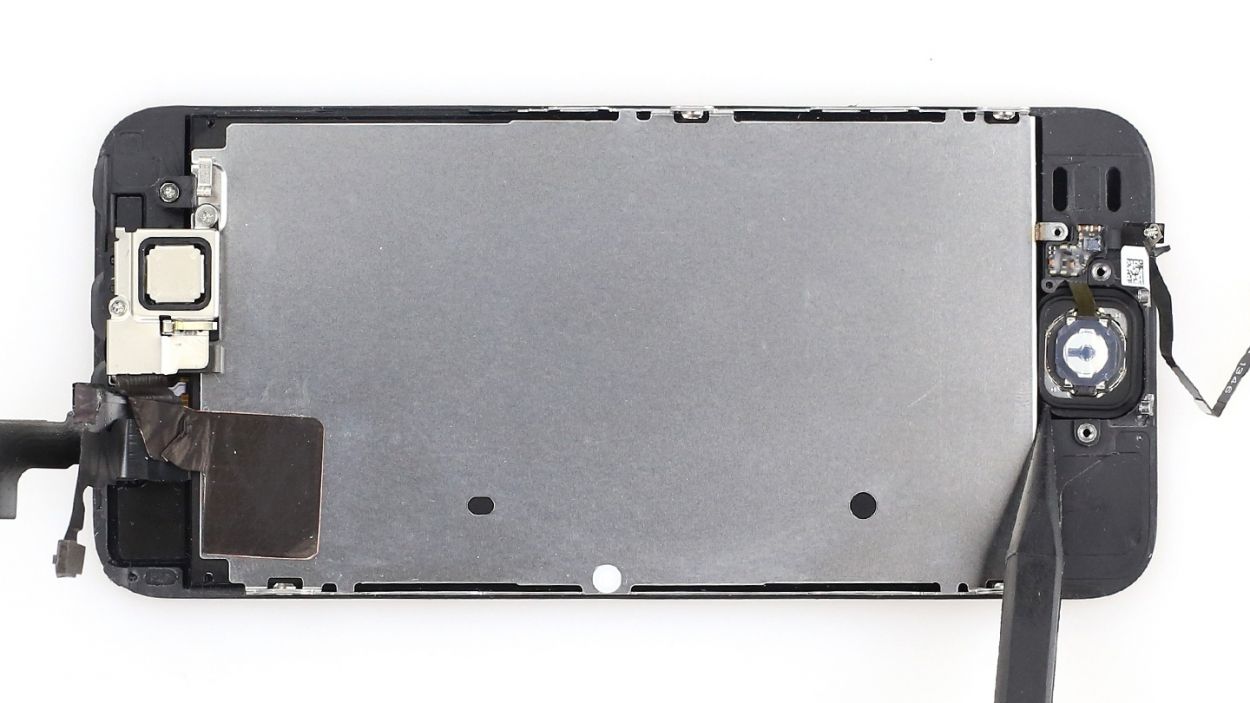
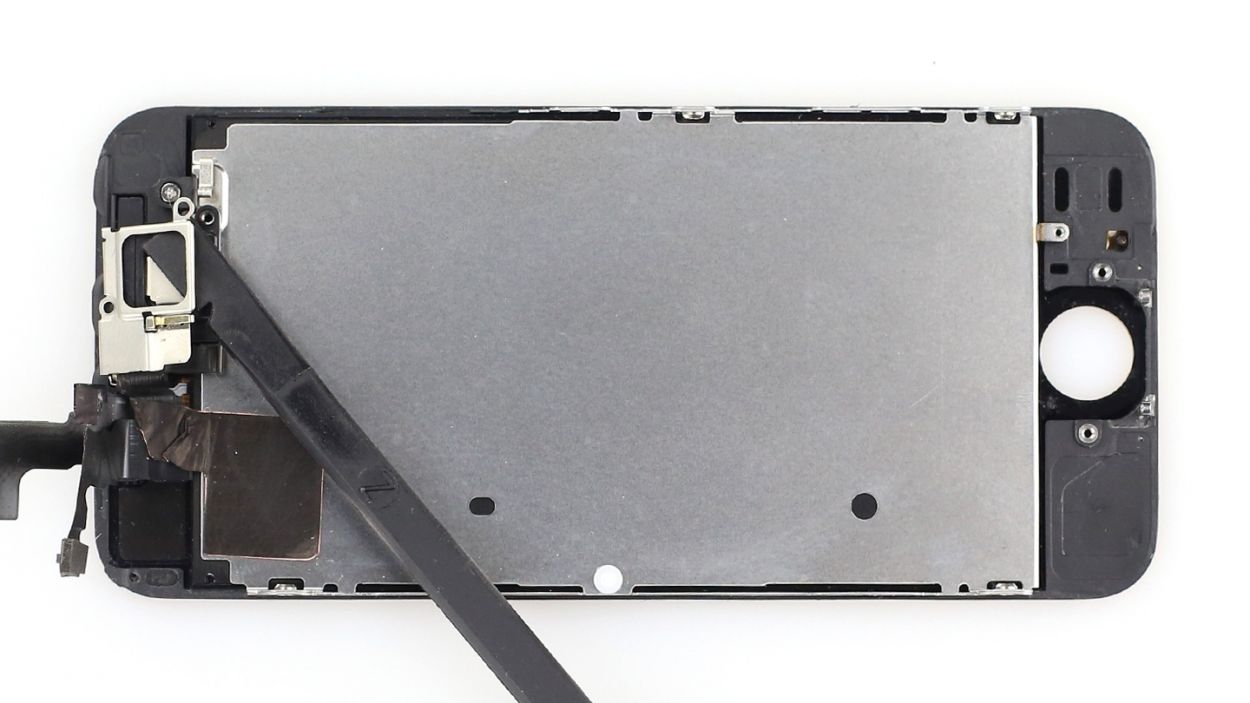
Step 7
– Time to say goodbye to the cable set! It’s got a little glue love happening with the sensors, so gently coax it off using your laboratory spatula (check out figure 1 for a visual!).
– Now, give that cable set a lift with your fingers. Just fold it over so the camera snuggles up to the rear panel (see figure 2). No need to bother with the heat shield!
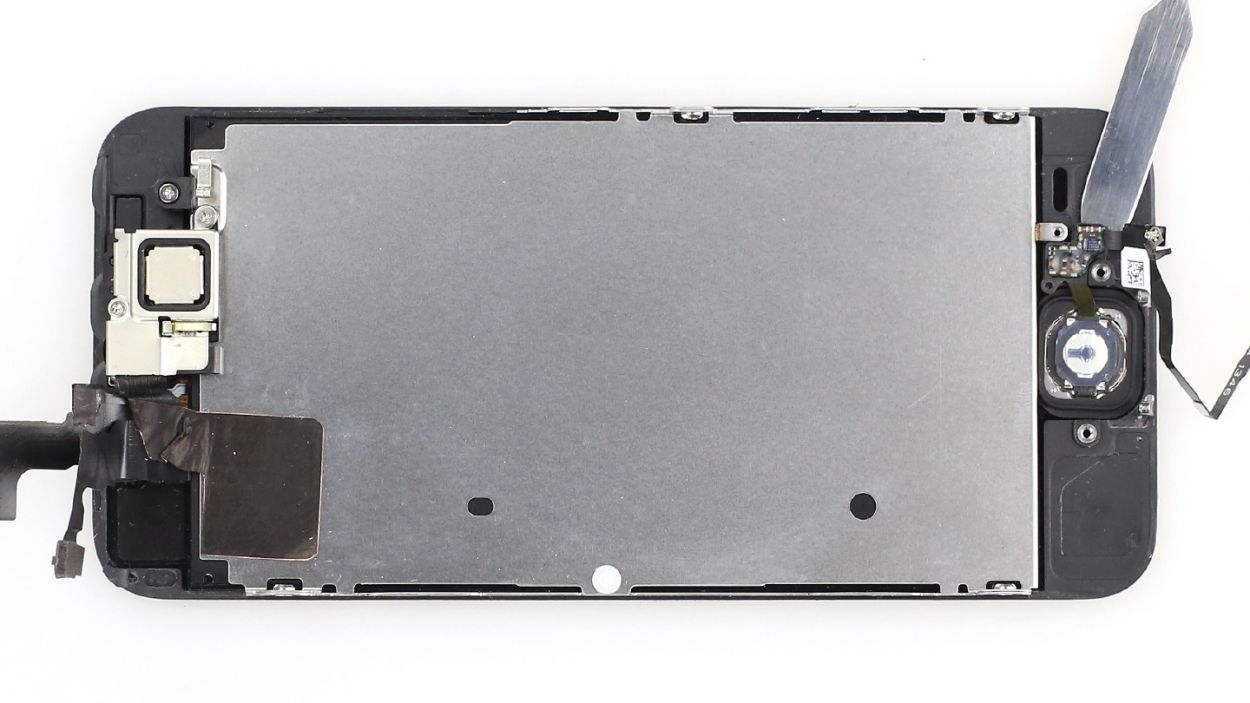
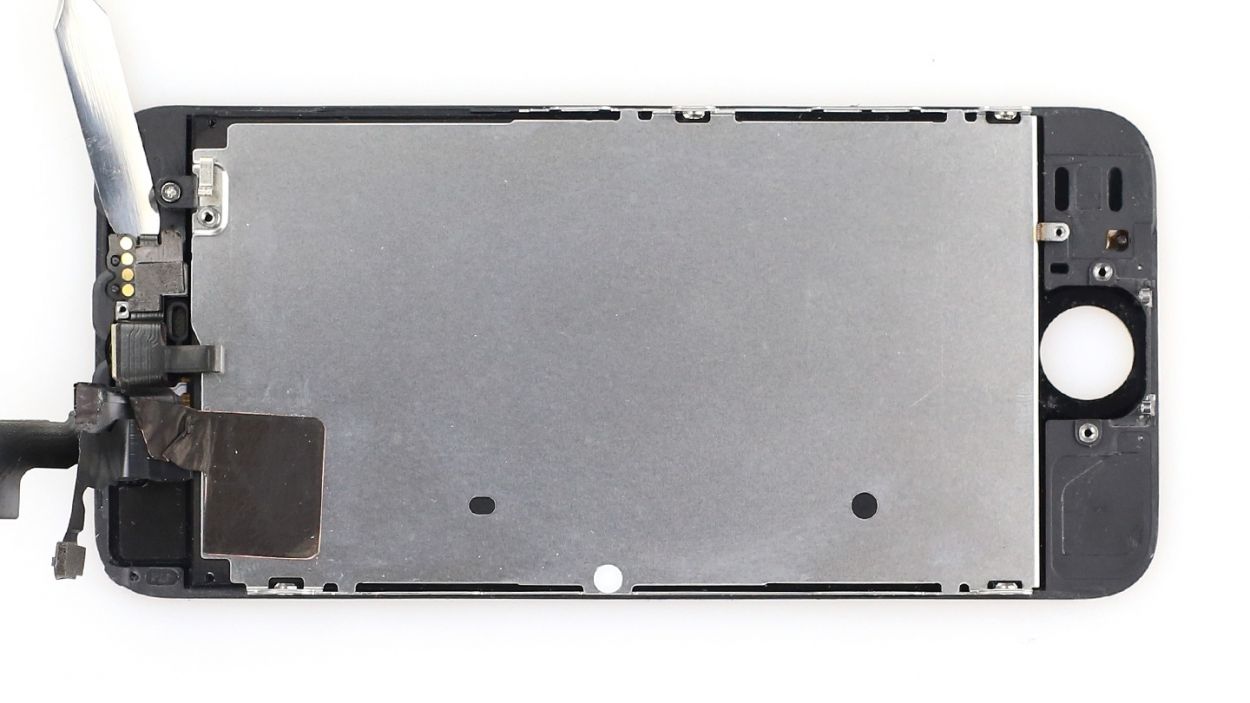
Step 8
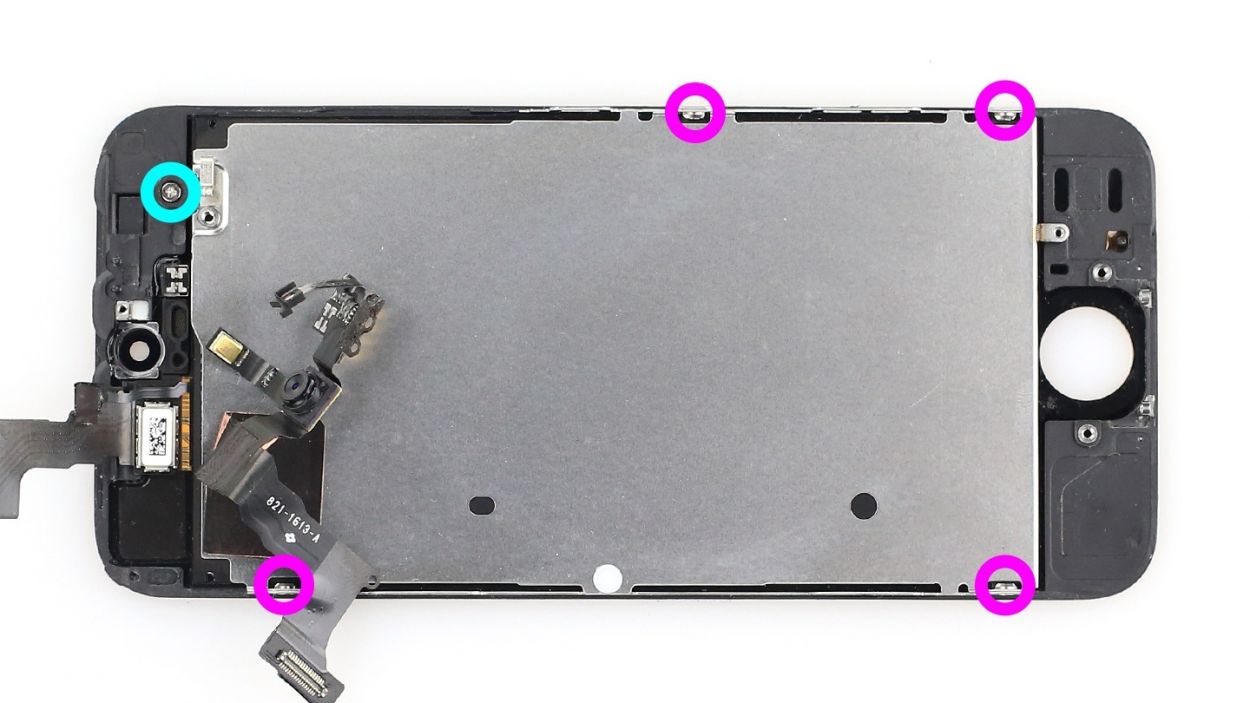
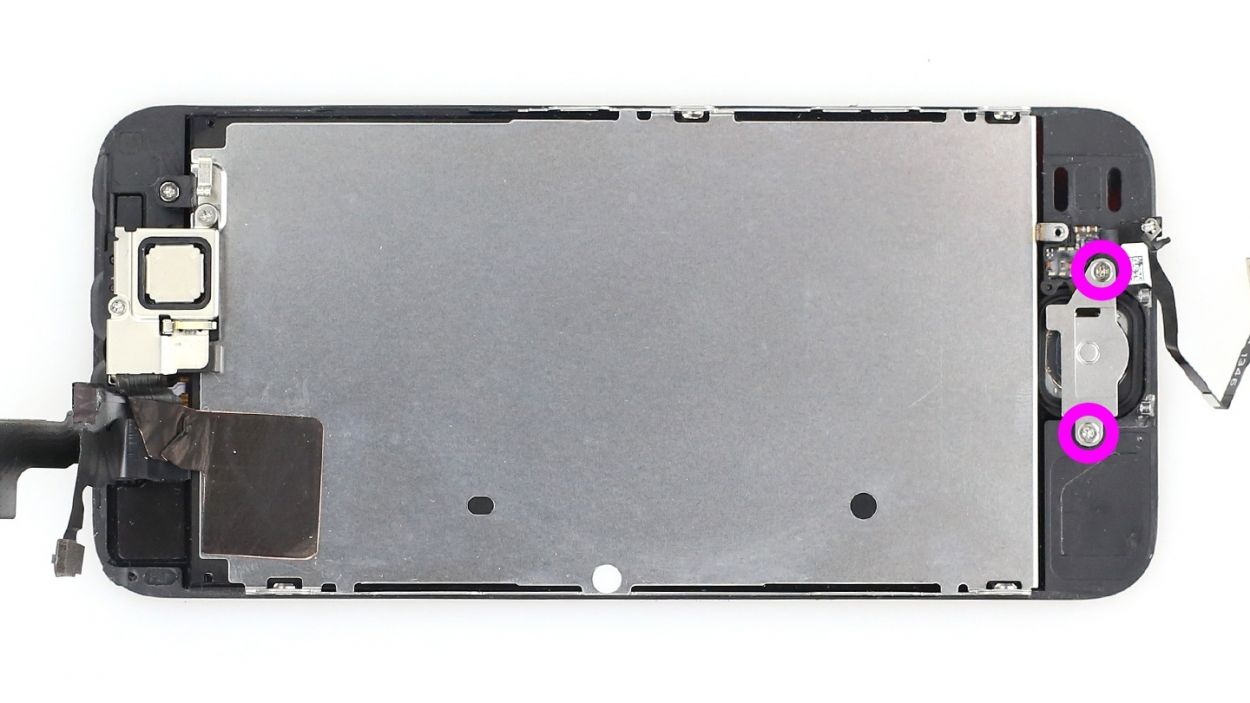
– First up, let’s tackle those five Phillips screws that are keeping the metal cover snugly in place (check out figure 1 for a visual!). You’ll need: 1 x 2.6 mm Phillips screw and 4 x 1.2 mm Phillips screws.
– Once those screws are out, it’s time to gently remove the rear panel (see figure 2).
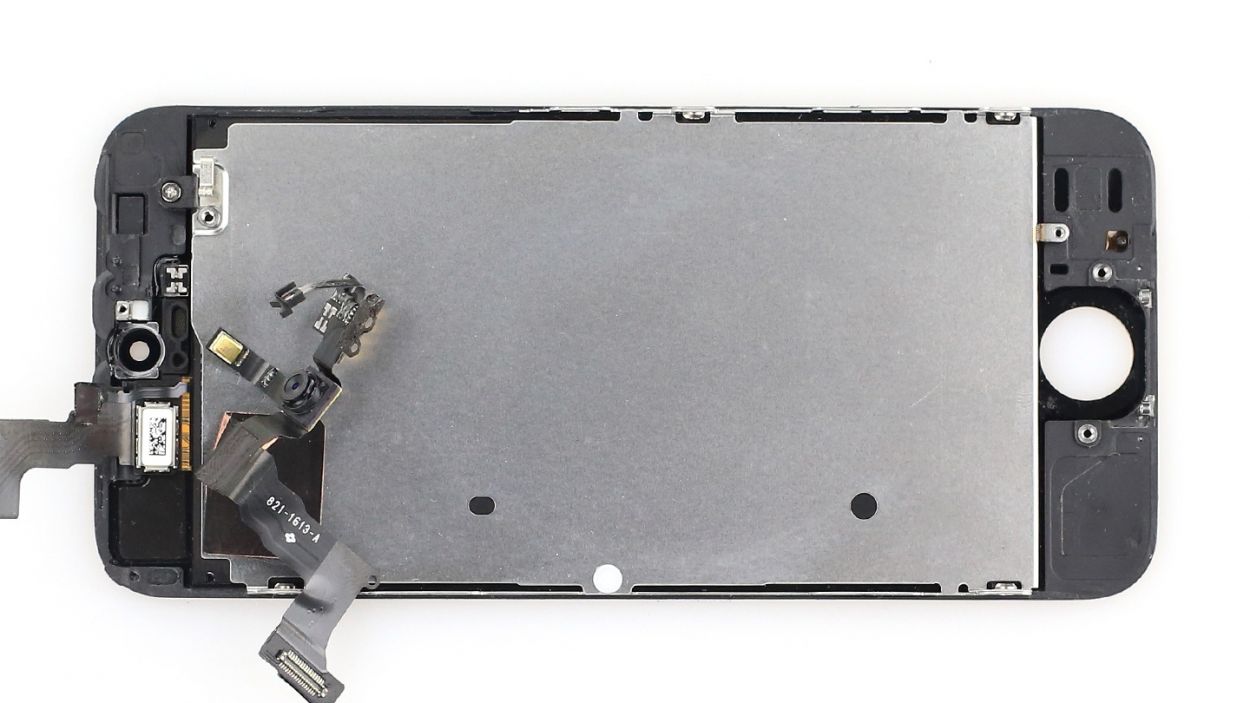
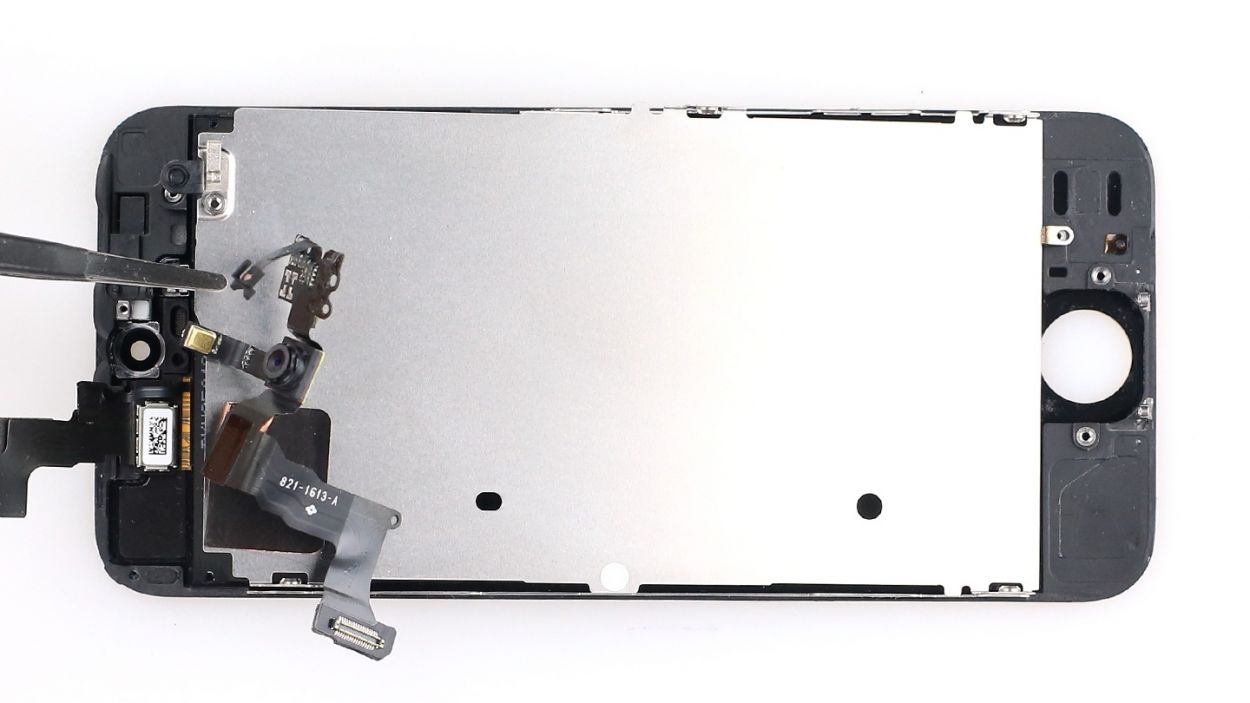
Step 9


– Keep in mind that not all displays come with the same goodies. If you find it necessary, you might need to snag a couple of parts from your old display before putting in the new screen (check out figure 1): Front camera bracket (it’s just a little glued), Sensor bracket (also lightly glued).
– Front camera bracket (it’s just a little glued).
– Sensor bracket (also lightly glued).
– And hey, don’t forget you can reuse a couple of stickers too (see figure 2)!
Step 10

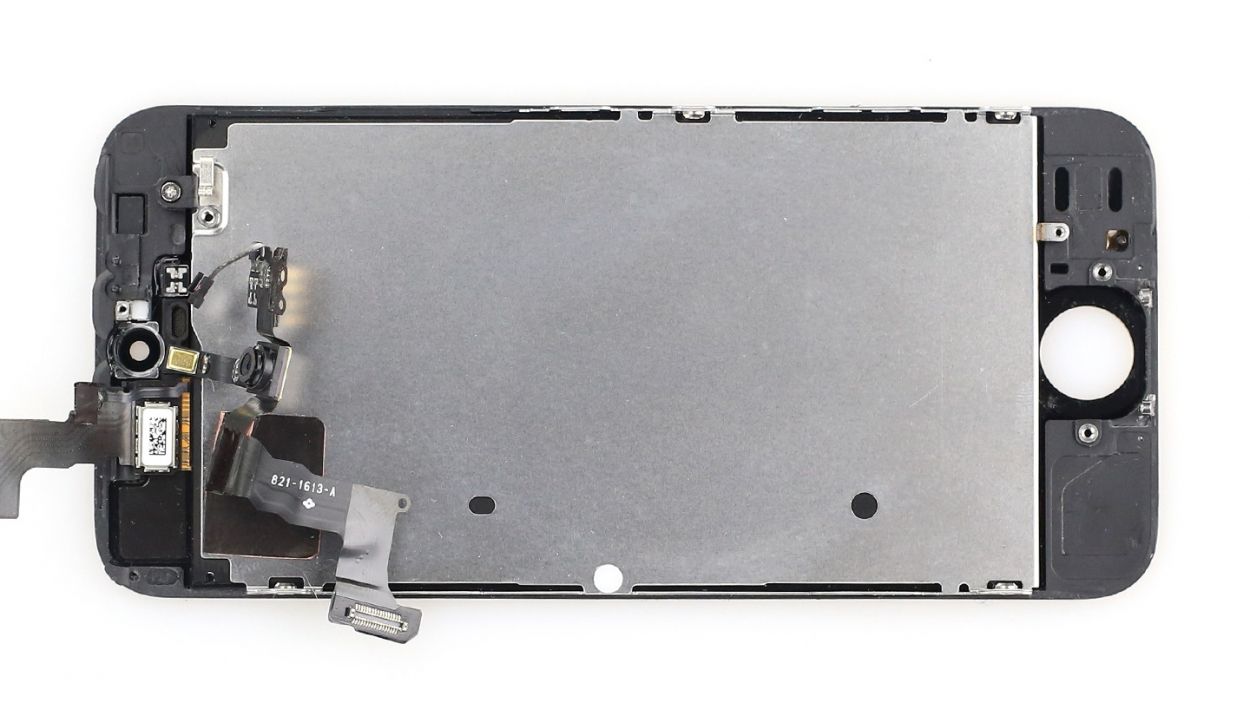
– Now, let’s pop that shiny silver rear panel onto the back of your new display and secure it with some screws. You’re almost there!
Step 11
Getting the sensors in the right spots is key! If they’re not positioned just right, the proximity sensor might throw a fit and not work like it should. Let’s keep everything running smoothly!
– First, slide that ambient microphone into the little black groove (check out figure 1 for guidance).
– Next up, attach the front camera and the sensor to their designated brackets (see figure 2). It’s super important to get those sensors in the right spot; otherwise, the proximity sensor might throw a little tantrum and not work as it should.
Step 12

Heads up! The screws you’re working with are like a quirky puzzle—each one has its own length. If you mix them up, you might end up with a screw that presses against the display glass from the inside, which could lead to some unwanted damage. Let’s keep everything safe and sound!
– Let’s pop that earpiece back into its cozy spot (check out figure 1). After that, it’s time to cover it up again (see figure 2).
– Now, let’s fasten those Phillips screws (see figure 3). Make sure the front camera is perfectly centered on the display. Feel free to nudge it a little if it’s not quite right. You’ll need 1 x 4.0 mm Phillips screw and 1 x 2.2 mm Phillips screw for this part!
Step 13

– Time to reinstall that Home button (check out figure 1)! Just make sure the cable set is snug and in the right spot.
– Next up, let’s pop that cover back on and secure it with some screws (see figure 2). You’ll need 2 x 1.4 mm Phillips screws for this part!
– Now, fold the cable set back over and tighten it down. Just a friendly reminder: don’t twist that metal contact while you’re at it! You’ll need 1 x 1.4 mm Phillips screw.
Step 14

If those connectors are feeling a bit shy and aren’t snugly connected, you might see some funky stripes on your display or notice that parts of your touchscreen are taking a break. Let’s make sure everything is plugged in just right!
– Reconnect those connectors (check out figure 1). Sometimes, the touchscreen connector likes to play hide and seek when you attach the LCD connector. You’ve got this—just remember: Touchscreen, LCD, Front camera/sensor/earpiece/ambient microphone.
– Once everything is snug, fire up your iPhone! Give a quick check to see if the LCD, touchscreen, proximity sensor, front camera, and earpiece are all doing their thing. If something’s off, you might see stripes on the display or parts of the touchscreen might be taking a little break.
– Now, let’s get that cover back on and secure it with some screws (see figure 2). You’ll need: 1 x 1.7 mm Phillips screw (not magnetic), 2 x 1.2 mm Phillips screws, and 1 x 1.7 mm Phillips screw (magnetic).
Step 15


– This step is pretty tough. Use tweezers or the spudger to position the cable set’s connector and then use the spudger to carefully press the connector onto the connection (see figure 1).
– If the connector is fitted correctly, put the silver cover over the connector. It’s easiest to position the cover using tweezers (see figure 2). Using the spudger, carefully press the cover on until it gently clicks into place (see figure 3).
Step 17

– Now, let’s get those two pentalobe screws back in at the bottom of the enclosure. You’ll need 2 x 4.0 mm pentalobe screws for this part of the adventure!
Step 18
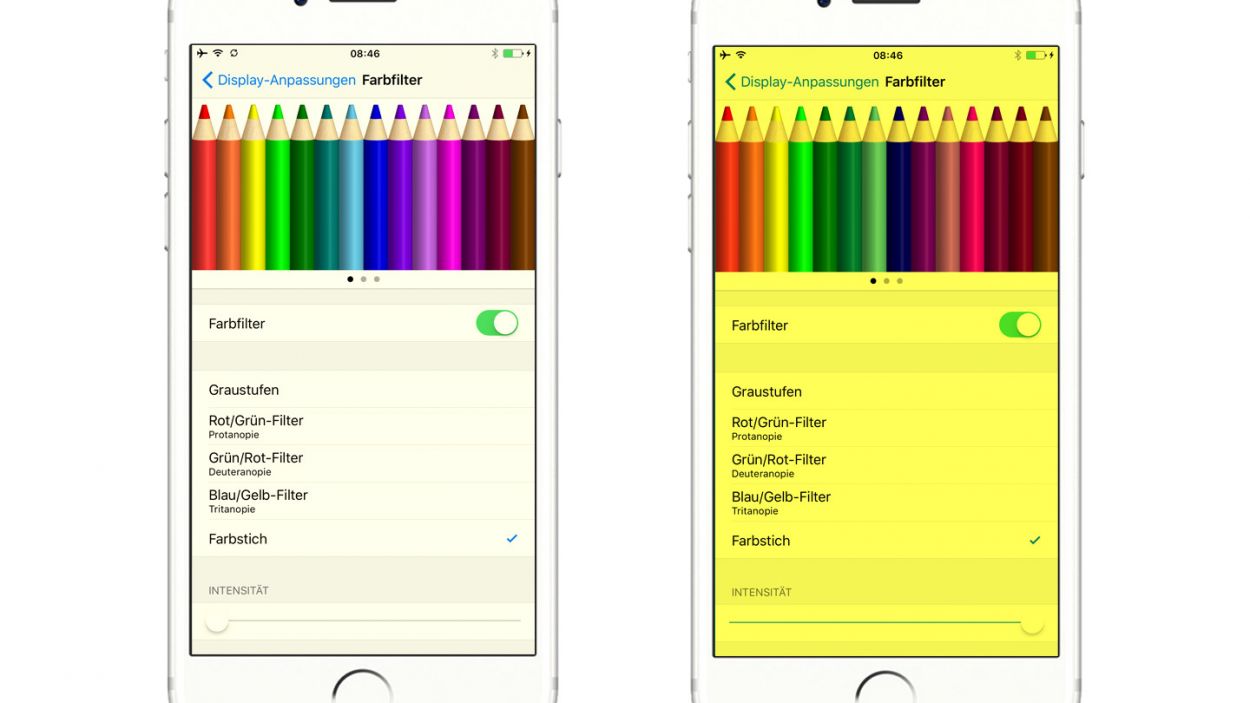
– Dive into your “Settings” and navigate to “General” > “Accessibility” > “Display Accommodations”!
– Next, find and select “Colour Filters”.
– Turn on those “Colour Filters” to get started!
– Now, choose the “Colour Tint” filter.
– You can jazz up the color intensity using the handy slider!