Step-by-Step Guide to Replace Samsung Galaxy Watch4 Screen
Duration: 45 minutes
Steps: 10 Steps
Keep your battery charge below 25%—safety first, always!
Ready to replace that cracked or broken screen on your Samsung Galaxy Watch4? Let’s get to it! If the frame’s a bit bent, don’t worry—just swap it out to ensure the new screen fits perfectly and avoids any weird pressure damage. And, if your battery looks swollen, please take care. For your safety, make sure to drain the battery below 25% before you dive in. It’s a small step that helps prevent any thermal surprises if the battery gets accidentally damaged during the repair. Oh, and don’t forget—replacement adhesive is key when you’re putting everything back together. Need some assistance along the way? No problem! You can always schedule a repair if things get tricky.
Step 1
– First things first, let’s give your watch a little break! Take it off the charger and power it down so it’s ready for some TLC.
– Next up, it’s time to say goodbye to the watch band. Remove it with care!
Step 2
– Grab your trusty Tri-point Y00 screwdriver and let’s get to work! Carefully unscrew those four 4.0 mm-long screws that are holding the back cover in place. You’ve got this!
Tools Used
Step 3
Hang tight, don’t remove the back cover just yet! The sensor flex cable is still hooked up to the motherboard, so let’s take it one step at a time.
– Gently slide an opening tool into the gap between the back cover and the metal frame.
– Twist the tool carefully to create a small gap, giving you some room to work.
Step 4
– Start by placing the watch face down, just like a sleepy little turtle taking a nap.
– Gently swing open the back cover by folding it away from the gap you’ve created—think of it as giving your watch a little stretch.
– Grab the flat end of a spudger and carefully pry up the sensor flex cable from the motherboard. It’s like giving it a little nudge to say, ‘Hey, time to disconnect!’
– Now, go ahead and remove the back cover. It’s time for your watch to breathe a little!
– Check that rubber gasket for any signs of wear and tear. If it looks a bit worse for wear, don’t fret! Just swap it out for a new one during reassembly to keep that water resistance on point.
Tools Used
Step 5
– Time to get disconnected! Use the pointed end of a spudger to carefully release the hall sensor, display, and crown button flex cables. You’re making great progress!
Tools Used
Step 6
– Grab your trusty Phillips screwdriver and unscrew that 4.4 mm-long screw holding the motherboard in place. You’ve got this!
Step 7
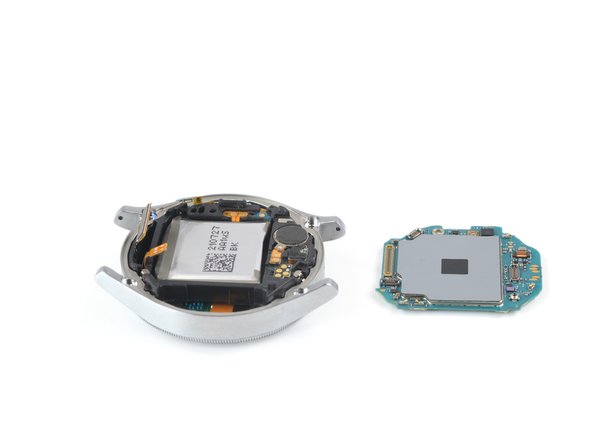
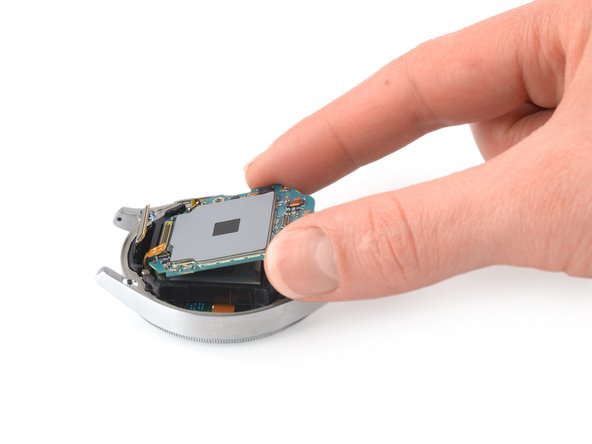
– Gently coax the motherboard out of the watch assembly, guiding it towards the bottom like you’re helping a friend out of a tight spot.
– When putting everything back together, keep an eye out to ensure those sneaky flex cables don’t get stuck under the motherboard. We want a smooth reassembly!
Step 8
– Gently pop the flat end of a spudger into the tiny opening near the barometric sensor, right across from the display connector. It’s like opening a secret door!
– Give the spudger a twist and a little tilt to nudge the core assembly out of its metal hideout. You’re in control, so take it slow and steady!
– Carefully guide the display flex cable through the opening in the core assembly. Think of it as threading a needle—precision is key!
– Once that’s done, go ahead and lift out the core assembly. Mission accomplished!
Tools Used
Step 10
If your screen is sporting a crack, keep those pesky glass shards in check by slapping a strip of tape over the damaged area. You’ve got this!
Success!


