Step-by-Step Nintendo Switch Lite Repair Guide
Duration: 45 minutes
Steps: 11 Steps
Guess what? There’s a new player in town: the Nintendo Switch Lite! It’s lighter on features, but also lighter on your wallet. Plus, it comes in some eye-catching colors—though we’re not here to admire the shades. Nope, we’re here to crack it open and see what’s inside. So grab your tools, get comfy, and let’s dive into this teardown adventure together. And hey, if you like staying in the loop, check out our newsletter—it’s a great way to keep tabs on future teardowns!
Step 1

– Look who’s here! The Switch Lite has entered the game! What fun facts does the Nintendex share about it?
– Powered by a custom NVIDIA Tegra processor for that smooth gameplay experience.
– Enjoy a vibrant 5.5″ capacitive touchscreen LCD boasting a crisp 1280 × 720 resolution.
– With 32 GB of internal storage and the ability to expand up to a whopping 2 TB using a microSDHC or microSDXC card, you’ll never run out of space!
– Stay connected with 802.11 a/b/g/n/ac Wi-Fi, Bluetooth 4.1, NFC, a USB Type-C port (for charging only), and a classic 3.5 mm audio jack.
– Equipped with a built-in accelerometer and gyroscope for that extra layer of responsiveness.
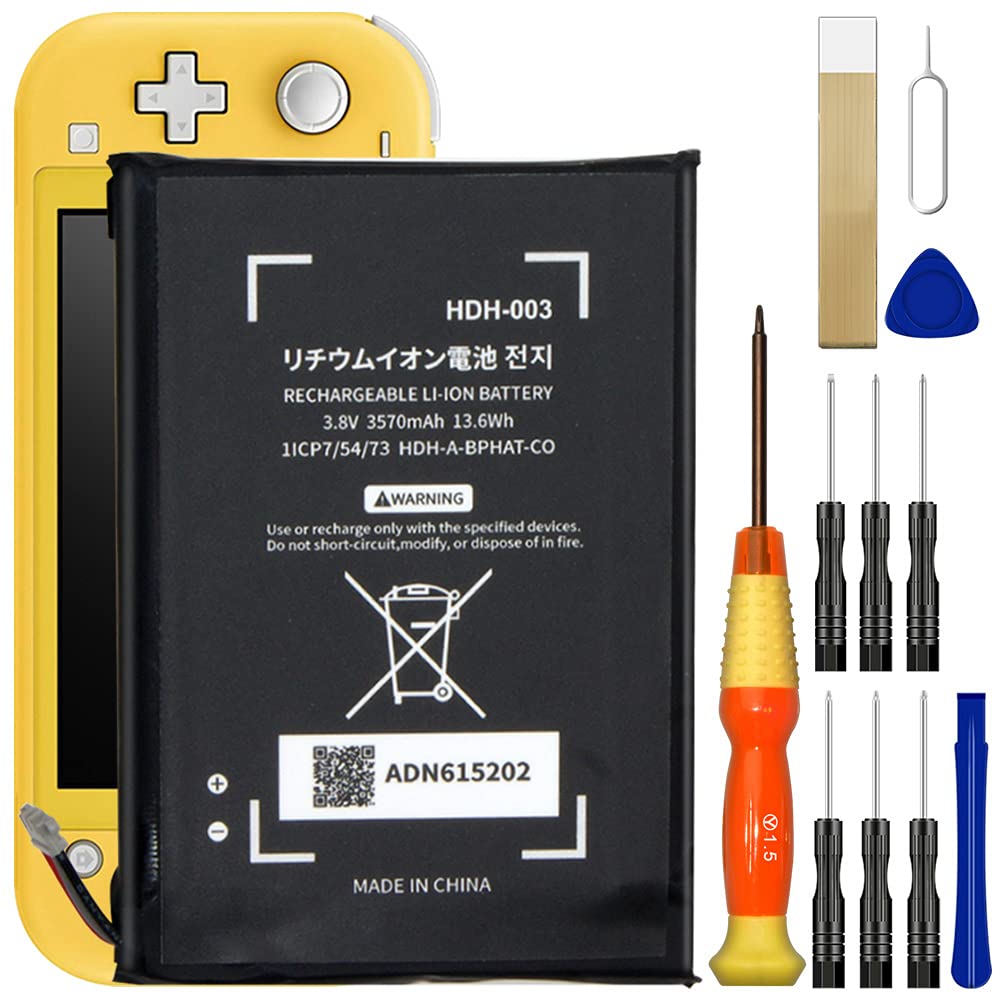
– This rechargeable lithium-ion battery offers a playtime range of 3.0 to 7.0 hours, perfect for those gaming marathons.
– And check it out—those controllers are here to stay, as they’re evolved with un-detachable features!
Step 2


– Let’s kick things off by firing up our X-ray Game Genie—big thanks to the cool tech from Creative Electron!
– This device packs a bit of old-school charm with its chunky bezel, so our go-to teardown wallpaper might not fit the bill perfectly. But hey, maybe we can jazz it up with a skin instead…
Step 3


– We gave the controls a good tug, hoping for a couple of shiny new yellow Joy-Cons, but no luck—they’re firmly attached.
– On the bright side, the built-in controls come with a proper, old-school D-pad. Nice touch!
– Other design tweaks: the IR blaster on the right Joy-Con is gone, and the speakers now live on the bottom instead of the front.
– Oh, and there’s no kickstand on the Lite, making it the sleekest and most aerodynamic Switch yet.
– Looks like this one calls for some good old-fashioned disassembly work. Let’s dive in!
Step 4


– Those pesky tri-point screws are blocking our path! Time to level up your toolkit with the proper gear before moving forward.
– Pop off the back cover and—wait for it—there’s another cover underneath. Let’s keep it moving!
– Heads up: the SD card reader is now bonded to the main board. On older models, we’d have already detached it by this stage.
– Sliding under the metal shield, we get our first glimpse of the internals—bright and shiny in the visible light.
– No distractions today—we’re on a mission. We’ve got our trusty Y00 driver ready to tackle this step like pros!
– Modularity is usually a win for repairs, but this little change sets us back a smidge. Not a dealbreaker, though—let’s keep going!
Step 5


– Let’s dive into the revamped-for-2019 Switch and check out how it stacks up against the Lite version.
– Time to get hands-on with the battery! It’s like peeling off an ultra-sticky sticker—seriously, who thought this adhesive was necessary?
– Nintendo claims this 13.6 Wh battery gives you 3-7 hours of gaming bliss. That’s better than the original Switch’s 16 Wh battery but falls short of the updated Switch’s impressive 9-hour playtime.
– The standout change: the Lite’s battery orientation is no longer upside-down. Trust us, this update is worth the teardown effort.
– And for other tweaks, here’s a fun breakdown: (1) The battery’s a bit smaller, paired with a thinner heat pipe. (2) The headphone jack is now modular—score! (3) The heat sink’s adhesive hasn’t gone cherry-flavored (but we can dream, right?).
Step 6


If you’re concerned about thermal performance dipping a bit, keep in mind that this Switch will only be displaying on its built-in screen at a cozy 720p or lower. Unlike the larger Switch, which has to crank it up to 1080p when docked, this one is all about keeping it chill.
– Efficient hardware means longer battery life and less heat—win-win! This updated Switch features a sleeker heat sink and fan combo, keeping things cool and efficient.
– Here’s a nice touch: the previous L and R triggers used to press against a PCB button directly, but now they’re rocking a membrane-style key. This upgrade could boost protection against dust and grime and gives those triggers a satisfying, snappy feel.
– The speaker drivers look familiar—same as the original Switch—but the housings have gotten a fresh redesign.
– Now they’re downward-firing and take up the space where the two Joy-Con batteries used to live. While we haven’t done a side-by-side sound test yet, we’d bet the Lite’s audio performance will blow your socks off!
Step 7


One theory floating around about joystick drift is that the black contact pads under the sliders might wear out over time. While they look fine here, there’s a chance they’re made of sturdier stuff this time around. Testing that, however, is a bit beyond what we can handle right now.
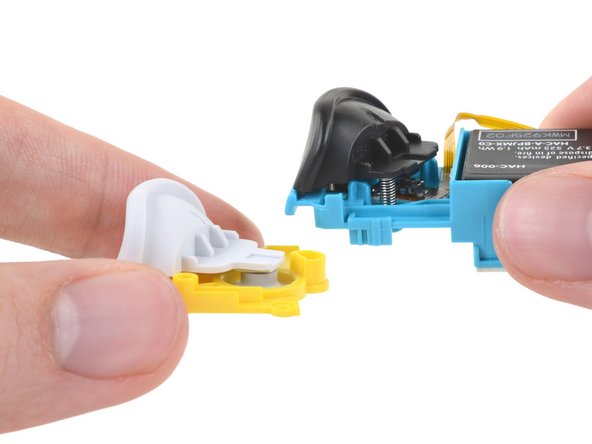
– Let’s set aside the mini-joycon board and dive into a hot topic surrounding the Switch—the joystick!
– At first glance, these joysticks might seem pretty similar to the ones from the 2019 Switch as we pop open their cases—but hold on, the clasps around the edges have had a little makeover, making the case a breeze to open.
– In our quest for drift-related upgrades, we’ve opened up both the Switch Lite (top) and the 2019 Switch (bottom) joystick assemblies for you to check out.
– While the insides don’t reveal any jaw-dropping changes right away, we do spot some fresh trace routing, a slimmer stick click button, and slightly beefier metal sliders.
Step 8


– Popping off the board, we see that the once-swappable flash storage is now permanently soldered on. (While DIY storage swaps weren’t functional in the original Switch, they were at least physically doable—ah, memories!)
– Here’s the lineup on Side A of this silicon capybara:
– Nvidia ODNX10-A1 (Tegra X1-based SoC, likely a custom twist on the T210B01 variant)
– 2x Samsung K4U6E3S4AM-MGCJ LPDDR4X DRAM chips, 16 Gb each (adding up to 4 GB total)
– Samsung KLMBG2JETD-B041 32 GB eMMC flash storage
– ST Microelectronics ST21NFCD NFC controller and FingerTip touchscreen controller
– Realtek ALC5639 audio codec
– Cypress CYW4356X 802.11ac Wi-Fi + Bluetooth 5.0 SoC
Step 9


– Alright, let’s spin this capybara around and check out some chip goodness:
– ST Microelectronics STM32F038C6 – a 32-bit microcontroller with 32 KB of flash storage, ready to roll.
– B1913 GCBRG HAC STD T1056719A1 secure MCU – this one’s likely packing some serious security muscle.
– Maxim Integrated MAX77620HEWJ – the power management IC keeping things running smooth.
– Rohm BM92T10MWV-Z – our trusty USB-C power delivery controller, doing what it does best.
– Texas Instruments BQ24193 – the battery charge management champ of the setup.
– Maxim Integrated MAX17050 – monitoring your battery’s fuel gauge like a pro.
– Ricoh RP602Z330C – a 1.5 A buck-boost regulator, keeping the energy flow nice and steady.
Step 10


– The original Switch rocked a non-laminated, air-gapped display—pretty rare these days, but it’s perfect for keeping cracked screen fixes affordable and easy. On a device that’s prone to drops, this design really helps keep repair costs in check.
– So, how does the Switch Lite stack up?
– With just a bit of heat and some gentle prying, the display assembly pops right off the frame—so far, so good.
– A little more finesse, and the digitizer/screen separates cleanly from the display. Boom! The Switch line’s reputation for repairability stays strong.
Step 11

– Get ready for a repair that’s easy on the wallet and the eyes – the Lite’s layout is a breeze to navigate.
– One thing to note: this slimmed-down Switch doesn’t have swappable controllers, storage, or an SD card tray, so we’ll need to work with what we’ve got.
– Lucky for us, the display and digitizer are separate, making them easier to replace, and the Game Card reader and headphone jack are also replaceable – nice touch!
– All in all, this Lite model might not be the coolest kid on the block, but it’s definitely repairable – and that’s what counts. Let’s dive in and see just how repairable it is.
Success!