Step-by-Step Sony PlayStation 4 Hard Drive Replacement Guide
Duration: 45 minutes
Steps: 6 Steps
Hey there, before you kick things off, make sure you save your important data onto an external storage device!
Remember to disconnect your PS4 from the power source before embarking on any repairs.
Ready to swap out the hard drive on your Sony Playstation 4? Let’s get started! But first, if you’re planning on upgrading and want to keep all your precious game saves and settings, make sure to give your data a safe home by backing it up on an external storage device. Safety first! Make sure your PS4 is completely unplugged before diving in. Got questions or need help? You can always schedule a repair.
Step 1
– Give your PS4 a nice, firm hug with both hands, making sure to grab the sides of the top cover.
– With your thumbs, give a gentle push on the shiny side of the top cover until it happily pops to the side.
– Now, lift that glossy top cover up and back, and watch it gracefully come off your PS4!
Step 2
– Grab your trusty Phillips screwdriver and unscrew that 6.5 mm screw holding the hard drive bracket snugly in the enclosure. You’ve got this!
Step 3
Handle that hard drive like a glass slipper, folks! Those delicate parts inside don’t do well with sudden moves. If you need help, you can always schedule a repair.
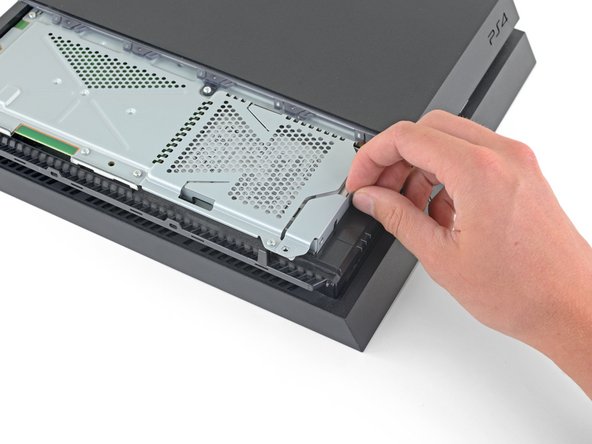
– Gently slide the hard drive bracket out of its cozy little enclosure.
Step 4
– Unscrew those two 7.2 mm screws on the right side of the hard drive tray and let the adventure begin!
Step 5
– Pop off those two 7.2 mm screws from the left side of the hard drive tray like a pro! You’ve got this!
Step 6
– Gently take the hard drive out of its cozy home in the hard drive tray.


