Super Mario Bros. 35th anniversary Game and Watch teardown
Duration: 45 minutes
Steps: 9 Steps
Get ready to dive into the world of your Super Mario Bros. 35th anniversary Game and Watch with this guide! While it’s not a professional masterpiece, it’s here to help you navigate the teardown safely and smoothly. Just a heads-up: there might be an easier way to tackle some of these steps, so feel free to explore! If you need help, you can always schedule a repair.
Step 1

No worries! These screws are all the same size—easy peasy to keep track of.
– Remove those 4 Y00 screws from the back of your device, it is the first step to get inside
Step 2

Be gentle when lifting around the four clips at the top and bottom—don’t snap them! Keep it smooth and steady, and you’ll be back in business in no time. If you need help, you can always schedule a repair.
– Gently work the back case off the main unit, just like peeling off a sticker. Take it slow to avoid any surprises.
Step 3


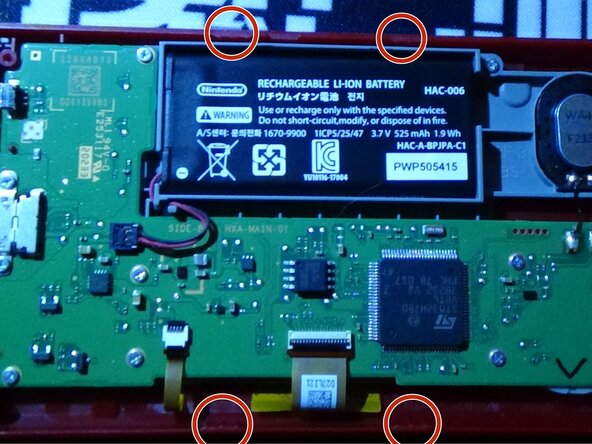
If this hasn’t been disconnected yet, it might give you some resistance. Take your time and be super careful—don’t let anything short out while you try the bit method.
Heads up: after you put everything back together, you’ll need to set the time again.
– Gently unplug the battery connector like a pro.
– Grab a spudger or the trusty Y00 bit. If you’re going with the bit, apply a little pressure on the connector while you lift the bit upwards from under the cables.
Tools Used

Step 4


The ribbon should slide right out when you’re ready.
– For the smaller backlight ribbon cable, gently flip up the tiny black latch with your fingernail or a slim flathead screwdriver. No need to muscle it—just a light touch does the trick.
Step 5


Handle that cable with care, folks! A small flathead can be tricky, so keep your cool and watch your moves.
– Gently flip up the black bar on the wide ribbon cable using a small flathead screwdriver or a spudger—just a little nudge does the trick!
Tools Used
Step 6


You might notice a tiny pop when opening up your device—that’s just the speaker adhesive letting go from the plastic. No worries, it’s totally normal and part of the process.
– Grab a small flathead screwdriver and gently lift from the top right corner of the speaker—easy does it!
Step 7
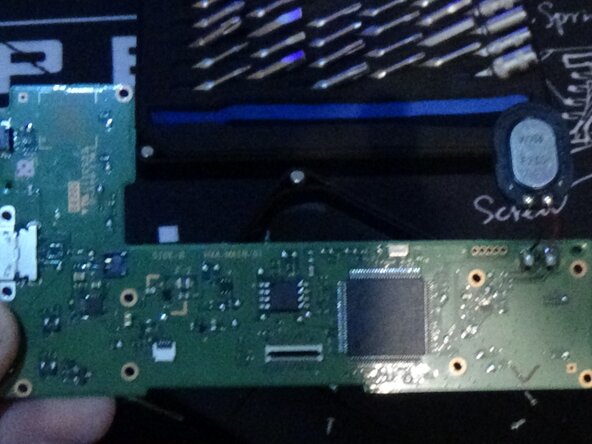
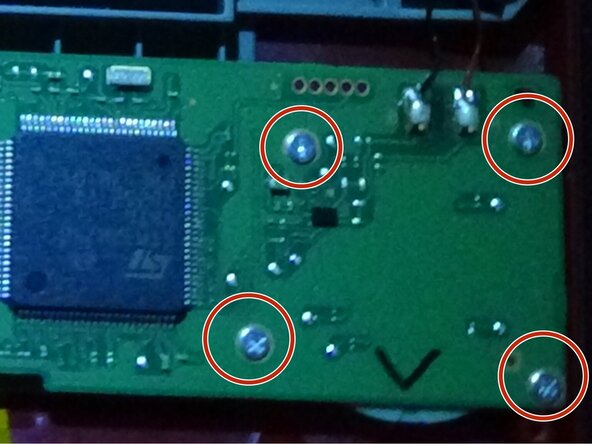

Gently lift out the motherboard — just a heads up, the speaker is soldered right onto it, so handle with care to keep everything in one piece.
Keep these screws in a safe spot and organized so nothing gets lost or mixed up later. Staying tidy now makes reassembly much smoother down the line.
– Take out the 10 screws holding down the motherboard.
Step 8

You’re almost there—just one more step to go! Keep going, and you’ll have this device fixed up in no time. If you need help at any point, you can always schedule a repair.
– Unscrew the single screw tucked nicely in the top right corner—it’s the last screw securing the system—and gently lift up the housing to get things started.
Step 9

– You can now pop out the buttons with ease.
– Nice work! You’ve reached the finish line. To put it all back together, just go through these steps in reverse. If things get tricky, you can always schedule a repair.
Success!