Technicolor TC7200.U Teardown
Duration: 45 minutes
Steps: 4 Steps
Step 1


– First things first, gently peel off the two rubber feet that are hiding the screws securing the top cover.
– Next up, grab your trusty screwdriver and unscrew those T10 screws.
– Now, take your spudger and carefully slide it in to pry open the top cover. Once it’s loose, lift it off and set it aside.
Tools Used

Step 2


– At this stage, the board is snugly held in place by the case itself. No worries—you’re almost there!
– Gently bend the front edge of the case outward to give the board a little room to breathe and move upward.
– Once the front is free from the case, carefully slide the back side of the board out as well, and you’re all set to proceed.
Step 3

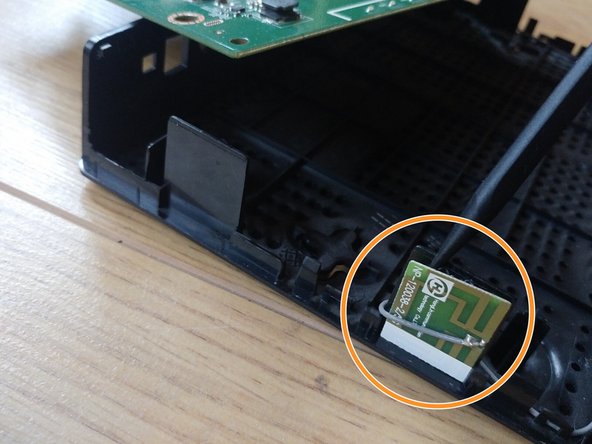
– Two parts are still hanging on to the case. No worries, we’re almost there!
– Grab your spudger and gently work your way through the glue to detach one side, then do the same for the other. Patience is key, but you’ve got this!
Tools Used
Step 4
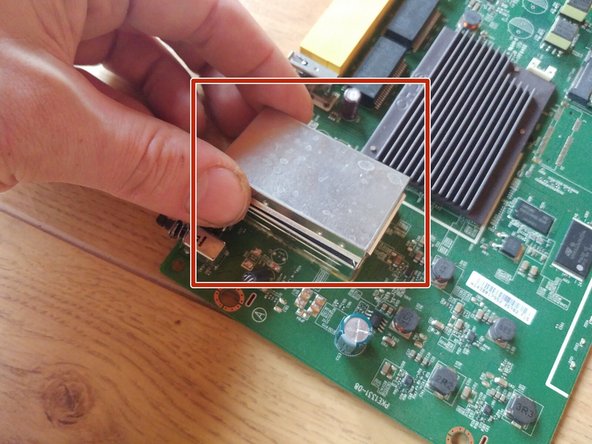

– Pop open the cable cover to reveal the goodies inside.
– Take a good look at the circuit board and get familiar with it.
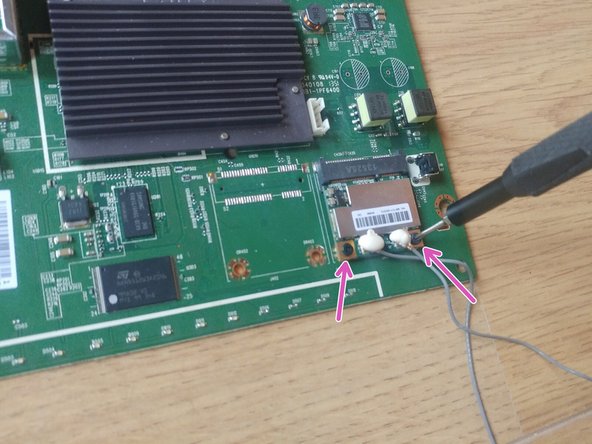
– Loosen those screws holding the WiFi module with your screwdriver—easy does it.
– The part we’re working with is the Bothhand GS5014LF.
– And don’t forget, we’ve got the STMicroelectronics NAND512W3A2CN6 chip on deck.
Success!