Texas Instruments TI-82 Teardown
Duration: 45 minutes
Steps: 6 Steps
We’re cracking open the classic TI-82 calculator for a look under the hood. Grab your tools and let’s see what makes this old-school math wizard tick!
Step 1

– Your calculator comes with a nifty protective shield that smoothly slides over the front. When you’re ready to crunch some numbers, just slide it to the back. It’s a clever design that makes it way harder to misplace that cover!
Step 2


The CR1616 coin cell battery preserves settings and programs in memory while the main batteries are being changed.
– Flip your device over to get to the battery cover.
– Grab a spudger and gently pry the release tab down, then lift the battery cover off with ease.
– Next, unscrew these:
– 2 Phillips #0 screws (7.2mm)
– 1 Phillips #0 screw (15.3mm), and don’t forget to remove the battery retaining clip.
Tools Used

Step 3

– Gently slide a spudger between the two halves of the case and pop them apart.
– Keep an eye out for corrosion near the battery terminals, especially in older devices. It’s a good reminder to avoid leaving batteries in for too long!
Tools Used
Step 4

– Crack open the two halves of your calculator and you’ll spot a shiny foil shield guarding the electronics underneath.
– Unscrew the four Phillips screws to reveal the goodies below, then gently lift off the shield.
Step 5

– Here’s a quick look at the core components: first up, we’ve got the guts of the device, the real heart of the operation. You’ll find the SRM20255LLM10 / F4ZM1938 (32Kbyte SRAM), the LH531GP4 (Mask ROM), the T 84C00AM-8 (Z80 CPU), and the Toshiba / TC14L010AF / 1273 9506EAI (ASIC). When working with these parts, take your time and handle them carefully. If you need extra help, you can always schedule a repair.
Step 6
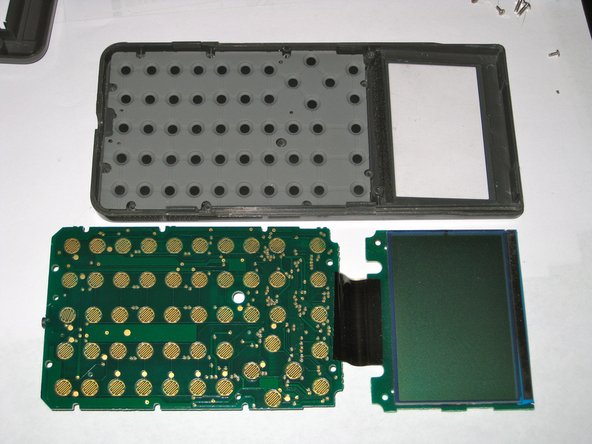

– Take out the rest of the Phillips screws—don’t let any hide from you.
– Now gently lift out the screen and main board. The membrane keypad will stay cozy right where it is in the front case.
Success!