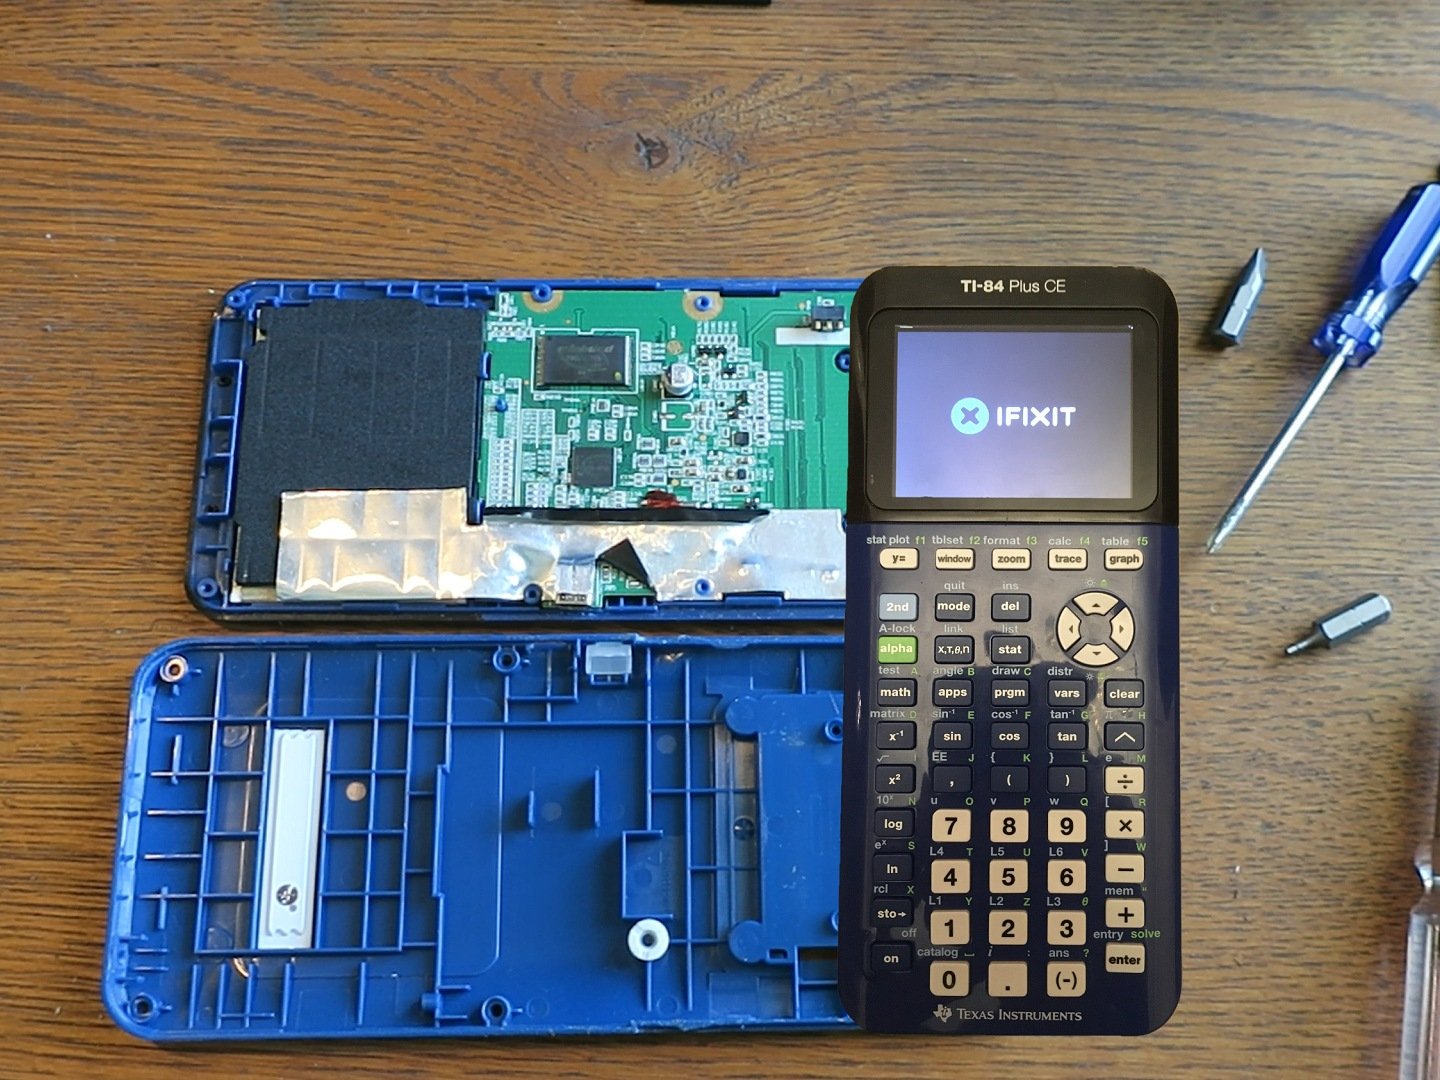
TI-84 Plus CE Teardown
Duration: 45 minutes
Steps: 6 Steps
Step 1


Heads up: your calculator’s RAM is about to take a little vacation!
Rest assured, everything in the Archive is in safe hands.
– Slide off the cover like you mean it.
– Flip the calculator over so it’s screen-down, ready for action.
– Grab your Phillips #0 screwdriver and unscrew the battery cover.
– Pop out the battery. If it’s playing hard to get, use a spudger to nudge it free.
Tools Used


Step 2


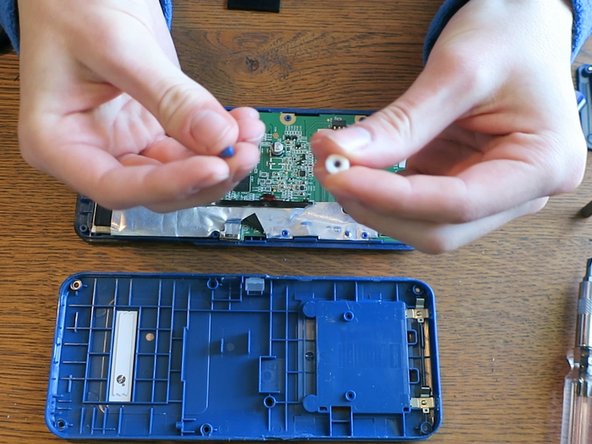
– Grab your trusty Phillips #00 screwdriver and start loosening those screws hiding beneath the battery. You’ve got this!
– Next, switch to the T6 screwdriver and take out the 6 screws lining the edges of the calculator. Piece of cake!
Tools Used

Step 3


The screen bezel comes off pretty easily.
No need to stress about keeping one side face down; the buttons won’t be going anywhere.
You won’t have to worry about accidentally tearing any cables during this process.
– Grab a spudger and gently pry around the edges to separate the top shell from the bottom, working your way all around the device.
– Heads up—the middle section can be a real stubborn one! You might need to apply some extra force, but keep at it—you’ll get there.
Tools Used
Step 4

These are actually two distinct components.
– Now that you’ve got the back shell off, it’s time to locate the Reset button. You’re getting closer!
– Peel off the white and black rubber to reveal the hard plastic beneath. You’re almost there!
Step 5

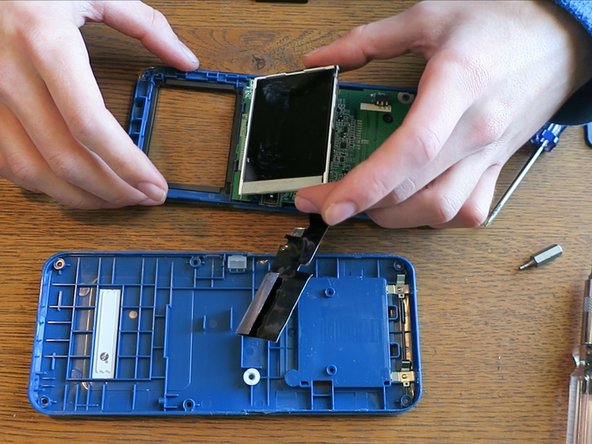
Watch out not to tear the tan ribbon cable—that’s a removable part, so handle with care!
You’ll find some protective shielding snugly wrapped around the LCD.
– Carefully flex the aluminum shield backward. It’s sticking around thanks to some glue, so don’t expect it to come off completely.
– Need to get at the LCD? Just lift it up and tilt it back.
– Once the LCD is out of the way, you can easily pop out the clear plastic cover attached to the shell. Perfect time to swap out any tired glue underneath.
– Check out this step-by-step to disconnect the ribbon cable from the ZIF connector: Recognizing & Disconnecting Cable Connectors.
Step 6
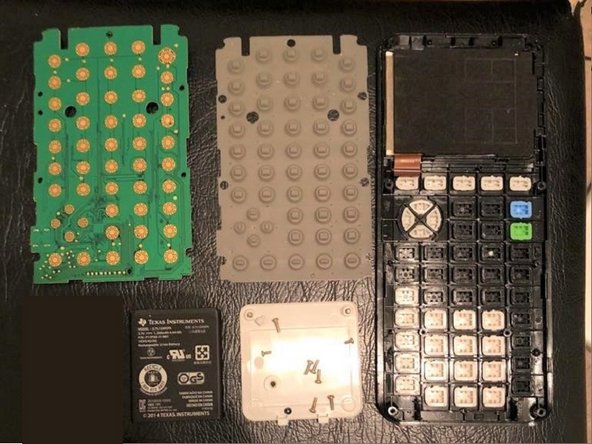

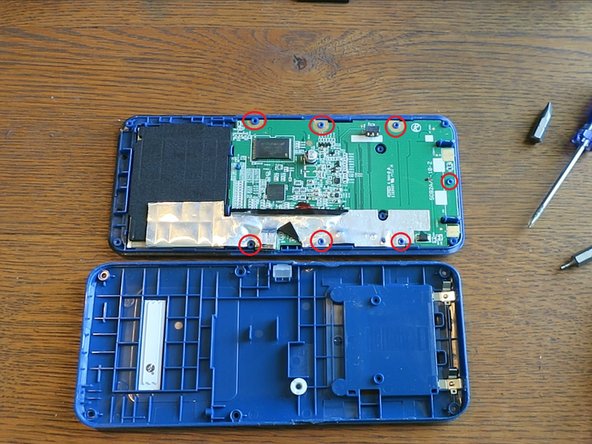
Check out these detailed high-res shots of the PCB—front and back—so you can see exactly what’s happening beneath the surface. Clear images help guide your repair with confidence. If you need help along the way, remember you can always schedule a repair.
– Here’s a look at the motherboard and all its bits and bobs. Unless you’re planning to tackle the LCD ribbon cable, everything else is soldered onto this board and isn’t going anywhere easily.
– To get to the buttons hiding under the motherboard, you’ll have to break the heat-melted spots on the PCB—yep, it’s attached pretty snugly to the shell.
– Once you’ve removed the PCB, lift off the grey membrane and voilà, buttons revealed!
– Let’s talk repairability: I’m giving this device a 4 out of 10. Swapping the battery is a breeze. The shell pops off without too much drama, and you can replace the LCD screen, its plastic cover, and the Reset button. But, don’t expect to upgrade or easily swap out things like the FLASH, ASIC, USB, LED, keypad buttons, or battery contacts. Those are in for the long haul.
– Keep the buttons face-down while working, or they might make a break for it and fall out.
Success!