TicWatch Pro 3 GPS Battery Replacement Guide
Duration: 45 minutes
Steps: 18 Steps
Hey there! To stay safe and sound, make sure your watch’s battery is drained below 25% before you dive into taking it apart.
Ready to give your TicWatch Pro 3 GPS a fresh lease on life? Let’s swap out that battery! But before diving in, make sure it’s below 25% charged. This little precaution helps keep things safe and sound, reducing the risk of a fiery fiasco if something goes sideways during the repair. And hey, if your battery is looking a bit swollen, be sure to handle it with care! When it’s time to put everything back together, don’t forget to grab some replacement adhesive. Your watch will be back in action, but just a heads up – it’ll lose its IP (Ingress Protection) rating. If you run into any tricky spots, feel free to schedule a repair!
Step 1
– Alright, let’s get the ball rolling! First things first, make sure to take your watch off the charger and give it a little power nap by turning it off.
– Next up, it’s time to remove that watch band. Let’s get to it!
Step 2
– Grab your trusty Torx T3 screwdriver and let’s get to work! Carefully unscrew those four 4.1 mm-long screws holding the back cover in place. You’ve got this!
Step 3
A hair dryer, heat gun, or hot plate can do the trick, but keep it cool and don’t toast your device!
– Warm up your trusty iOpener and give the back of the watch a cozy 5-minute hug to help loosen that stubborn adhesive hiding underneath.
Step 4
Don’t try to remove the back cover assembly just yet, it’s still hooked up to the daughterboard. Take a deep breath, you’re doing great!
– Gently slide the flat end of a spudger into the microphone opening at the top edge of the back cover.
– Give it a little nudge upwards to loosen the back cover assembly. You might need to put in a bit of muscle here!
– Now, swing that back cover assembly open at a cool 45-degree angle to reveal the sensor assembly cable.
Tools Used
Step 5
To pop this connector back in place, line it up carefully and press down on one side until it clicks, then do the same on the other side. Avoid pressing on the middle—nobody likes bent pins! Misalignment can cause damage, so take your time and nail it.
– Grab a spudger and gently pop the sensor assembly cable connector straight up from its socket. Easy-peasy!
Tools Used
Step 8
– Grab a Phillips screwdriver and unscrew the three 4.1 mm-long screws holding the core assembly in place. Easy peasy!
Step 10
Be gentle when handling the display cables at the bottom of the core assembly, we don’t want any accidental strains or tears!
– Gently flip open the core assembly, just like opening a book.
Step 11
– Grab your trusty spudger and gently pop the screen and digitizer cables free by prying the connectors straight up out of their sockets. Take it slow and steady—you’re doing great!
Tools Used
Step 12
– Take out the core assembly.
Step 15
Keep it cool and avoid puncturing or bending the battery with your tool—a damaged battery can leak nasty chemicals or even start a fire.
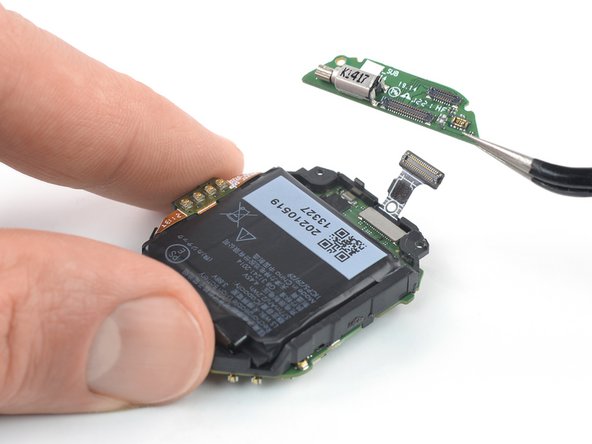
Hold off on removing the battery completely just yet. It’s still attached to the motherboard.
If you’re having trouble lifting the battery, warm up an iOpener and place it on the motherboard to loosen the adhesive. Remember, don’t put the iOpener directly on the battery.
Step 18
Steer clear of popping in a busted or wonky battery, it’s a serious safety risk.
– Take out the battery.
– Grab your new battery and stick it down with some pre-cut adhesive or double-sided tape. To get it lined up perfectly, slap that new adhesive into the device exactly where the old adhesive was, not directly onto the battery. Give the new battery a good press to make sure it’s in place.
Success!


