TicWatch Pro 3 GPS Daughterboard Replacement Guide
Duration: 45 minutes
Steps: 11 Steps
Follow this guide to swap out the daughterboard on your TicWatch Pro 3 GPS. Heads up—you’ll need some fresh adhesive when putting everything back together. After the fix, your watch will work like a charm, but it’ll lose its water-resistance rating. No stress, though, it’ll still track your steps and look cool doing it!
Step 1


– Before you dive into repairs, take your watch off the charger and power it down.
– Remove the watch band.
Step 2

– Let’s get started! Use a Torx T3 screwdriver to carefully remove the four 4.1 mm-long screws that hold the back cover in place. Remember to handle the screws with care, and make sure they’re fully removed before moving on to the next step.
Step 3

A hair dryer, heat gun, or hot plate can do the trick too—just keep it cool (well, not literally) and don’t overcook your gadget.
– Pop a heated iOpener on the back of the watch for about 5 minutes to help loosen the adhesive beneath. Let the heat work its magic!


Step 4


Hold up! Don’t yank that back cover off just yet—it’s still hanging on to the daughterboard.
– Slide the flat end of a spudger into the microphone opening at the top edge of the back cover.
– Pry upwards to pop off the back cover assembly. It might take some muscle!
– Swing the back cover assembly open by 45 degrees to reveal the sensor assembly cable.
Tools Used

Step 5


To reconnect connectors like this one, gently line it up and press one side down until it clicks, then repeat on the other side. Avoid pressing down in the middle – misalignment can cause the pins to bend and create lasting damage.
– Grab your trusty spudger and gently pop the sensor assembly cable connector straight up from its socket. Take it slow and steady—you’re doing great!
Tools Used


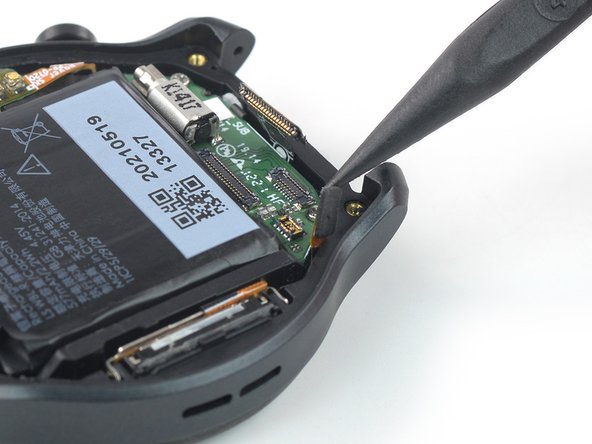
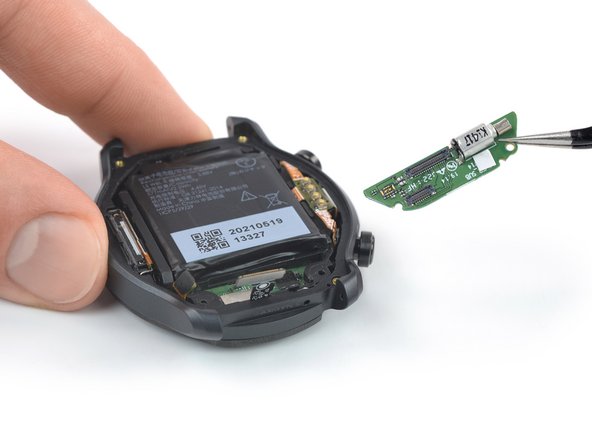
Step 9

– Grab your trusty Phillips screwdriver and zip out those two 4.1 mm screws holding down the daughterboard.


Step 11

– Before you start celebrating, do a quick check! Compare your shiny new part to the old one. You might need to move some bits and pieces or peel off sticky stuff from the new part before sticking it in.
– Ready to put your gadget back together? Just follow these steps in reverse, like rewinding a cool action movie!
– Putting things back together? Don’t forget new adhesive! Clean up the area with isopropyl alcohol (>90%) first, then apply that sticky goodness where needed.
– Be a hero for the planet! Take your electronic waste to an R2 or e-Stewards certified recycler. High five for being awesome!
– Things not quite clicking? No worries! Try some basic troubleshooting, check our Q&A, or you can always schedule a repair.
– Changed your mind? No problem, you can bail out anytime.
– This guide still has a pulse, since its a work in progress.
Success!