Tutorial on Samsung Galaxy S8 Active Battery Replacement Guide
Duration: 45 minutes
Steps: 12 Steps
Before you start tinkering, make sure your device’s battery is pumped up above 25%. Batteries are a bit like a can of soda, so handle with care – a punctured one might surprise you! Keep it charged and stay safe out there.
Get ready to give your Samsung Galaxy S8 Active a battery makeover in just a few simple steps! First up, say goodbye to the back cover – it’s time to make way for a fresh new battery. But don’t forget, you’ll need some replacement adhesive to make sure that back cover stays put. And before you dive in, make sure your battery’s feeling below 25% – a little lower and we’re in the danger zone! Remember, a punctured or damaged battery is a big no-no; keep it charged for a safer swap. Need a hand with the iOpener Heating guide? We’ve got your back, just a click away to show you the ropes!
Step 1


– Alrighty, time to jazz it up! Grab that SIM card ejector tool or a trusty paperclip. Gently slide it into the tiny hole on the left side at the tippity top of your device.
– Give it a gentle press to work some magic and pop out the SIM tray.
– Slide that SIM card tray out like a pro.
– Now, for the grand finale! Pop that SIM card back in the tray. Make sure it’s facing gold side up with the notch on the bottom right. Gently press it back into its cozy SIM tray slot.
Step 2


Popping off the S8 Active’s back cover? You might mess up its waterproof vibe. Keep some extra adhesive handy to keep it safe from water. If you need help, you can always schedule a repair.
– Let’s kick things off by unscrewing those four black 3mm screws that are holding the rubber bumpers snugly in place. Grab your trusty TR6 Torx Security Screwdriver and get to work!
– Now, gently peel off those rubber bumpers from the top and bottom edges of your device. You’re making great progress!
Tools Used

Step 3

To prevent any unexpected surprises, remember that using a heat gun, hair dryer, or hot plate might heat up the metal frame. Keep it cool, calm, and collected while handling.
Take it easy on the heat – the OLED display, battery, and other delicate internal parts won’t be happy with too much heat. Just a short blast of around one minute should do the trick to soften things up.
To warm the edges, you can also opt for an iFixit iOpener, hair dryer, or even a hot plate. If you need help, you can always schedule a repair.
– Grab a heat gun and give those back edges a gentle heat massage to relax the adhesive that is holding the back cover to the frame.


Step 4


– Alrighty, let’s get this repair shindig started! First, you’ll want to gently slide that secret agent tool, the Jimmy, under the edge of your device’s back cover. Then, keep things from going all sideways by sticking an opening pick in there, too. Now it’s time to cut carefully around the top, being sure not to mess with those camera and fingerprint sensor cables. And finally, slide the Jimmy down the sides of your gadget, loosening things up as you go. If you need help, you can always schedule a repair!
Tools Used

Step 5

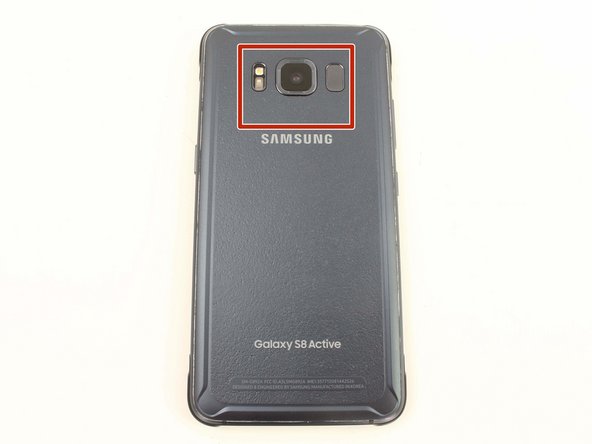
The fingerprint sensor cable is nestled up top near the front-facing camera. Be gentle when popping off the back cover to keep that cable intact and avoid any tears!
– Get the opening pick ready to slice through the adhesive that’s still sticking around.
– Gently crack open the back cover until you catch a glimpse of the fingerprint sensor flex cable connector.
Step 6


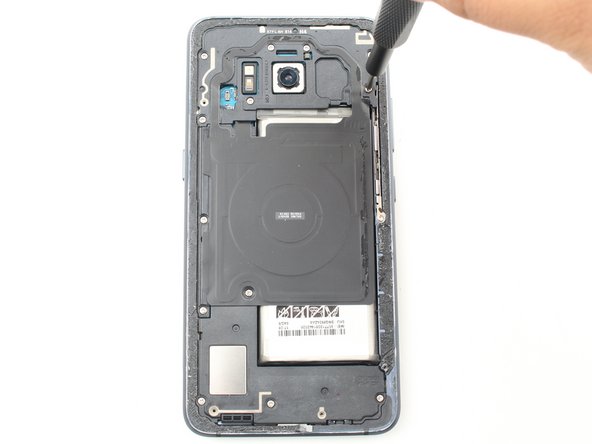
– Gently flip the cover over and place it on top of the device like a pro.
– Using the flat end of a spudger, disconnect the fingerprint flex cable with ease.
– Lift off the back cover like a champ.
– When putting things back together, tilt the back cover to align the flex cable perfectly over its socket. Snap the cable in place by pressing down gently with the spudger.
Tools Used

Step 7


– Time to get your hands dirty! Start by unscrewing eleven 3.5 mm screws with your trusty Phillips #00 Screwdriver.
– Next up, tackle those two 2mm screws, also using your Phillips #00 Screwdriver. You’ve got this!
Tools Used

Step 8


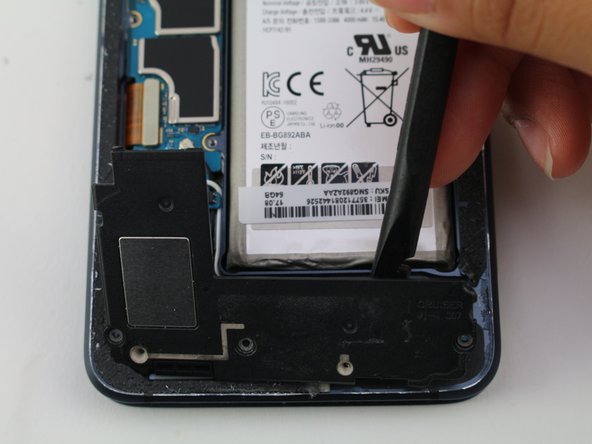
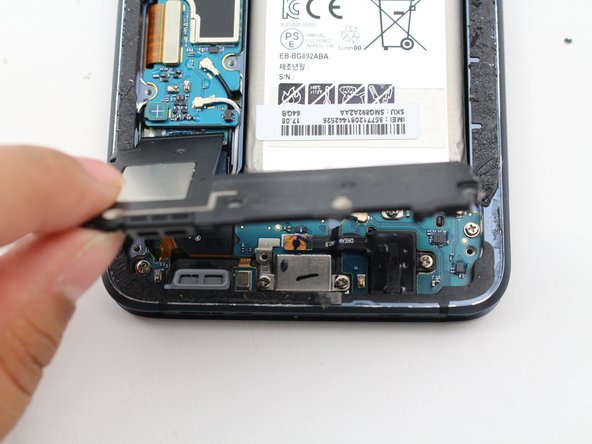
– Gently pry off the NFC antenna and charging coil assembly using the flat end of a spudger. You’ve got this!
Tools Used

Step 10

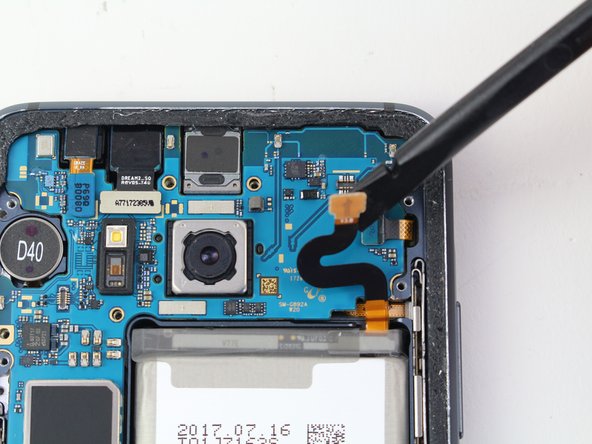
– Grab your trusty spudger and use its flat end to gently disconnect that pesky battery flex cable. You’ve got this!
Tools Used
Step 11

Try using a hair dryer or heat gun to loosen up that adhesive, but take it easy—you don’t want to roast the battery. And heads up, the heat will make the metal frame toasty, so handle with care. If you need help, you can always schedule a repair.
– Give your battery a warm hug with the heated iOpener by placing it on top for about three minutes. This will help soften the sticky adhesive holding your battery in place.
– If you prefer a different approach, try dropping 1-2 drops of high-concentration (>90%) isopropyl alcohol under each corner of the battery. Let it soak for a few minutes to help loosen that pesky adhesive.
Step 12


– Grab your trusty spudger and gently nudge up the bottom of the battery with some solid, steady pressure until the adhesive gives way. You’ve got this!
– If you used isopropyl alcohol, take a breather and let it chill for ten minutes before popping in the new battery. This way, the alcohol can fully evaporate, and you’ll be good to go!
Tools Used