Uniden UTAB71 Camera Replacement
Duration: 45 minutes
Steps: 4 Steps
Ready to swap out the camera in this tablet? You’ve got this! If pulling out the battery feels tricky, check out the battery replacement guide for extra help.
Step 1


First things first, let’s ensure your tablet is completely powered down before you start prying it open. Safety first!
Watch out for those two power ribbons connecting the screen to the back of your tablet. Handle them with care and avoid putting too much stress on them!
Take your time and ease the pry tool gently around the tablet’s edges—slow and steady wins the day!
– Grab a plastic pry tool and gently work your way around the edges—think of it like opening a stubborn cookie jar. Apply steady pressure to separate the two halves of the tablet without forcing it. Slow and steady wins this tech race!
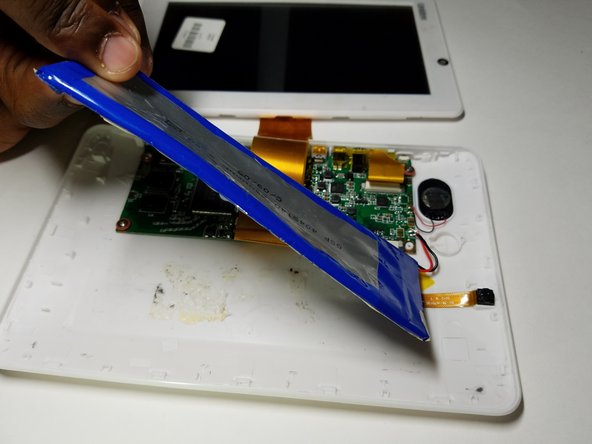
Step 2


Be gentle with the motherboard and all internal components—no need to apply pressure here! Treat it like it’s fragile, because, well, it is. If you’re feeling unsure or need a hand, you can always schedule a repair.
The battery is securely attached to the back of the tablet, so be sure to give it a good push to release it!
– Grab a trusty credit card and gently slide it under the battery to pop it off the back of your tablet. You’re doing great!
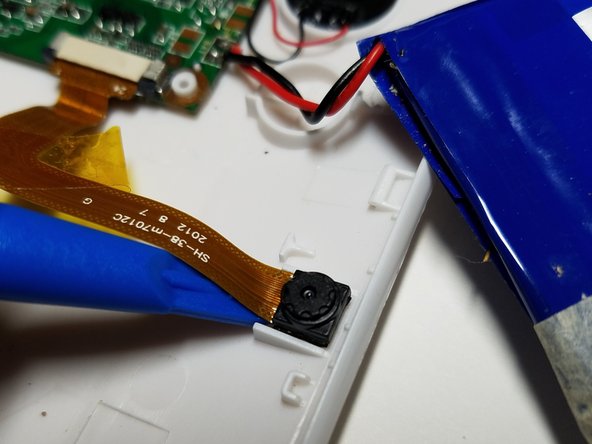
Step 3

– Gently pop off the clips holding the power ribbon that connects the camera to the motherboard with your trusty blue pry tool. You’ve got this!
Step 4

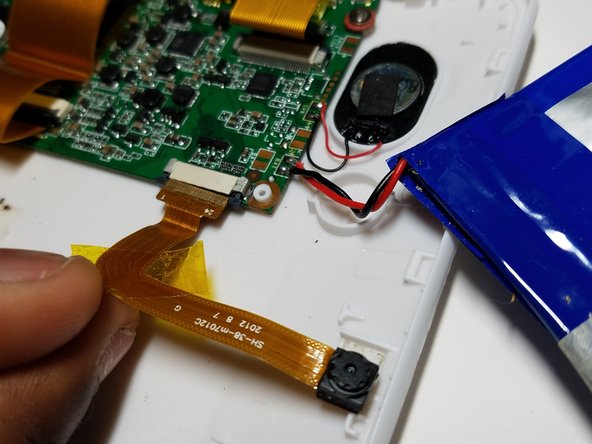
– Grab your trusty pry tool and gently peel away the yellow tape that’s holding the power ribbon snug against the camera. You’ve got this!
– Now, slide that plastic pry tool underneath the camera component and give it a little lift off the tablet. It’s easier than it sounds!
Success!
