Upgrade PlayStation 5 Pro Storage: Step-by-Step Guide
Duration: 45 minutes
Steps: 7 Steps
Hold onto your gadgets because before we dive into the exciting world of repairs, make sure you’re all set and ready to go!
Get ready to boost your PlayStation 5 Pro’s storage with a snazzy M.2 SSD! This awesome upgrade means more space for your favorite games, movies, music, and all that fun stuff you love. But hold your horses before diving in! First, double-check that your M.2 SSD plays nice with your PlayStation—remember, M.2 SATA SSDs are a no-go. Your SSD should come with a heat-dissipation feature, like a heatsink or thermal pad, to keep things cool. Also, if you’re reusing an SSD that has data on it, make sure to back that up because the formatting during setup will wipe it clean. Let’s get to it and make your console happier!
Step 1


Alright, champ! Before we dive into this repair, let’s get ready.
– Give your PlayStation a little break – turn it off and unplug everything. It’s time for a console makeover!
– Lay your PlayStation down so the right side is facing you. Think of it as a little sunbathing session for your console.
Step 2
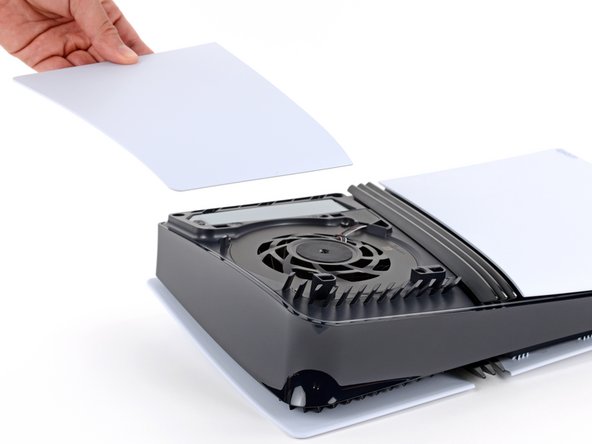
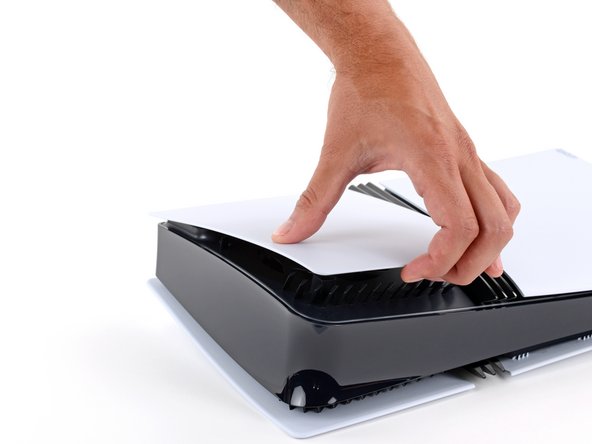

The cover is held in place by some sneaky hooks on the back edge and a bunch of clips in the front. Once you get those clips loose, you’ll be greeted with some satisfying “pops” as they come free!
– Give a good, firm pull on the front edge of that smaller, upper cover to pop those clips loose.
– Lift off the cover.
– To put the cover back on, hook the hooks into their slots along the rear edge, then press down firmly on the front edge to snap the clips back in place.
Step 3

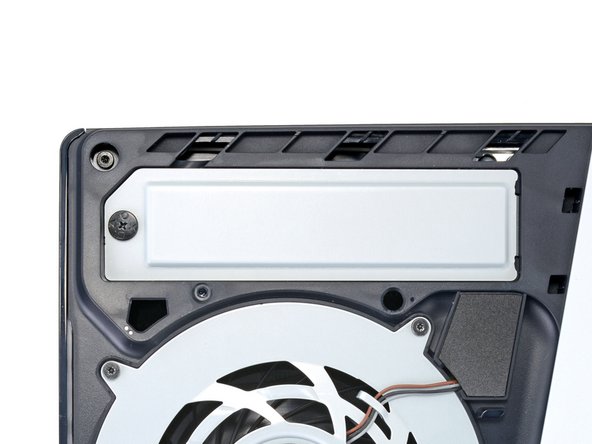
– Grab your trusty Phillips screwdriver and go ahead and unscrew that 17.4 mm-long screw that’s holding the expansion slot cover in place. You’re doing great, keep it up!
Step 4
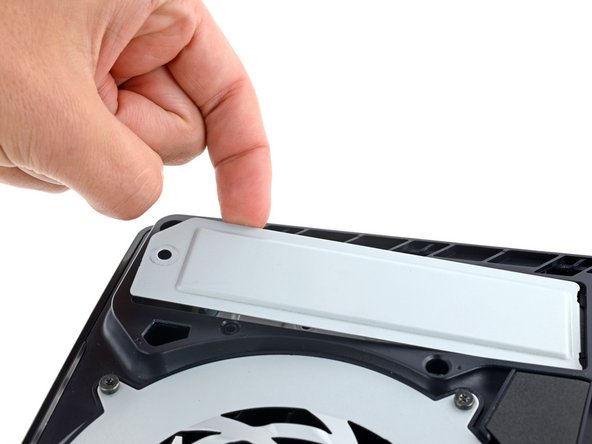

– Lift the expansion slot cover near the notch by the screw hole with your fingers and take it off.
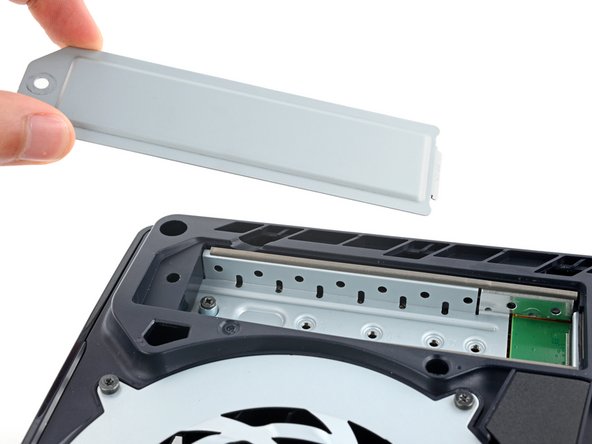
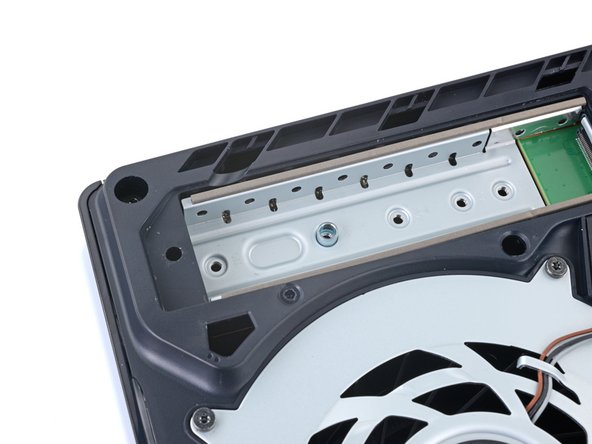
Step 5


– Grab your trusty Phillips screwdriver and give that 10.9 mm SSD screw securing the spacer a little spin to loosen it up. It’s time to set that spacer free!
Step 6
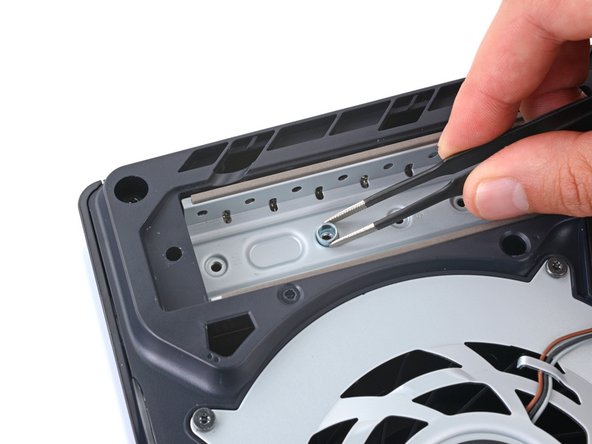

Hey there! Remember to pop that spacer in before installing the SSD. It’s a little detail that makes a big difference!
No sweat, you’ve got this! The expansion slot has a bunch of different indentations that fit any size SSD. Don’t worry, each one is labeled with its matching size, making it easy to find your perfect fit.
– Alright, time to get that spacer in the right spot! Use tweezers or your fingers to carefully move the spacer to the indent that matches the size of your SSD. It’s like finding the perfect fit for your new tech friend!
Step 7


Be careful not to overtighten this screw, you might end up harming the SSD.
First, check that your SSD plays nice with your PlayStation and has some cool ways to keep its temperature down, like a heatsink or thermal pad.
Just a heads up: the SSD and the M.2 socket have a special way they fit together, so you’ll only be able to snap that SSD in one way. No guesswork here!
Don’t worry if your SSD looks a bit tilted before you secure it; that’s just part of the process!
– To put your device back together, just retrace your steps in reverse, starting with that clever little expansion slot cover.
– New SSD installed in your PlayStation? Don’t forget to give it a little formatting love afterward.
– Transferring your games to the shiny new SSD? Check out Sony’s guide for some slick moves.
– Ready to declutter? Swing by an R2 or e-Stewards certified recycler with your e-waste.
– If things didn’t unfold quite as smoothly as you hoped, don’t sweat it! Try some basic troubleshooting or hit up our Answers community for a helping hand.
– Changed your mind? No problem! Just cancel right here.
–
Success!